 m-mizutani/alertresponder
AWS Serverless Application Modelによる自動セキュリティアラート応答フレームワーク

注:このリポジトリは廃止されました。新しいリポジトリはこちら: https://github.com/m-mizutani/deepalert
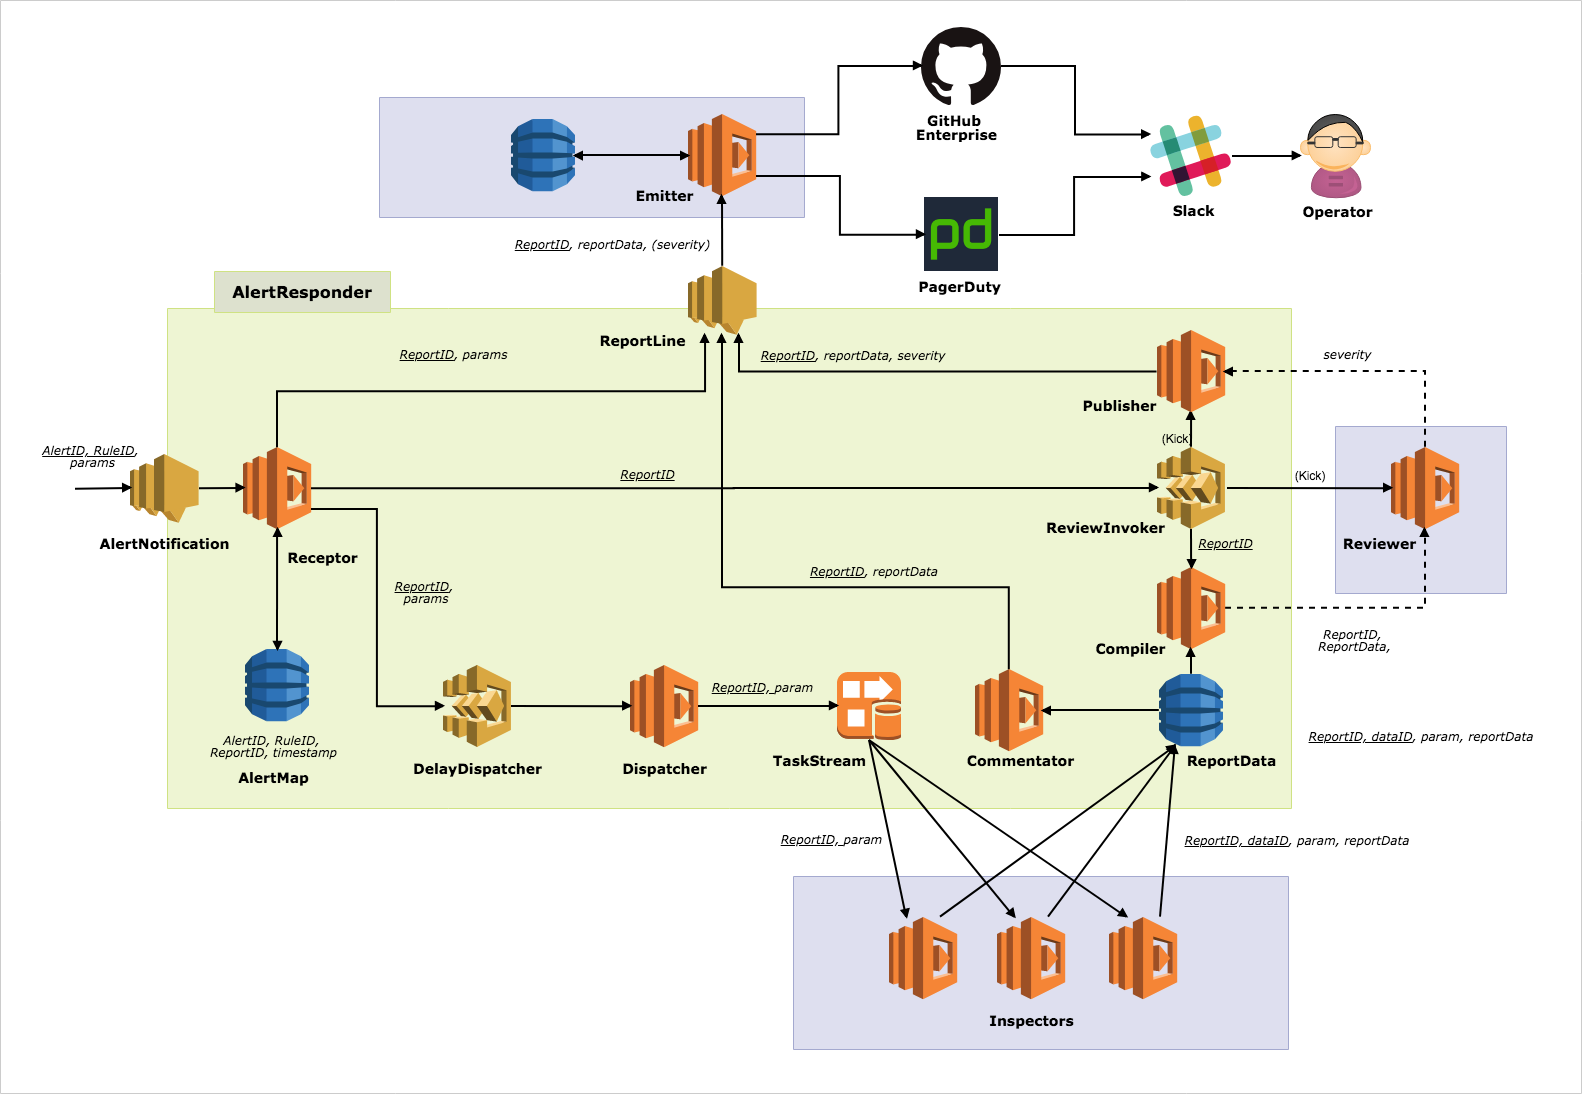
AlertResponder は、セキュリティアラートの自動対応のためのサーバーレスフレームワークです。
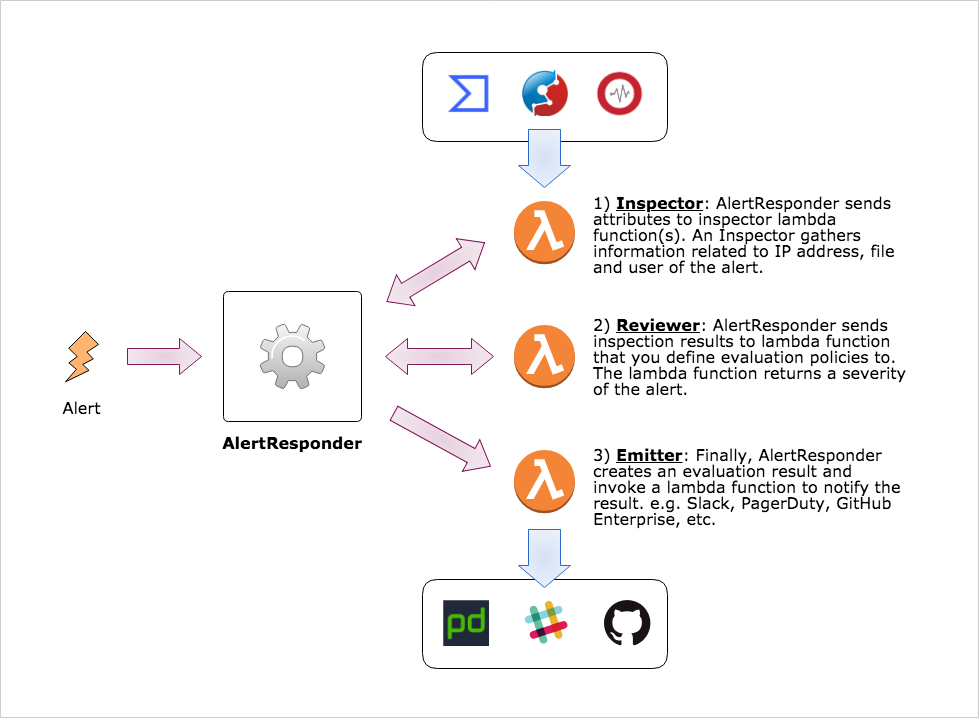
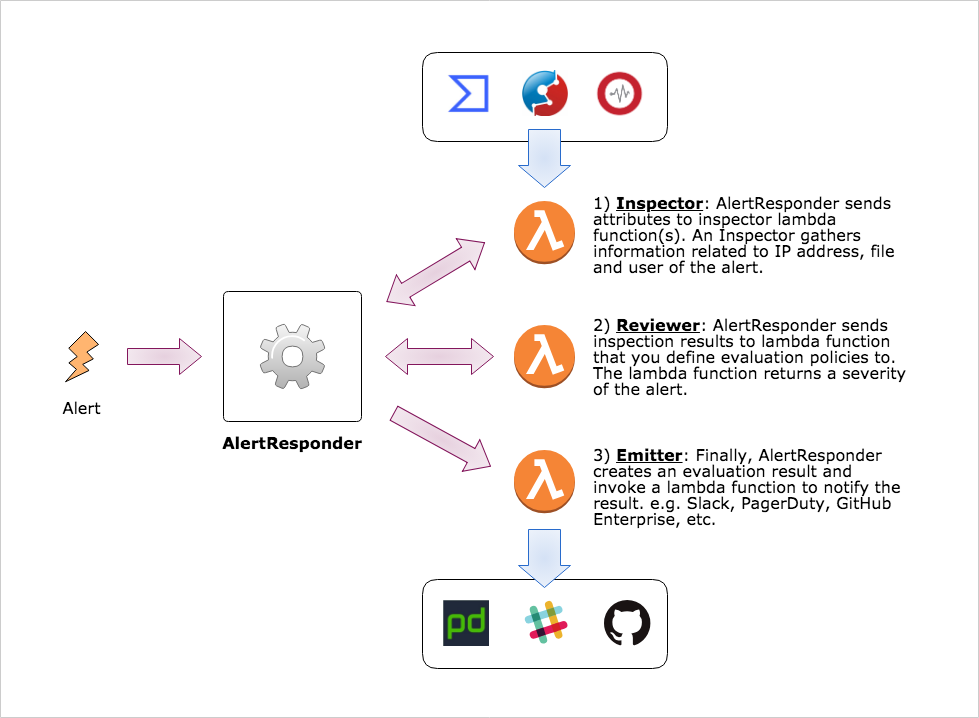
AlertResponder は、セキュリティの観点から注目すべきイベントであるアラートを受け取り、そのアラートに自動的に対応します。AlertResponder は自動対応の3つのパートを持っています。
以下の変数をご自分の環境に合わせて置き換えてください:
$REGION: AWS リージョンに置き換えます(例:ap-northeast-1)$STACK_NAME: CloudFormation スタック名に置き換えます$ curl -o alert_responder.yml https://s3-$REGION.amazonaws.com/cfn-assets.$REGION/AlertResponder/templates/latest.yml
$ aws cloudformation deploy --template-file alert_responder.yml --stack-name $STACK_NAME --capabilities CAPABILITY_IAM
パラメータファイル(例:config.json)を用意し、make コマンドを実行します。
$ cat config.json
{
  "StackName": "your-alert-responder-name",
  "TestStackName": "your-test-stack-name",
  "CodeS3Bucket": "your-some-bucket",
  "CodeS3Prefix": "for-example-functions",

  "InspectionDelay": "1",
  "ReviewDelay": "10"
}
$ env AR_CONFIG=config.json make deploy
注:AWS 認証情報(API キーなど)と適切な権限が必要であることを確認してください。
AlertResponder をデプロイした後、tester ディレクトリに移動し、テスト用のスタックをデプロイします。
$ cd tester/
$ make AR_CONFIG=../config.json deploy
デプロイ後、tester ディレクトリ内にスクリプトによって作成された param.json が表示されます。
$ cat params.json
{
  "AccountId": "214219211678",
  "Region": "ap-northeast-1",
  "Inspector": "slam-alert-responder-test-functions-Inspector-1OBGU89CT1P4B",
  "Reporter": "slam-alert-responder-test-functions-Reporter-1NDHU0VDI8OPA"
}
その後、git リポジトリのトップレベルディレクトリに戻り、統合テストを実行できます。
$ go test -v
=== RUN   TestInvokeBySns
--- PASS: TestInvokeBySns (3.39s)
           (snip)
PASS
ok      github.com/m-mizutani/AlertResponder    20.110s
