


AutoGadgetFSは、USBプロトコルに関する深い知識がなくても、USBデバイスとそれに関連するホスト/ドライバ/ソフトウェアを評価できるオープンソースフレームワークです。このツールはPython3で書かれており、RabbitMQとWiFiアクセスを利用して、研究者が世界中のどこからでもリモートでUSBセキュリティ評価を実施できるようにします。ConfigFSを活用することで、AutoGadgetFSはユーザーがデバイスを迅速にクローンしてエミュレートできるようにし、各実装の詳細に深く踏み込む必要をなくします。また、このフレームワーク上で独自のファザーを作成することもできます。
<div style="text-align:center"><img src="https://raw.githubusercontent.com/ehabhussein/AutoGadgetFS/master/screenshots/devtest.jpeg" width="450" height="187" /></div>

<a name="MMITM"/>```bash
Minimal agfs in the middle setup:
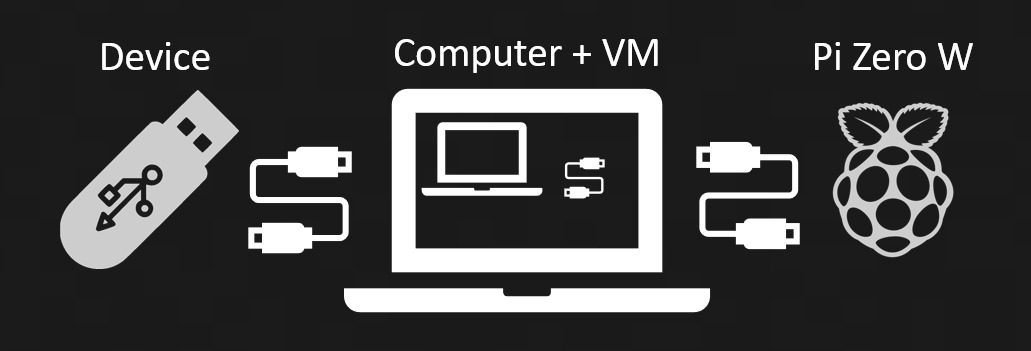
```bash Complete agfs in the middle setup with debugging support:
<div style="text-align:center"><img src="https://raw.githubusercontent.com/ehabhussein/AutoGadgetFS/master/screenshots/scenario2.jpeg"/></div>

---

<a name="Usbdev"/>

### USBデバイスクラスサポート:

[✔️] USB HIDデバイス完全サポート(中間者攻撃)

[⚠️] デバイスのみのテスト.. 全USBデバイス(中間者攻撃なし)

[⏳] 将来のリリース... 全USBデバイス(中間者攻撃)

---

<a name="Caps"/>

### 機能:

1. USBデバイスを簡単に見つけ、選択し、アタッチする。
1. 任意のUSB HIDデバイスをエミュレートする。
1. HIDデバイスの中間者スニッフィングを実行する(通信をディスクに保存)。
1. デバイススニッフィング(任意のデバイス)。
1. 複数のファザーにより、デバイスまたはホストをファズできる。
1. ランダムファザー(固定長またはランダム長のパケット)。
1. 過去のUSB通信から学習するスマートファザー。
1. 記述ファザー:ファザーにどのバイトをファズするかを指定し、パケットの残りはそのままにする。
1. ガジェットファザー。
1. シーケンシャルファザー。
1. コントロール転送の列挙。
1. ファイルからのパケットのリプレイ。
1. 保存されたUSBLyzerキャプチャからのパケットのリプレイ。
1. パケットを視覚的に表示し、通信のリバースエンジニアリングを容易にする。
1. DFUモードのデバイス、またはデバイスが情報を漏洩した場合のアラート。
1. USBデバイスとホストはインターネット上のどこにでも配置可能。
1. 突然のインターフェース変更を監視。

---

<a name="Road"/>

### ロードマップ:

1. デバイスへのコントロール転送要求をスニッフィングし、応答する。
1. 全てのタイプのデバイスに対する中間者攻撃(MITM)とエミュレーション。
1. コンソール/QTベースのインターフェース。
1. RPI zero Wでのより多くのインターフェース/エンドポイントのサポート。
1. greatfetのようなより多くのボードのサポート。
1. カスタムボードへの移行。
1. Raspberry Piが全インターフェースでUSBデバイスエミュレーションを完全サポートするよう作業。
1. シーケンス番号による送受信パケットの相関付け。

---

<a name="Installation"/>

### インストール:

<a name="Linux"/>

### Linuxマシン:

* 注記: WSL/WSL2はUSBパススルーの問題によりサポートされていません。

* Python3、ipython3、git、pip、rabbitMQサーバーをインストール

    ```bash
    sudo apt install python3 ipython3 git python3-pip rabbitmq-server dfu-util
    sudo service rabbitmq-server start
    ```

* リポジトリをクローン

    ```bash
    git clone https://github.com/ehabhussein/AutoGadgetFS
    cd AutoGadgetFS
    ```

* 要件をインストール

    ```bash
    sudo -H pip3 install -r requirements.txt
    ```

* ipythonの体験向上のためにprompt-toolkitをダウングレード:

    ```bash
    sudo python3 -m pip install prompt-toolkit~=2.0
    ```

* rabbitMQのWebインターフェースを有効化

    ```bash
    sudo rabbitmq-plugins enable rabbitmq_management
    http://localhost:15672/ to reach the web interface
    ```

* 認証情報 *guest:guest* でWebインターフェースにログイン
  * 注記: rabbitMQを `localhost` にインストールしていない場合は、以下のユーザーを追加してログインしてください:
    ```bash
    sudo rabbitmqctl add_user autogfs usb4ever
    sudo rabbitmqctl set_user_tags autogfs administrator
    ```
  * rabbitMQ設定ファイルをアップロード
    * 概要タブで一番下までスクロールして定義をインポート
    * *rabbitMQbrokerconfig/rabbitmq-Config.json* にあるファイルをアップロード

    ```bash
    sudo service rabbitmq-server restart
    ```

* インストールをテスト

    ```python
    sudo ipython3

    Python 3.7.7 (default, Apr  1 2020, 13:48:52)
    Type 'copyright', 'credits' or 'license' for more information
    IPython 7.9.0 -- An enhanced Interactive Python. Type '?' for help.

    In [1]: import libagfs

    In [2]: x = libagfs.agfs()

    ***************************************
    AutoGadgetFS: USB testing made easy
    ***************************************
    Enter IP address of the rabbitmq server: 127.0.0.1

    In [3]: exit

    sudo `python3` agfsconsole.py

    ***************************************
    AutoGadgetFS: USB testing made easy
    ***************************************
    Enter IP address of the rabbitmq server: 127.0.0.1
    Give your project a name?!:
    ```   ```

* Patch Pyusb langID ( Not needed unless you get pyusb errors for langID ):
  * Edit the file `/usr/local/lib/python3/dist-packages/usb/util.py`
    * make changes to the `def get_string` method to look like below:

        ```python
        if 0 == len(langids):
            return "Error Reading langID"
            #raise ValueError("The device has no langid")
        if langid is None:
            langid = langids[0]
        elif langid not in langids:
            return "Error Reading langID"
            #raise ValueError("The device does not support the specified langid")
        ```

    * If you prefer to use `patch` apply the following patch to the file: `AutoGadgetFS/pyusb_patches/pyusb_langid.patch`

---

<a name="Rasp"/>

### Raspberry Pi Zero W:

* Obtain a copy of [Raspian Lite Edition](https://downloads.raspberrypi.org/raspios_lite_armhf_latest)
  * Burn the Image to the SD card using [BalenaEtcher](https://www.balena.io/etcher/)

* Mount the SD card on your machine and make the following changes:
  * In the `/path/to/sdcard/boot/config.txt` file add to the very end of the file:

    ```bash
    enable_uart=1
    dtoverlay=dwc2
    ```

  * In the `/path/to/sdcard/boot/cmdline.txt` add right after `rootwait`

    ```bash
    modules-load=dwc2
    ```

  * it should look like this make sure its on the same line:

    ```bash
    console=serial0,115200 console=tty1 root=PARTUUID=6c586e13-02 rootfstype=ext4 elevator=deadline fsck.repair=yes rootwait modules-load=dwc2
    ```

* Enable ssh:
  * in the `/path/to/sdcard/boot` directory create an empty file name ssh:

    ```bash
    sudo touch /path/to/sdcard/boot/ssh
    ```

* Enable Wifi:
  * in the `/path/to/sdcard/boot` directory create an file named `wpa_supplicant.conf`:

    ```bash
    sudo vim /path/to/sdcard/boot/wpa_supplicant.conf
    ```

  * Add the following contents:

    ```bash
    ctrl_interface=DIR=/var/run/wpa_supplicant GROUP=netdev
    update_config=1
    country=US
    network={
                ssid="<your wifi SSID>"
                psk="<your wifi password>"
                key_mgmt=WPA-PSK
             }
    ```

* Unmount the SD card and place it back into the Raspberry Pi Zero and power it on.
* Copy the content of `AutogadgetFS/Pizero/` to the Pi zero: `username: pi` & `password: raspberry`

    ```bash
    cd AutogadgetFS/Pizero/
    scp gadgetfuzzer.py removegadget.sh requirements.txt router.py pi@<pi-ipaddress>:/home/pi
    ```

* SSH into the PI Zero and setup requirements for AutoGadgetFS:

