 cobbr/c2bridge
C2Bridges は、開発者が新しいカスタム通信プロトコルを作成し、Covenant 内ですぐに活用できるようにします。

C2Bridgeを使用すると、開発者は新しいカスタム通信プロトコルを作成し、Covenant内ですぐに利用できます。
C2Bridgeは、Covenantのコードを一切編集することなく、アウトバウンドのコマンド&コントロールプロトコルを開発するために使用されます。新しいリスナーを統合しても問題ない開発者にとっては、新しいC2プロトコルは、インターフェースに完全に統合された第一級の新しいリスナータイプとして追加されるべきです。ただし、状況によっては、Covenantの外部にC2Bridgeを作成し、それをBridgeListenerに接続して、概念実証や新しいプロトコルのテストを行う方が速い場合もあります。
開発者は、C2Bridgeプロジェクトを新しいC2Bridgeを作成するためのテンプレートとして使用できます。C2Bridgeプロジェクト内には、抽象C2Bridgeクラスがあります。開発者はこのクラスから継承し、選択した新しいC2プロトコルを使用してインプラントとBridgeListenerの間で読み書きを行うために必要な関数を実装できます。
using System.Threading;
using System.Threading.Tasks;

namespace C2Bridge
{
    /// <summary>
    /// IC2Bridge is an interface implemented by the C2Bridge class.
    /// </summary>
    public interface IC2Bridge
    {
        Task RunAsync(CancellationToken token);
    }

    /// <summary>
    /// C2Bridge is an abstract class that new C2Bridges should inherit from.
    /// </summary>
    public abstract class C2Bridge : IC2Bridge
    {
        // The BridgeConnector handles communication between the Covenant server and the C2Bridge
        protected BridgeConnector BridgeConnector { get; set; }
        // The BridgeProfile handles parsing and formatting data passed between the implant and Covenant
        protected BridgeProfile BridgeProfile { get; set; }

        /// <summary>
        /// The constructor for the C2Bridge. New C2Bridges should use their own constructor that accepts
        /// any command line arguments needed for the C2Bridge to function.
        /// </summary>
        /// <param name="Connector">The BridgeConnector that handles communication with the Covenant server.</param>
        /// <param name="Profile">The BridgeProfile that handles the parsing and formatting of data.</param>
        protected C2Bridge(BridgeConnector Connector, BridgeProfile Profile)
        {
            this.BridgeConnector = Connector;
            this.BridgeProfile = Profile;
            BridgeConnector.OnReadBridge += OnReadBridge;
        }

        /// <summary>
        /// The RunAsync function is the main function that should start the C2Bridge and continue to run until you
        /// are done with your operation. C2Bridge developers should implement the logic to start and run the listener
        /// within this function.
        /// </summary>
        /// <param name="Token">The CancellationToken that will cancel the C2Bridge if the source of the token is cancelled.</param>
        /// <returns></returns>
        public abstract Task RunAsync(CancellationToken Token);

        /// <summary>
        /// The OnReadBridge function is called each time data is read from the Covenant server meant for an implant.
        /// C2Bridge developers should implement the logic to determine which implant this data is meant for and write
        /// this data to the implant.
        /// </summary>
        /// <param name="sender">
        /// Sender is the object that called the OnReadBridge function. C2Bridge developers can safely ignore this parameter.
        /// </param>
        /// <param name="args">Args contains the data that should be written from the Covenant server to the implant.</param>
        protected abstract void OnReadBridge(object sender, BridgeConnector.ReadBridgeArgs args);

        /// <summary>
        /// The WriteToConnector function handles writing data from an implant to the Covenant server. This logic should be the
        /// same for all C2Bridge types, but can be overloaded by the C2Bridge developer if custom logic is needed.
        ///
        /// When calling this function, the returned GUID string should be used to track implant GUID values by the C2Bridge.
        /// </summary>
        /// <param name="Data">The data read from the implant that should be written to the Covenant server.</param>
        /// <returns>
        /// Returns the GUID value parsed out of the Data. This value should be used to track implant GUID values by the C2Bridge.
        /// </returns>
        protected virtual string WriteToConnector(string Data)
        {
            var parsed = this.BridgeProfile.ParseWrite(Data);
            if (parsed != null)
            {
                _ = this.BridgeConnector.Write(this.BridgeProfile.FormatRead(parsed));
                return parsed.Guid;
            }
            return null;
        }

        /// <summary>
        /// The GetBridgeMessengerCode function should contain the code to be embedded in the implant for communication with
        /// the C2Bridge. This function is not actually used anywhere within the project, but is here so that the necessary
        /// implant code can be found along with the C2Bridge. C2Bridge developers should place the code here for use within
        /// a BridgeProfile's BridgeMessengerCode property.
        /// </summary>
        /// <returns></returns>
        protected abstract string GetBridgeMessengerCode();
    }
}
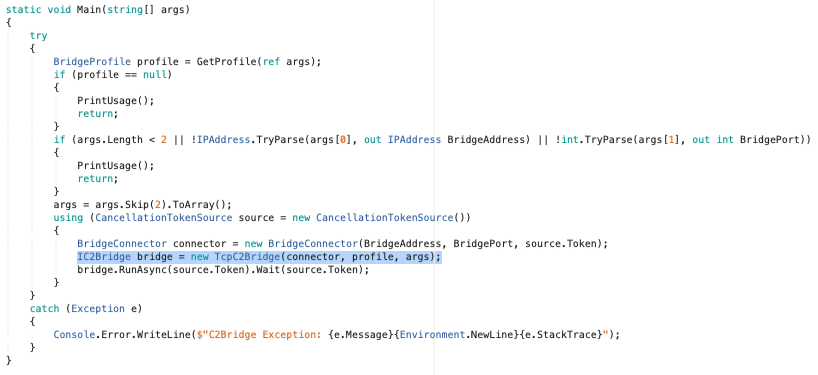
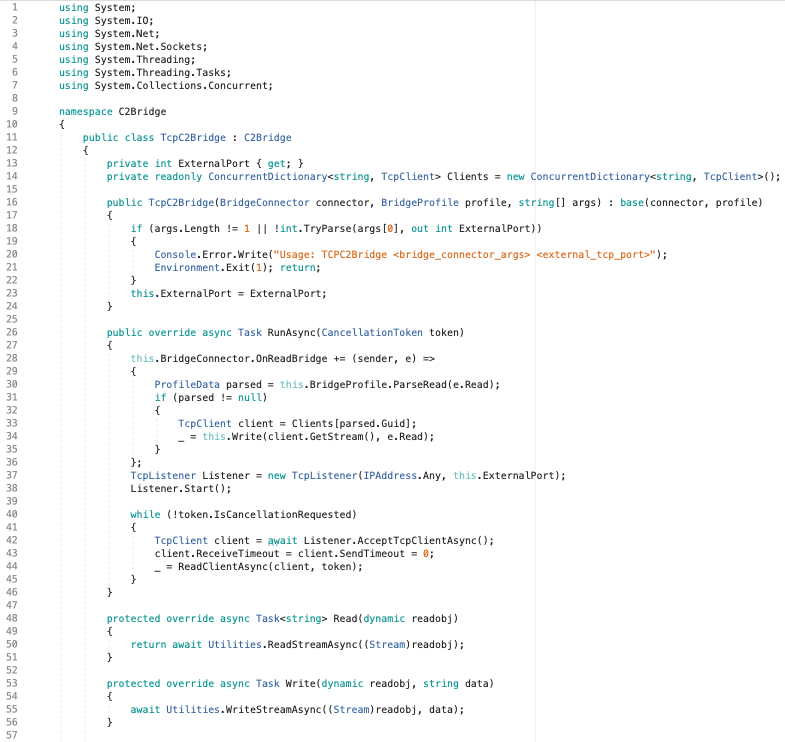
C2Bridgeプロジェクトには、このインターフェースから継承するTCPC2Bridgeクラスの例が含まれており、実装方法の例を提供しています。
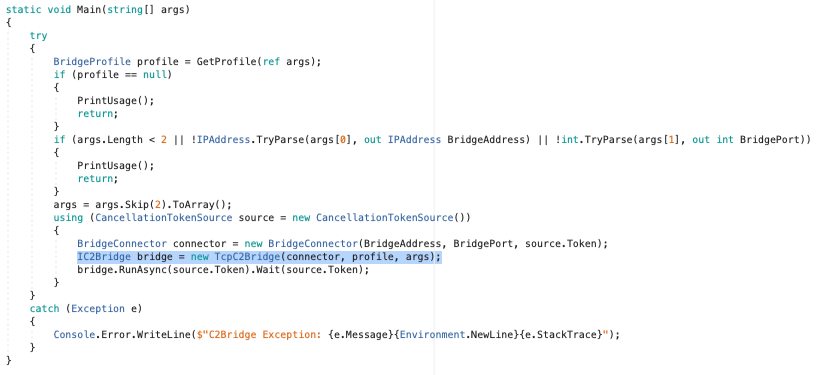
新しいC2Bridgeを作成したら、Main()関数内のTCPC2Bridgeのコンストラクタ呼び出しを、新しいコンストラクタに置き換えることができます:
抽象GetBridgeMessengerCode()メソッドは、実際にはC2Bridgeプロジェクト内のどこでも使用されませんが、C2Bridgeとインプラントを結び付けるために使用されます。インプラントには、アウトバウンドのC2Bridgeに対して読み書きできるコードが必要です。このコードは特定のC2Bridgeに固有のものであり、継承されたGetBridgeMessengerCode()メソッド内に配置する必要があります。C2Bridgeを利用するCovenantユーザーは、このメソッドからBridgeMessengerCodeを取得し、BridgeProfile内で使用します。
C2Bridgeを利用するCovenantユーザーは、そのC2Bridgeに固有のBridgeProfileを構成する必要があります。Gruntインプラントは、アウトバウンドのC2Bridgeに対して読み書きする方法を知っている必要があります。BridgeProfile.BridgeMessengerCodeプロパティは、インプラントに配置されるコードを表し、アウトバウンドのC2Bridgeへの読み書きを担当します。このコードは、C2BridgeのGetBridgeMessengerCode()メソッドにあります。
ユーザーは、完全に新しいBridgeProfileを作成するか、正しいBridgeMessengerCodeを使用してDefaultBridgeProfileを編集できます。これを行うには、リスナーナビゲーションページに移動し、「Profiles」タブを選択します:
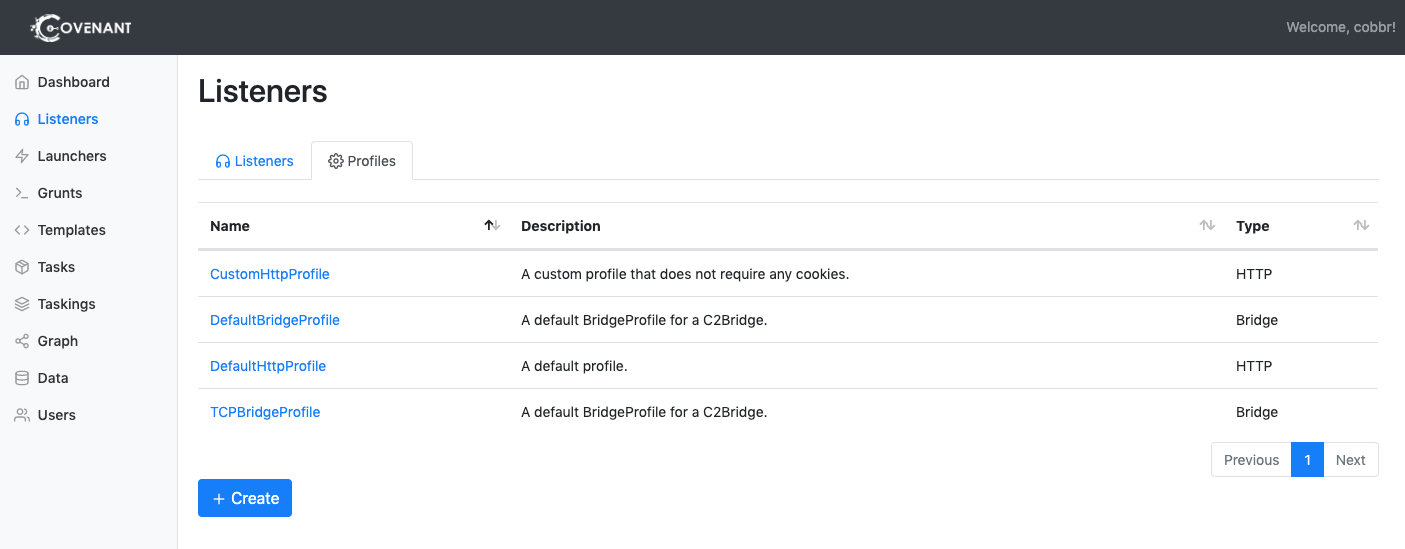
新しいプロファイルを作成するには、「Create」ボタンをクリックします。特定のプロファイルを編集するには、プロファイルの名前をクリックします。アクティブなリスナーに関連付けられているプロファイルは編集できないことに注意してください。
「Create」をクリックした後、「BridgeProfile」タブを選択します:
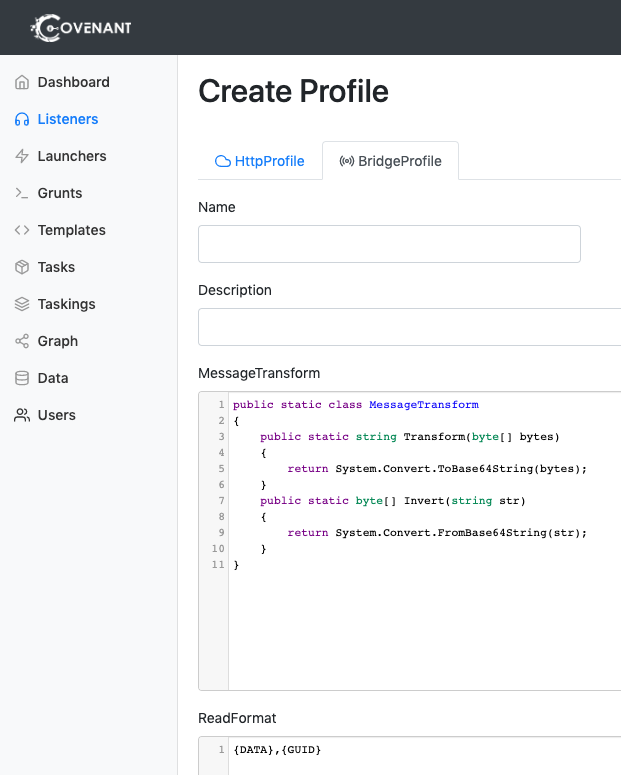
プロファイルを編集または作成する際には、以下のオプションを構成する必要があります:
Name。覚えやすい名前を選びましょう!Description。オペレーターが読んで、プロファイルがどのように機能するか、どのようなユースケースで使用するのが適切かを簡単に理解できる、詳細な説明にする必要があります。MessageTransformは、ReadFormatとWriteFormatで指定された形式に配置される前に、通信データがどのように変換されるかを指定する独自の方法です。MessageTransformは、MessageTransformという名前の静的C#クラスであり、パブリックなTransform関数とInvert関数を含む必要があります。Transform関数とInvert関数が互いにミラーリングされている限り(つまり data == MessageTransform.Invert(MessageTransform.Transform(data)))、クラスは任意の方法でデータを変換できます。MessageTransformクラスはクロスプラットフォーム互換であり、Net40、Net35、NetCore21でコンパイルできる必要があります。ReadFormatは、GruntがC2Bridgeからデータを読み取るときのメッセージ形式です。形式には、データとGrunt GUIDを配置する場所を含める必要があります。データを配置する場所を示す文字列"{DATA}"と、GUIDを配置する場所を示す文字列"{GUID}"を含めます。WriteFormatは、GruntがC2Bridgeにデータを書き込むときのメッセージ形式です。形式には、データとGrunt GUIDを配置する場所を含める必要があります。データを配置する場所を示す文字列"{DATA}"と、GUIDを配置する場所を示す文字列"{GUID}"を含めます。BridgeMessengerCodeは、インプラントに配置され、アウトバウンドのC2Bridgeへの読み書きを担当するコードです。このコードは、C2BridgeのGetBridgeMessengerCode()メソッドにあります。これらのオプションを構成する際、CovenantユーザーはBridgeMessengerCodeプロパティを除いて、これらの値を自由に構成できます。BridgeMessengerCodeプロパティは、C2Bridgeから取得する必要があります。
