 som3canadian/some-tools
कुछ पेंटेस्ट टूल्स। कुछ पेंटेस्टिंग टूल्स को इंस्टॉल करें और अपडेट रखें। मैंने अपनी OSCP परीक्षा पास करने के लिए इसका उपयोग किया।

अपने सभी पेंटेस्ट टूल्स को एक जगह प्रबंधित करें और एक कमांड से उन्हें अपडेट रखें 😎
sometools का लक्ष्य उन सभी टूल्स को प्रबंधित करना है जो Kali में शामिल नहीं हैं या जिनके लिए sudo apt install उपलब्ध नहीं है। Sometools बेहतर काम करता है यदि टूल्स एक repo हैं, लेकिन इसे बिना repo के भी काम करने के लिए ट्वीक किया जा सकता है।
मैं उन टूल्स को प्रबंधित और अपडेट रखने का एक आसान तरीका ढूंढ रहा था जो Kali-Linux में शामिल नहीं हैं। उदाहरण के लिए, मैं privilege escalation स्क्रिप्ट्स को प्रबंधित करने का एक आसान तरीका ढूंढ रहा था। एक दिन मैंने eugenekolo का sec-tools देखा (जिसे आप पेज के नीचे देख सकते हैं) और इसने मुझे तुरंत अपने टूल पर काम शुरू करने की प्रेरणा दी। मेरी मुख्य प्रेरणा check-update-all कमांड थी, जो आपको अपने सभी इंस्टॉल किए गए टूल्स को आसानी से अपडेट करने देता है।
लेकिन ध्यान रखें कि यह अलग है। मैंने इसे उन लोगों के लिए बनाया है जो Kali के साथ काम कर रहे हैं। इसे अन्य distro पर भी काम करना चाहिए, लेकिन मैंने Burp Suite या SQLmap जैसे टूल शामिल नहीं किए क्योंकि वे Kali में डिफ़ॉल्ट रूप से आते हैं।
$ git clone https://github.com/som3canadian/Some-Tools $ cd Some-Tools $ ./sometools.sh setup
$ ./sometools.sh list
## बुनियादी उपयोग
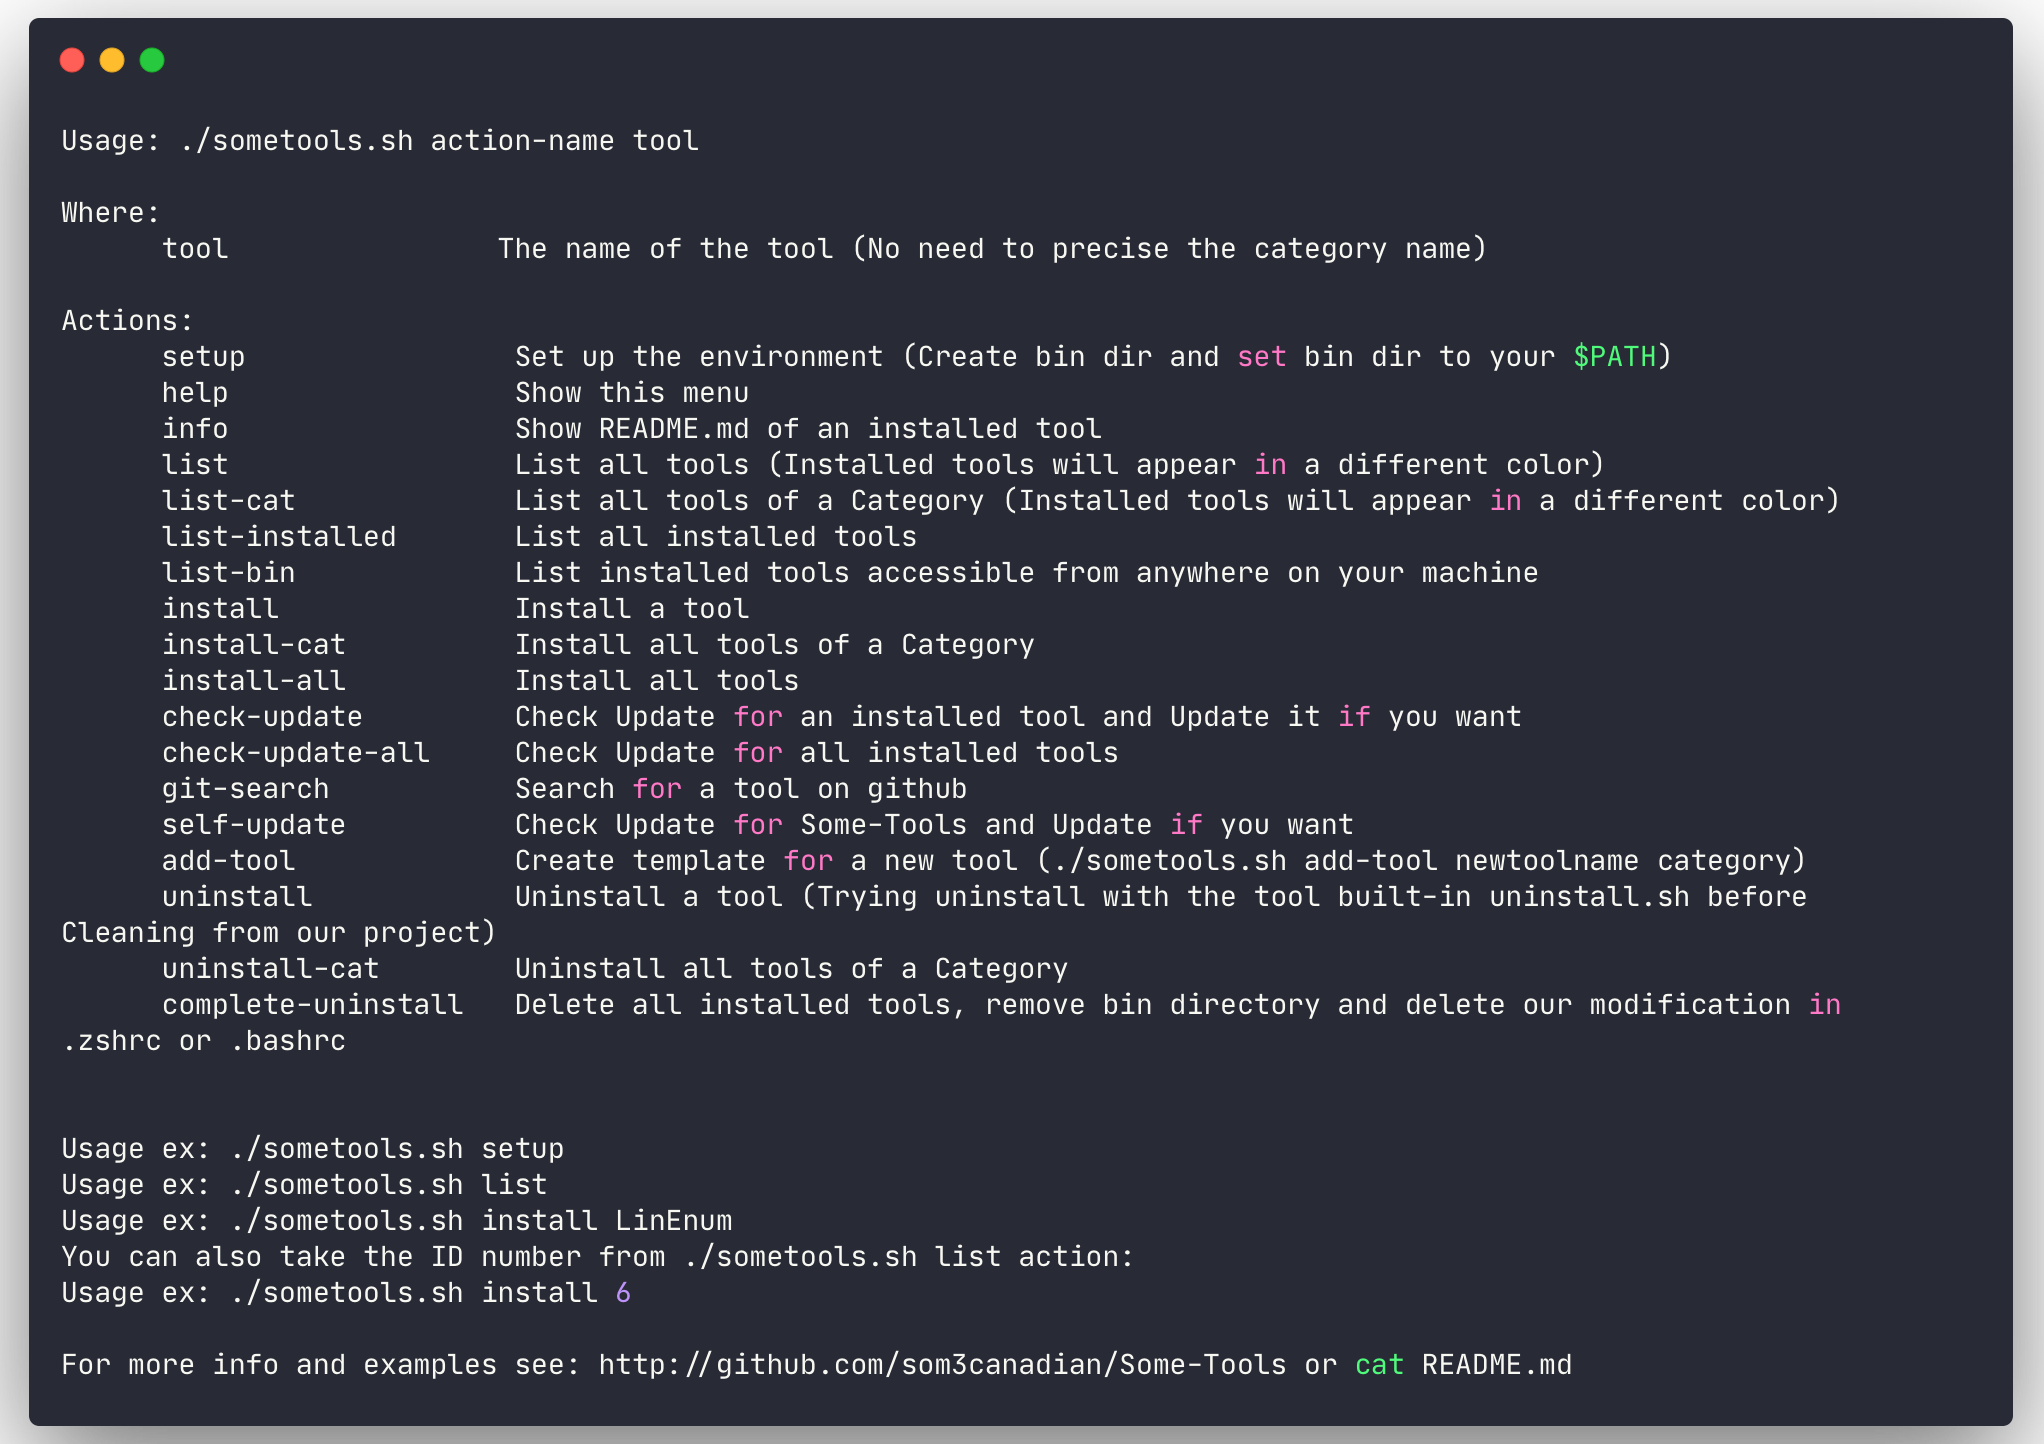
**नोट**: टूल का उपयोग करते समय श्रेणी के नाम निर्दिष्ट करने की आवश्यकता नहीं है। बस टूल का नाम या ID का उपयोग करें। आप `./sometools.sh list` करके टूल ID देख सकते हैं।
सबसे अधिक उपयोग की जाने वाली क्रियाएं हैं:
- list
- install
- check-update-all
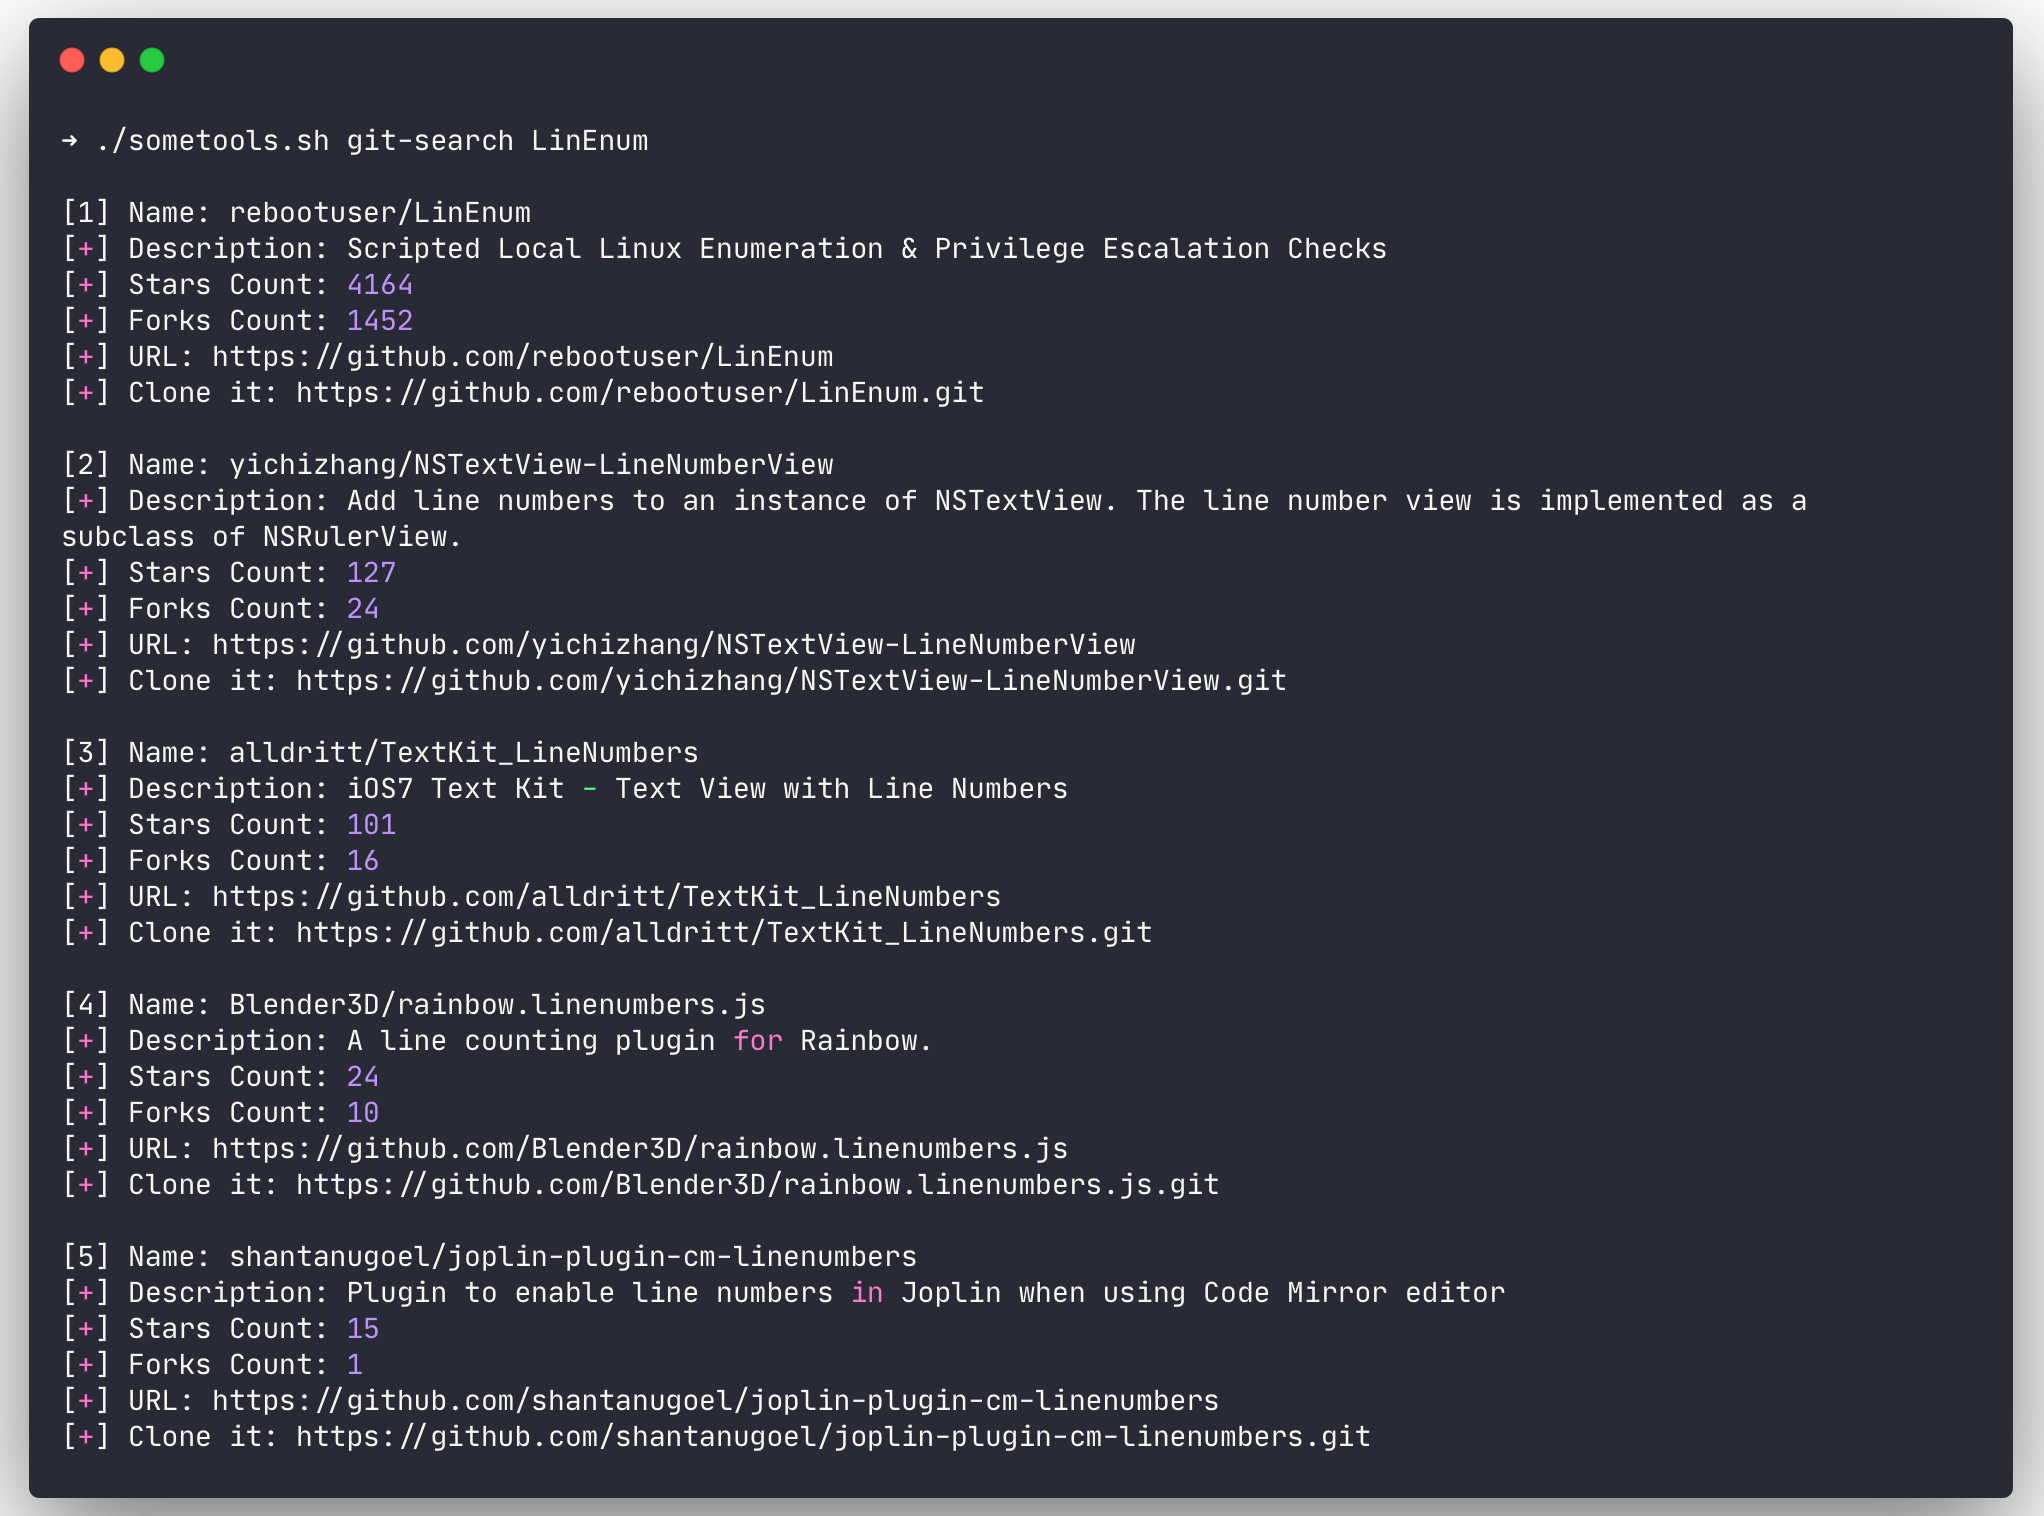
- git-search
- self-update```bash
# Inital setup. Should be the first command
$ ./sometools.sh setup
# List all available tools
$ ./sometools.sh list
# List all available tools of a category
$ ./sometools.sh list-cat Utilities
# List install tool(s)
$ ./sometools.sh list-installed
# List installed tools accessible from anywhere on your machine
$ ./sometool.sh list-bin
# Install a tool
$ ./sometools.sh install unicorn
# Using ID instead of tool name
$ ./sometools.sh install 4
# Install all tools of a Category
$ ./sometools.sh install-cat PrivEsc-Win
# Install All tools
$ ./sometools.sh install all
# Check update for all installed tools
# check-update-all command is the main reason why I made this
$ ./sometools.sh check-update-all
# Check for update
$ ./sometools.sh check-update PEAS
# Using ID instead of tool name
$ ./sometools.sh check-update 9
# Search for a tool on github
$ ./sometools.sh git-search LinEnum
# Search for a PoC in the PoC-in-GitHub tool
$ ./sometools.sh search-poc
# Show README.md of an installed tool
$ ./sometools.sh info unicorn
# Using ID instead of tool name
$ ./sometools.sh info 4
# Add a new tool
$ ./sometools.sh add-tool newtoolname PrivEsc-Lin
# Uninstall a tool
$ ./sometools.sh uninstall unicorn
# Using ID instead of tool name
$ ./sometools.sh uninstall 4
# Unistall all tools of a Category
$ ./sometools.sh uninstall-cat PrivEsc-Win
# Update some-tools
$ ./sometools.sh self-update
# Delete all installed tools, remove bin directory and delete our modification in .zshrc or .bashrc
$ ./sometools.sh complete-uninstall
बिन निर्देशिका सेटअप क्रिया करने पर बनाई जाएगी। यह वह निर्देशिका पथ होगा जिसे हम अपने शेल $PATH (your/install/dir/Some-Tools/bin) में जोड़ेंगे। बिन निर्देशिका में हम उन उपकरणों की प्रतिलिपि (सिमलिंक) रखेंगे जिन्हें हम अपनी मशीन पर हर जगह निष्पादनीय बनाना चाहते हैं। उदाहरण के लिए unicorn.py जैसे उपकरण को, आप जहाँ चाहें वहाँ unicorn निष्पादित कर सकते हैं।
सेटअप क्रिया प्रक्रिया में bin/PrivEsc-Lin और bin/PrivEsc-Win भी बनाएगी। इस निर्देशिका में हम अपने विशेषाधिकार वृद्धि स्क्रिप्ट रखेंगे। इसलिए, जब आप अपने उपकरणों का उपयोग करना चाहें, तो आप एक पायथन HTTP सर्वर चला सकते हैं और जल्दी से वांछित स्क्रिप्ट अपलोड कर सकते हैं। उन फ़ोल्डरों में स्क्रिप्ट check-update क्रिया के साथ उपकरण(ों) को अपडेट करने के साथ ही अपडेट हो जाएंगी।
