 m-mizutani/alertresponder
AWS सर्वरलेस एप्लिकेशन मॉडल द्वारा स्वचालित सुरक्षा अलर्ट प्रतिक्रिया ढांचा

ध्यान दें: यह रिपॉजिटरी पुरानी हो चुकी है। नई रिपॉजिटरी यहाँ है: https://github.com/m-mizutani/deepalert
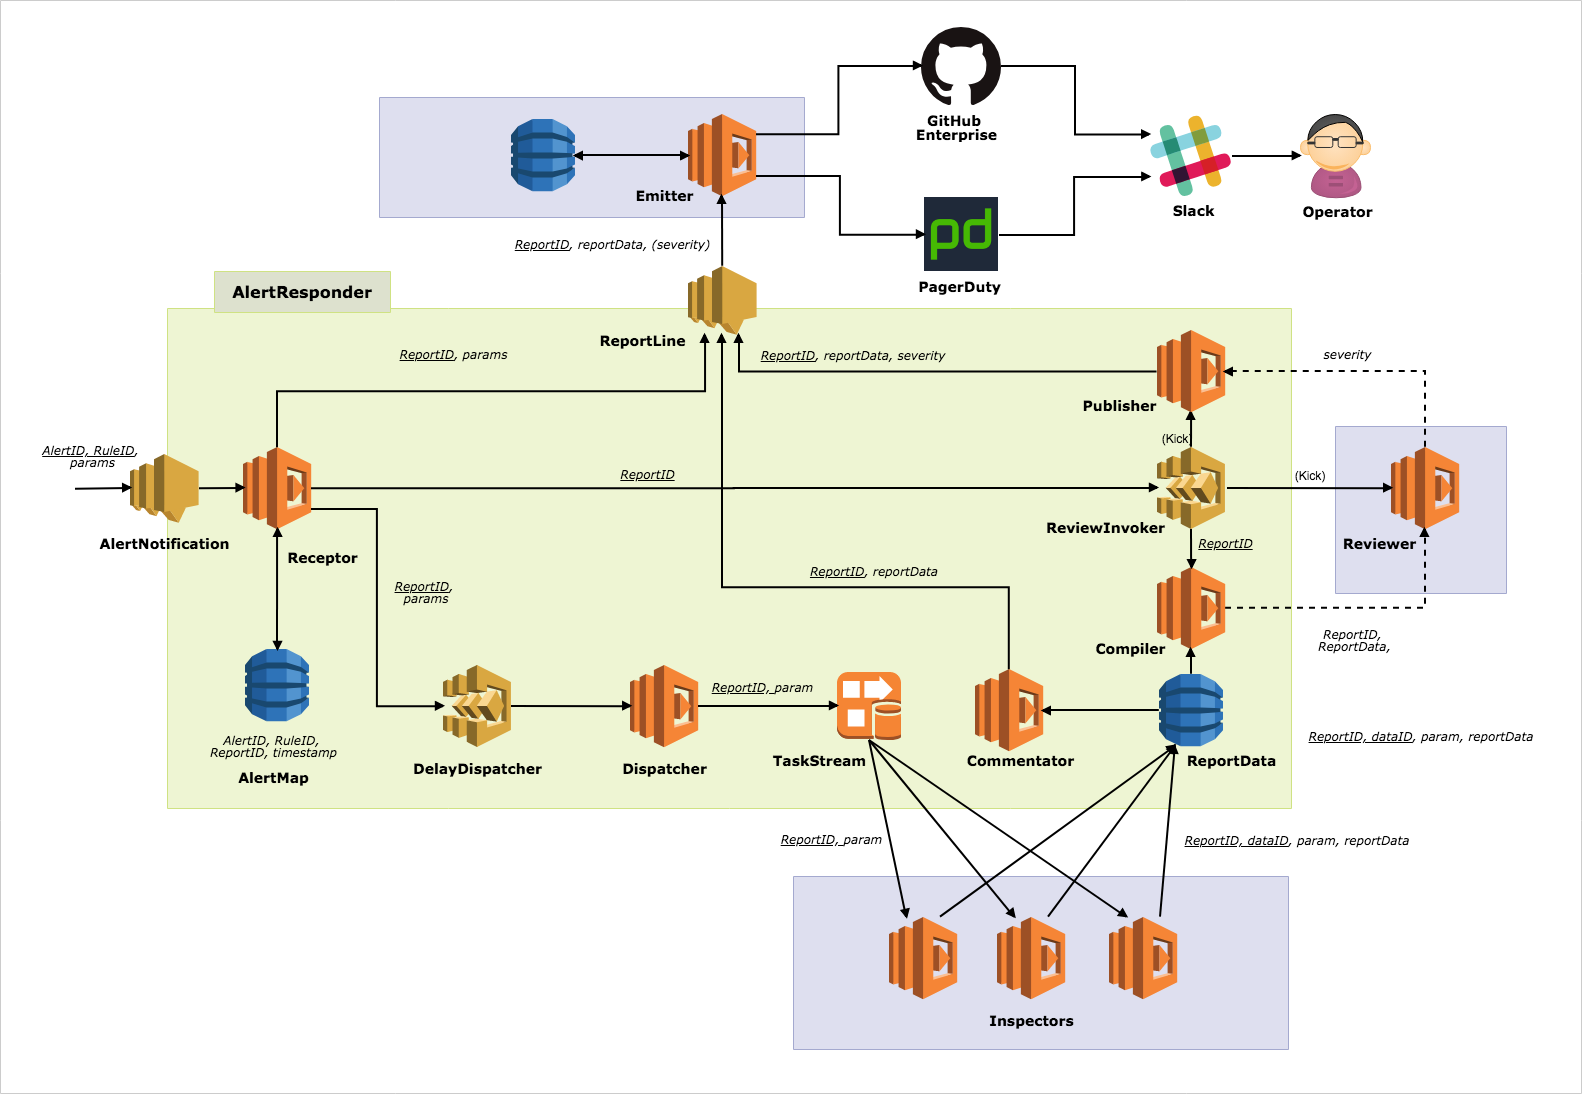
AlertResponder सुरक्षा अलर्ट के स्वचालित प्रतिक्रिया के लिए एक सर्वरलेस फ्रेमवर्क है।
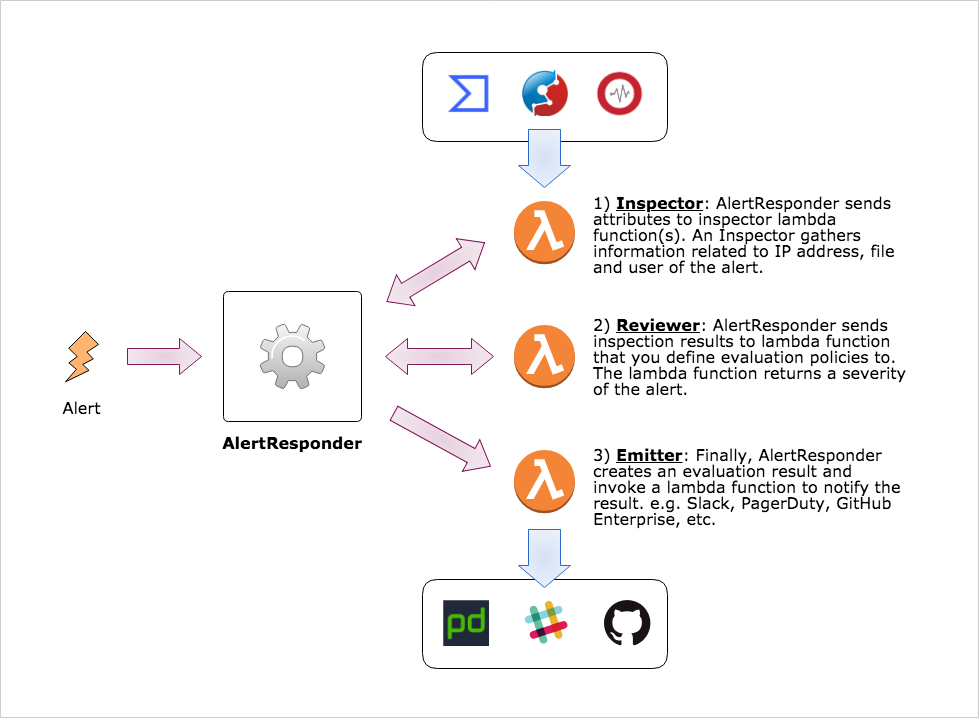
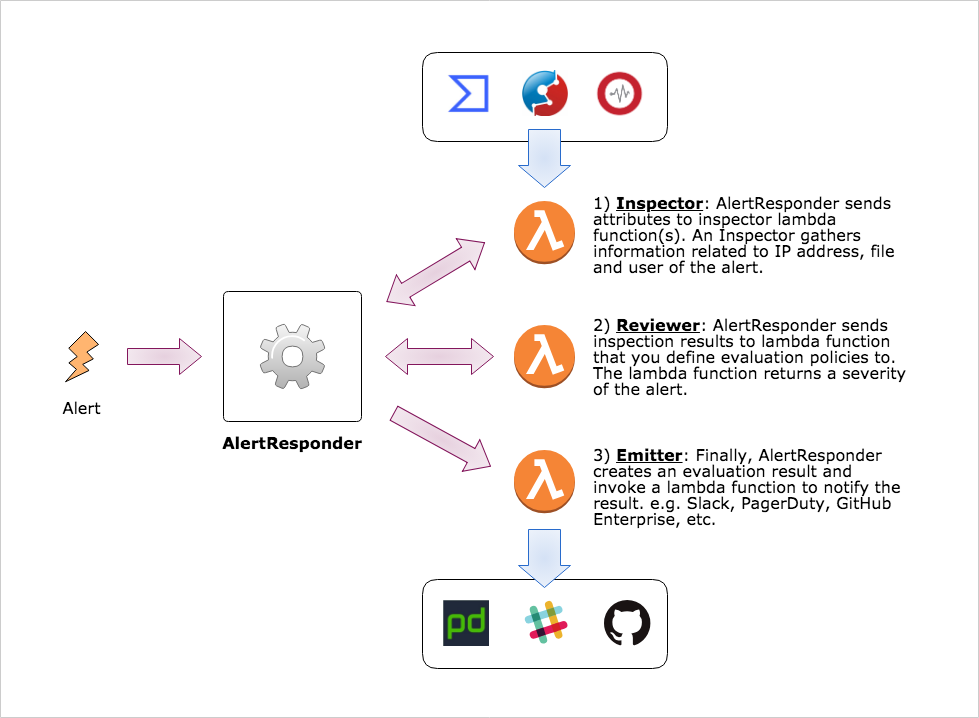
AlertResponder एक अलर्ट प्राप्त करता है जो सुरक्षा दृष्टिकोण से रुचि की घटना है और अलर्ट का स्वचालित रूप से जवाब देता है। AlertResponder के स्वचालित प्रतिक्रिया के 3 भाग हैं।
कृपया अपने वातावरण के अनुसार निम्नलिखित वेरिएबल बदलें:
$REGION: इसे अपने AWS क्षेत्र से बदलें। (उदा. ap-northeast-1)$STACK_NAME: इसे CloudFormation स्टैक नाम से बदलें$ curl -o alert_responder.yml https://s3-$REGION.amazonaws.com/cfn-assets.$REGION/AlertResponder/templates/latest.yml
$ aws cloudformation deploy --template-file alert_responder.yml --stack-name $STACK_NAME --capabilities CAPABILITY_IAM
एक पैरामीटर फ़ाइल तैयार करें, जैसे config.json और make कमांड चलाएं।
$ cat config.json
{
  "StackName": "your-alert-responder-name",
  "TestStackName": "your-test-stack-name",
  "CodeS3Bucket": "your-some-bucket",
  "CodeS3Prefix": "for-example-functions",

  "InspectionDelay": "1",
  "ReviewDelay": "10"
}
$ env AR_CONFIG=config.json make deploy
नोट: कृपया सुनिश्चित करें कि आपके पास AWS क्रेडेंशियल्स (जैसे API कुंजी) और उपयुक्त अनुमतियाँ हैं।
AlertResponder तैनात करने के बाद, tester निर्देशिका के अंतर्गत जाएं और परीक्षण के लिए एक स्टैक तैनात करें।
$ cd tester/
$ make AR_CONFIG=../config.json deploy
तैनाती के बाद आप tester निर्देशिका के अंतर्गत स्क्रिप्ट द्वारा बनाया गया param.json देख सकते हैं।
$ cat params.json
{
  "AccountId": "214219211678",
  "Region": "ap-northeast-1",
  "Inspector": "slam-alert-responder-test-functions-Inspector-1OBGU89CT1P4B",
  "Reporter": "slam-alert-responder-test-functions-Reporter-1NDHU0VDI8OPA"
}
फिर, git रिपॉजिटरी की शीर्ष स्तर निर्देशिका पर वापस जाएं और आप एकीकरण परीक्षण चला सकते हैं।
$ go test -v
=== RUN   TestInvokeBySns
--- PASS: TestInvokeBySns (3.39s)
           (snip)
PASS
ok      github.com/m-mizutani/AlertResponder    20.110s
