
AI-मूल साइबरसुरक्षा के लिए कार्रवाई की प्रणाली—जहाँ इरादा नियंत्रित निष्पादन बन जाता है, साक्ष्य परिचालन स्मृति बन जाता है, और हर ऑपरेशन अगले को बेहतर बनाता है।

AI-नेटिव साइबर सुरक्षा के लिए कार्रवाई की प्रणाली—जहाँ इरादा नियंत्रित निष्पादन बन जाता है, साक्ष्य परिचालन स्मृति बन जाता है, और हर ऑपरेशन अगले को बेहतर बनाता है।
CyberStrikeAI योजना, निष्पादन, मानवीय निगरानी, साक्ष्य और रीप्ले को एक लेखापरीक्षण-योग्य कार्यक्षेत्र में जोड़ता है। Go में निर्मित, यह Eino-संचालित एजेंटों, MCP-मूल उपकरणों, RAG ज्ञान, विज़ुअल वर्कफ़्लो, और अधिकृत सुरक्षा संचालनों के लिए अटैक-चेन मॉडलिंग और विश्लेषण को जोड़ता है।
यहाँ से शुरू करें: त्वरित आरंभ · दस्तावेज़ · सुरक्षा हार्डनिंग
[!IMPORTANT] CyberStrikeAI का उपयोग केवल उन प्रणालियों पर करें जिनके आप स्वामी हैं या जिनका परीक्षण करने के लिए आपको स्पष्ट रूप से अधिकृत किया गया है। साझा या उत्पादन वातावरण के लिए, उच्च-जोखिम वाले उपकरणों, WebShell, या C2 क्षमताओं को सक्षम करने से पहले सुरक्षा मॉडल और हार्डनिंग मार्गदर्शिका की समीक्षा करें।
लाइट मोड
|
डार्क मोड
|
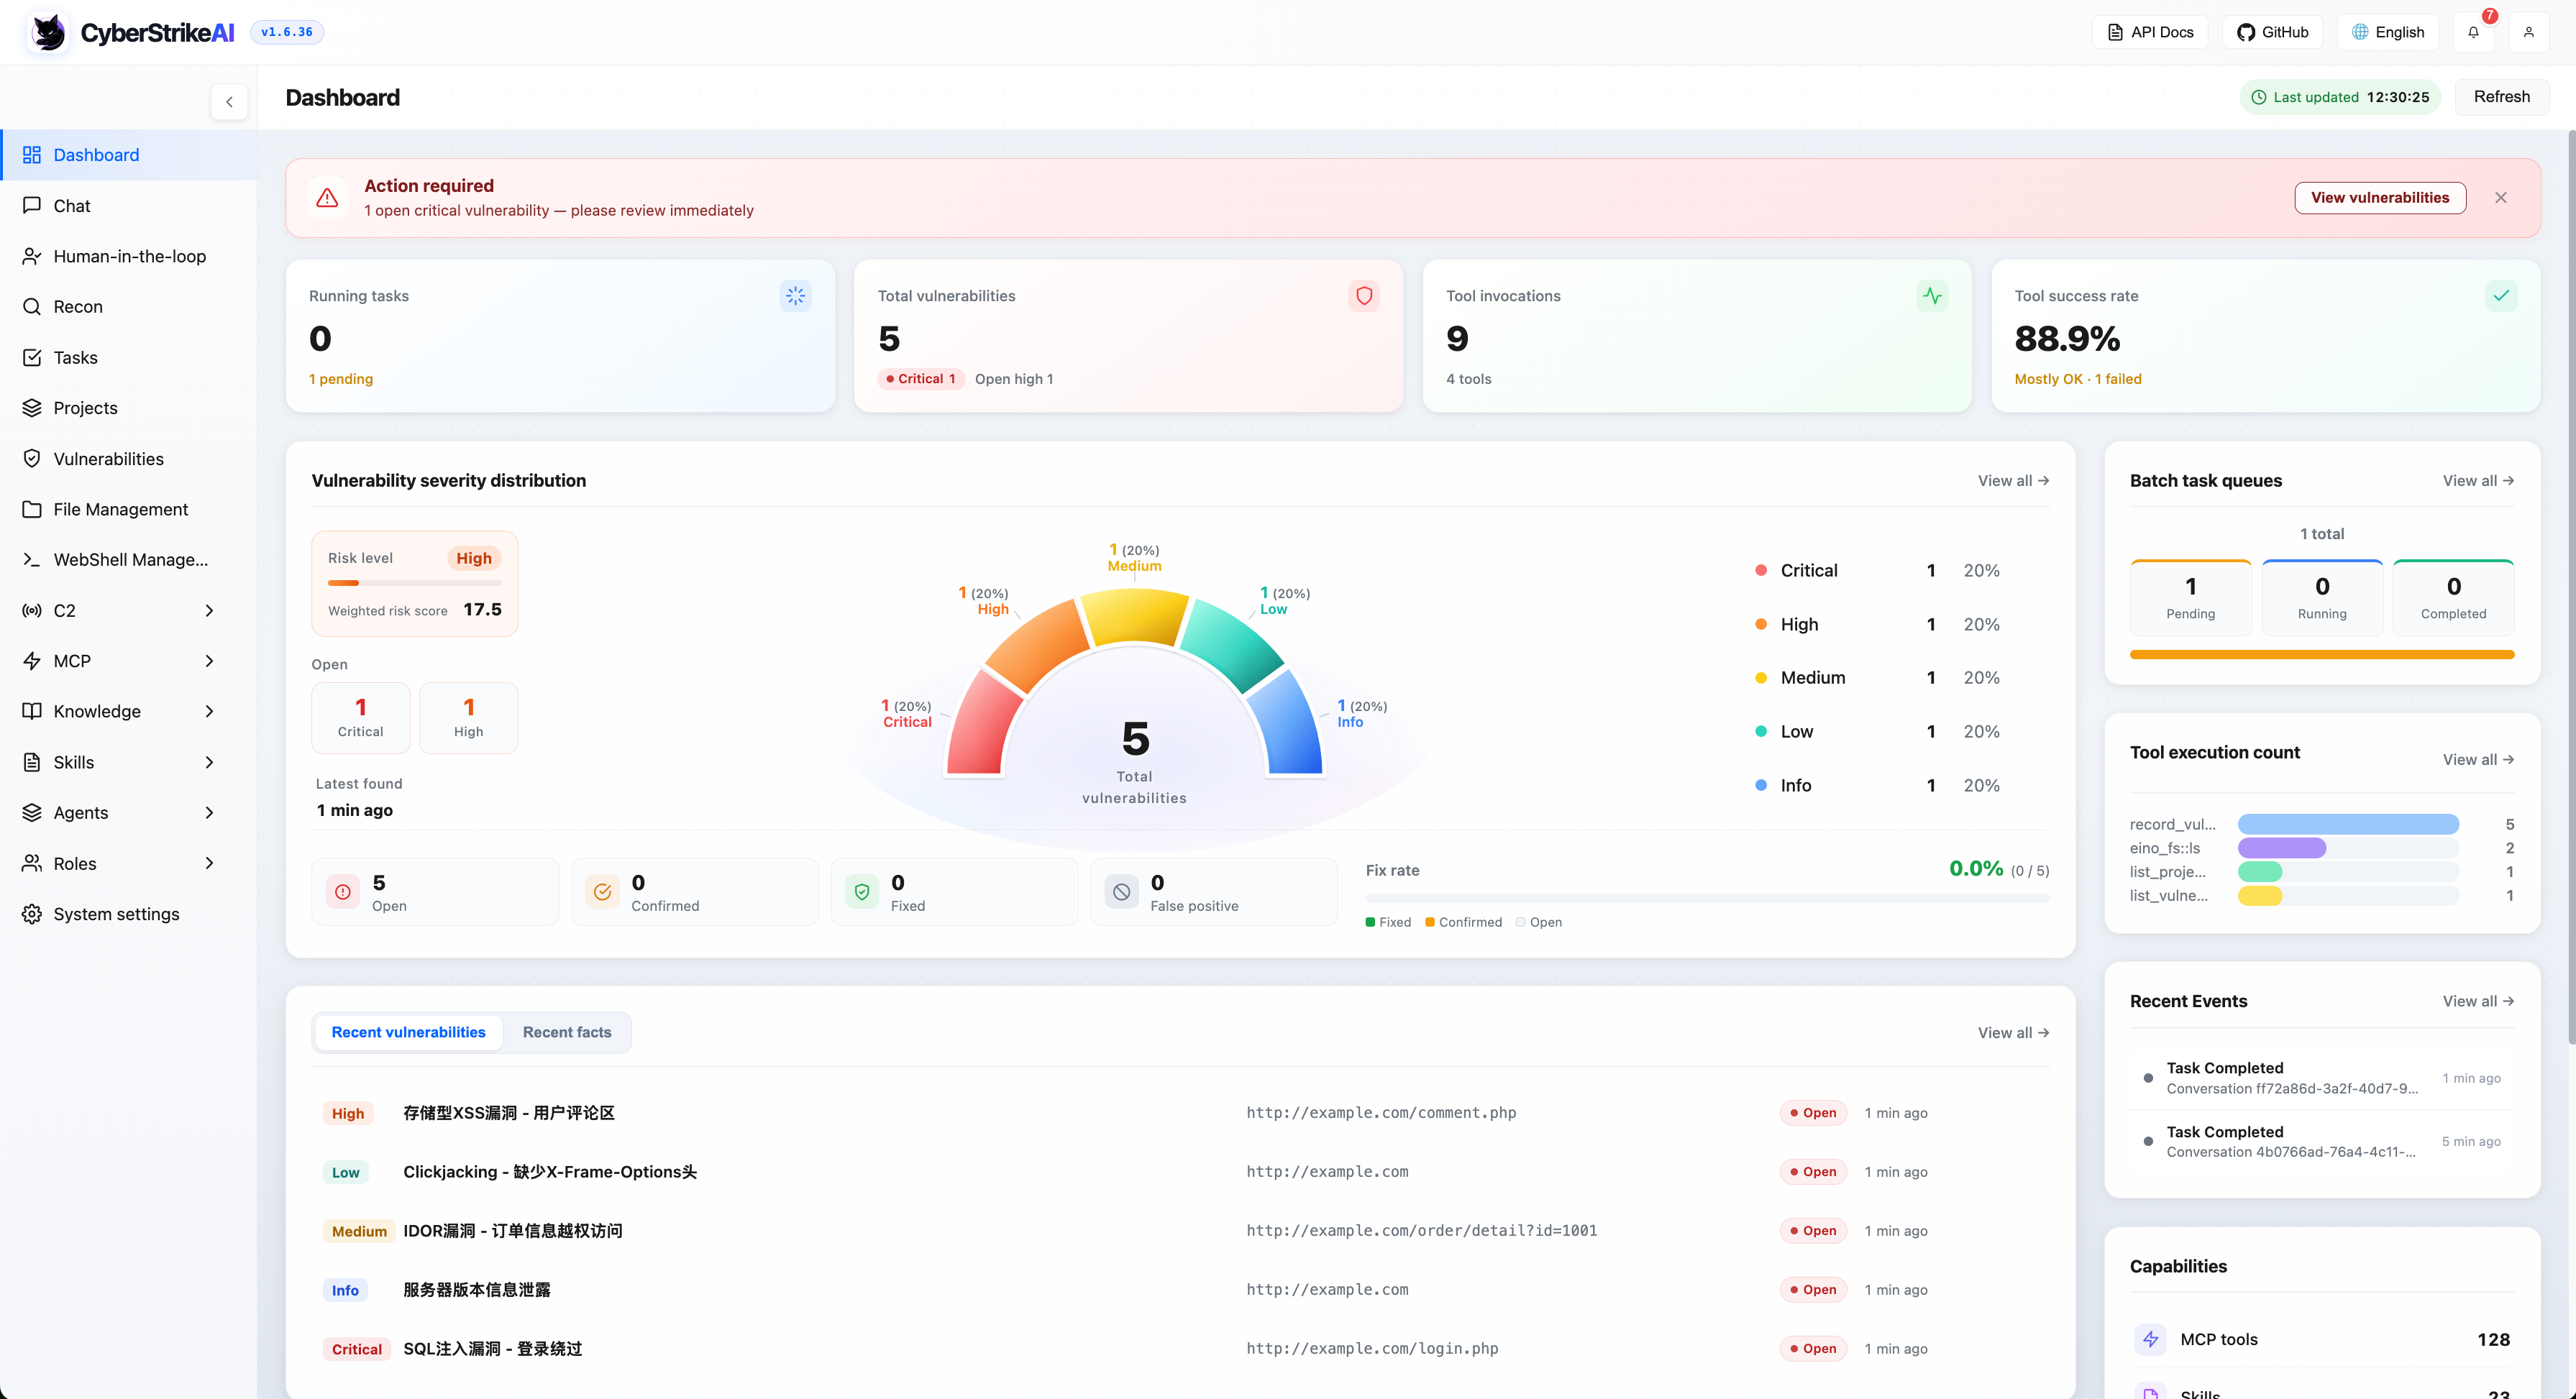
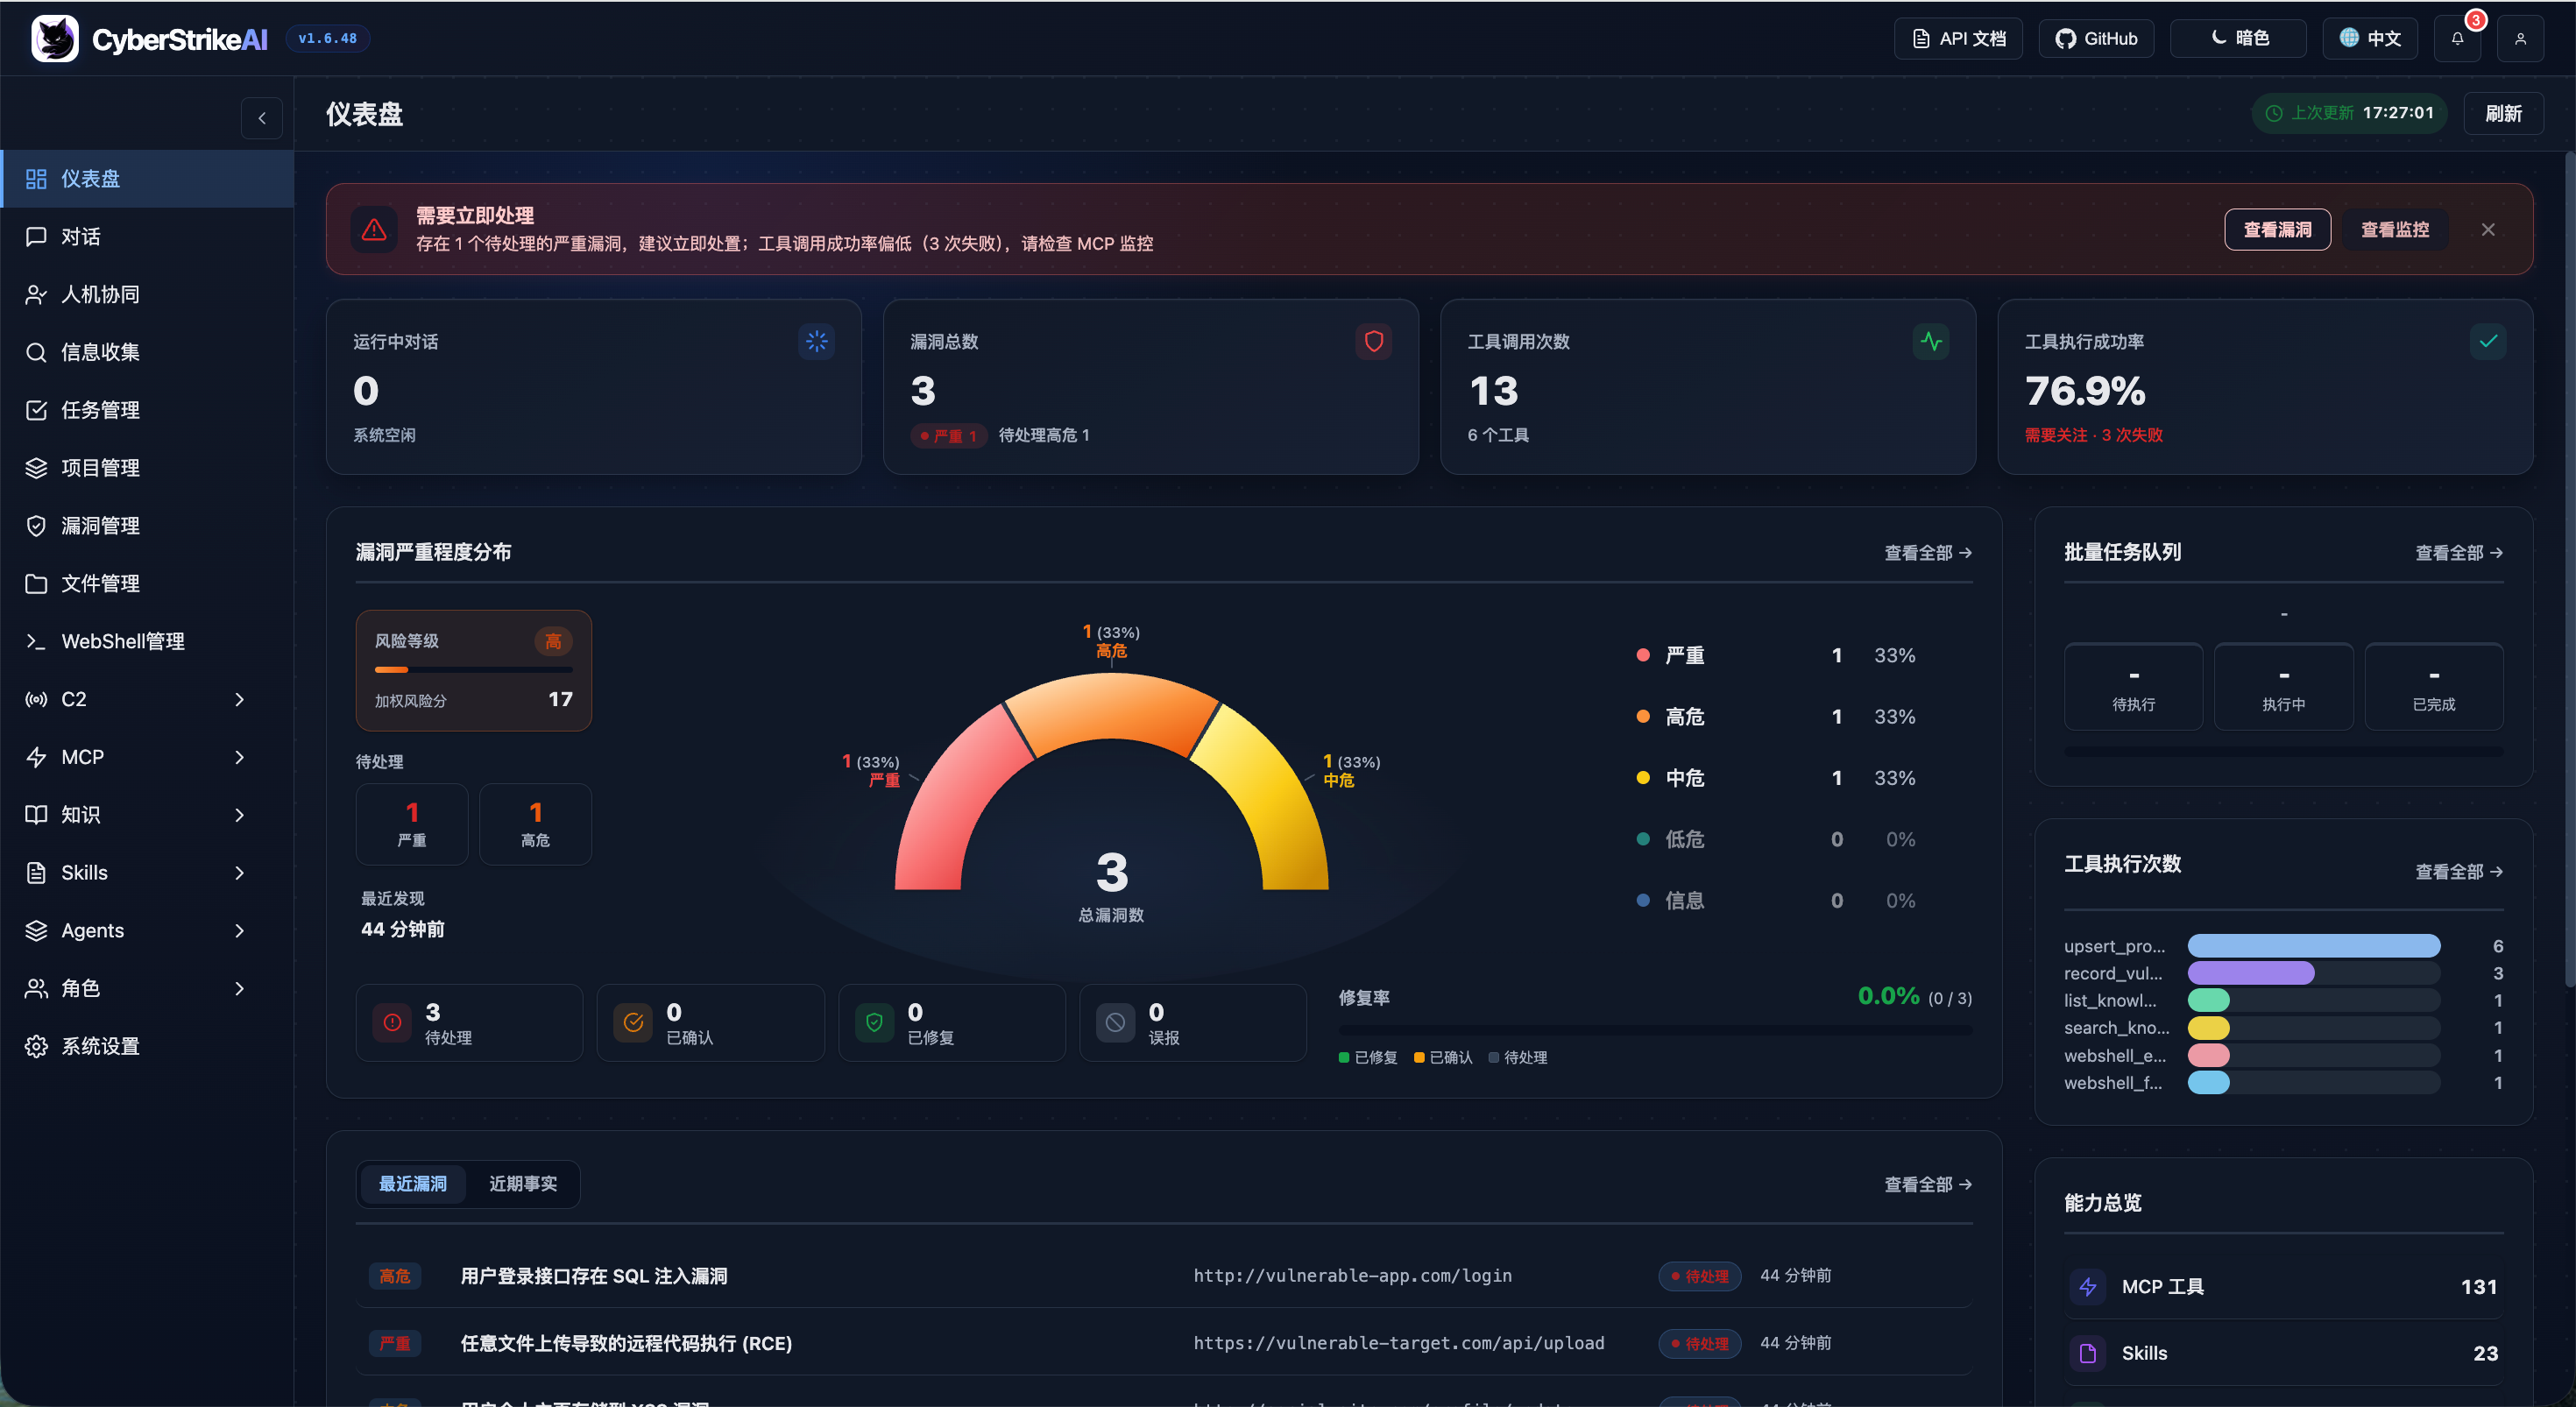
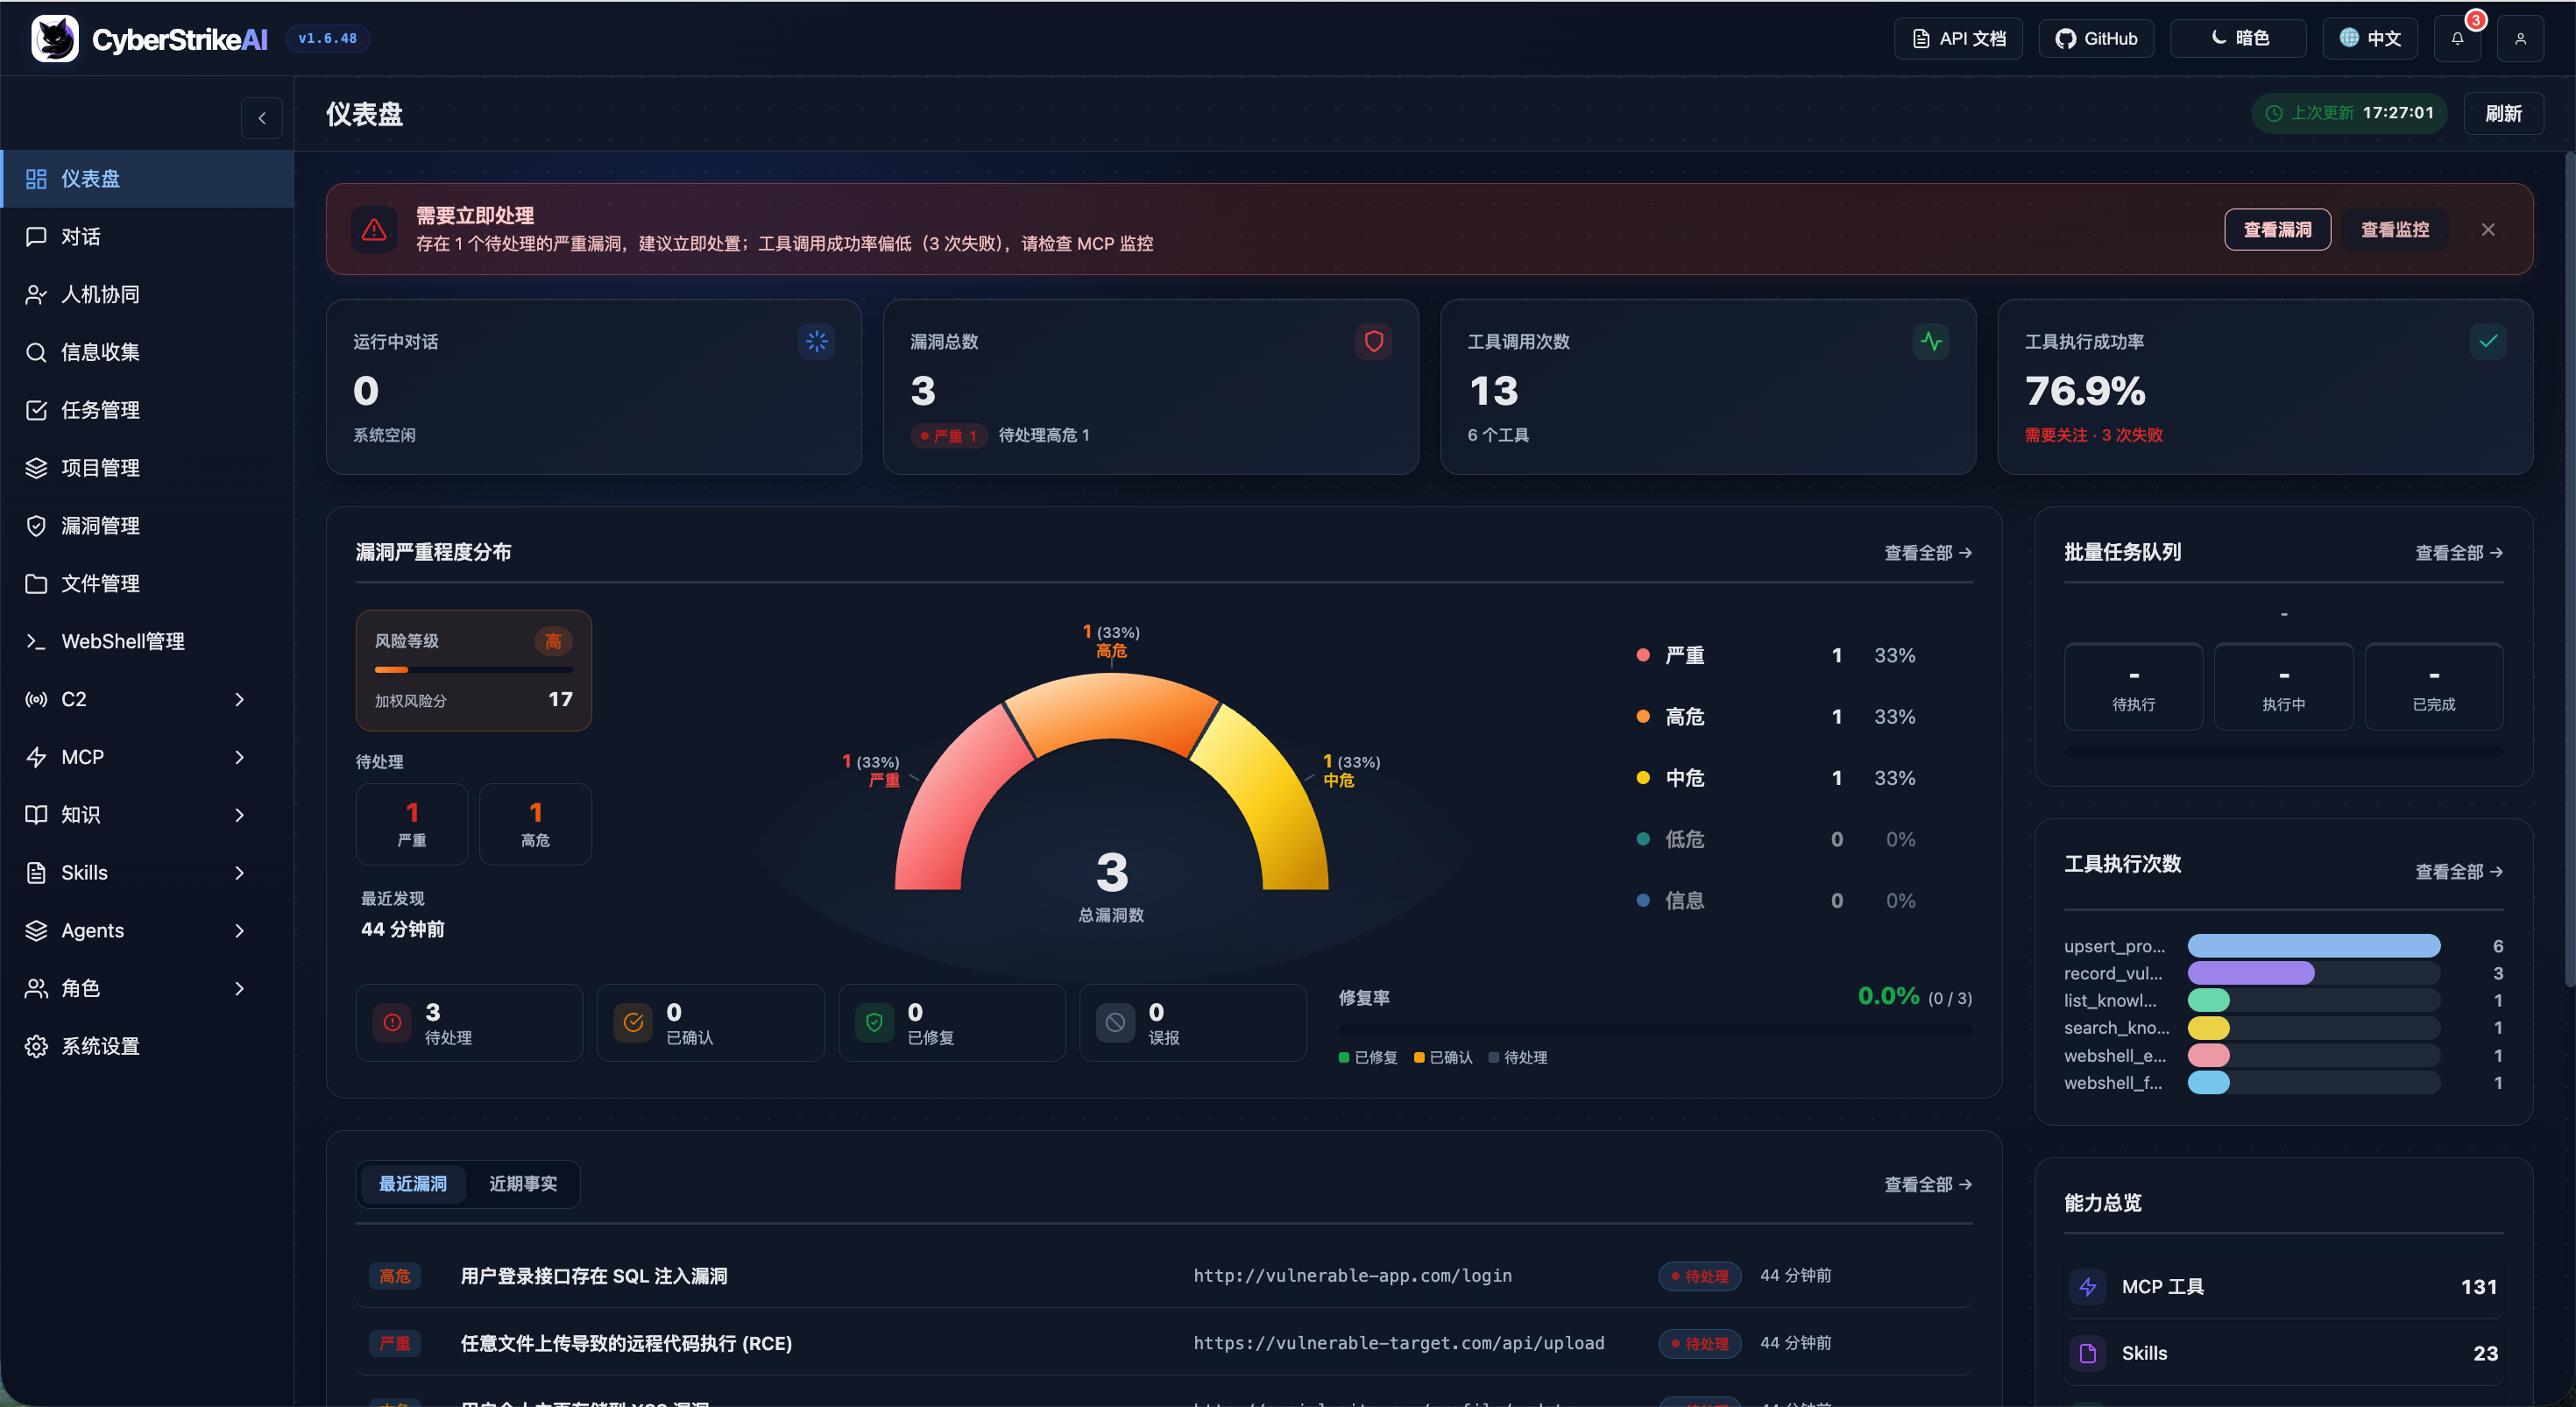
डैशबोर्ड सिस्टम रनटाइम स्थिति, सुरक्षा भेद्यताएँ, उपकरण उपयोग और ज्ञान आधार का व्यापक अवलोकन प्रदान करता है, जिससे उपयोगकर्ता प्लेटफ़ॉर्म की मुख्य विशेषताओं और वर्तमान स्थिति को जल्दी समझ सकते हैं।
execution_id पोलिंग, रद्दीकरण, प्रति-सर्वर सर्किट ब्रेकर, समवर्ती सीमाएँ और एकीकृत आउटपुट कैप शामिल हैं।WebShell, C2 और अन्य उच्च-जोखिम क्षमताएँ उन प्रणालियों के लिए हैं जिनके आप स्वामी हैं या जिनका परीक्षण करने के लिए स्पष्ट रूप से अधिकृत हैं। सुरक्षा मॉडल और हार्डनिंग मार्गदर्शिका देखें।
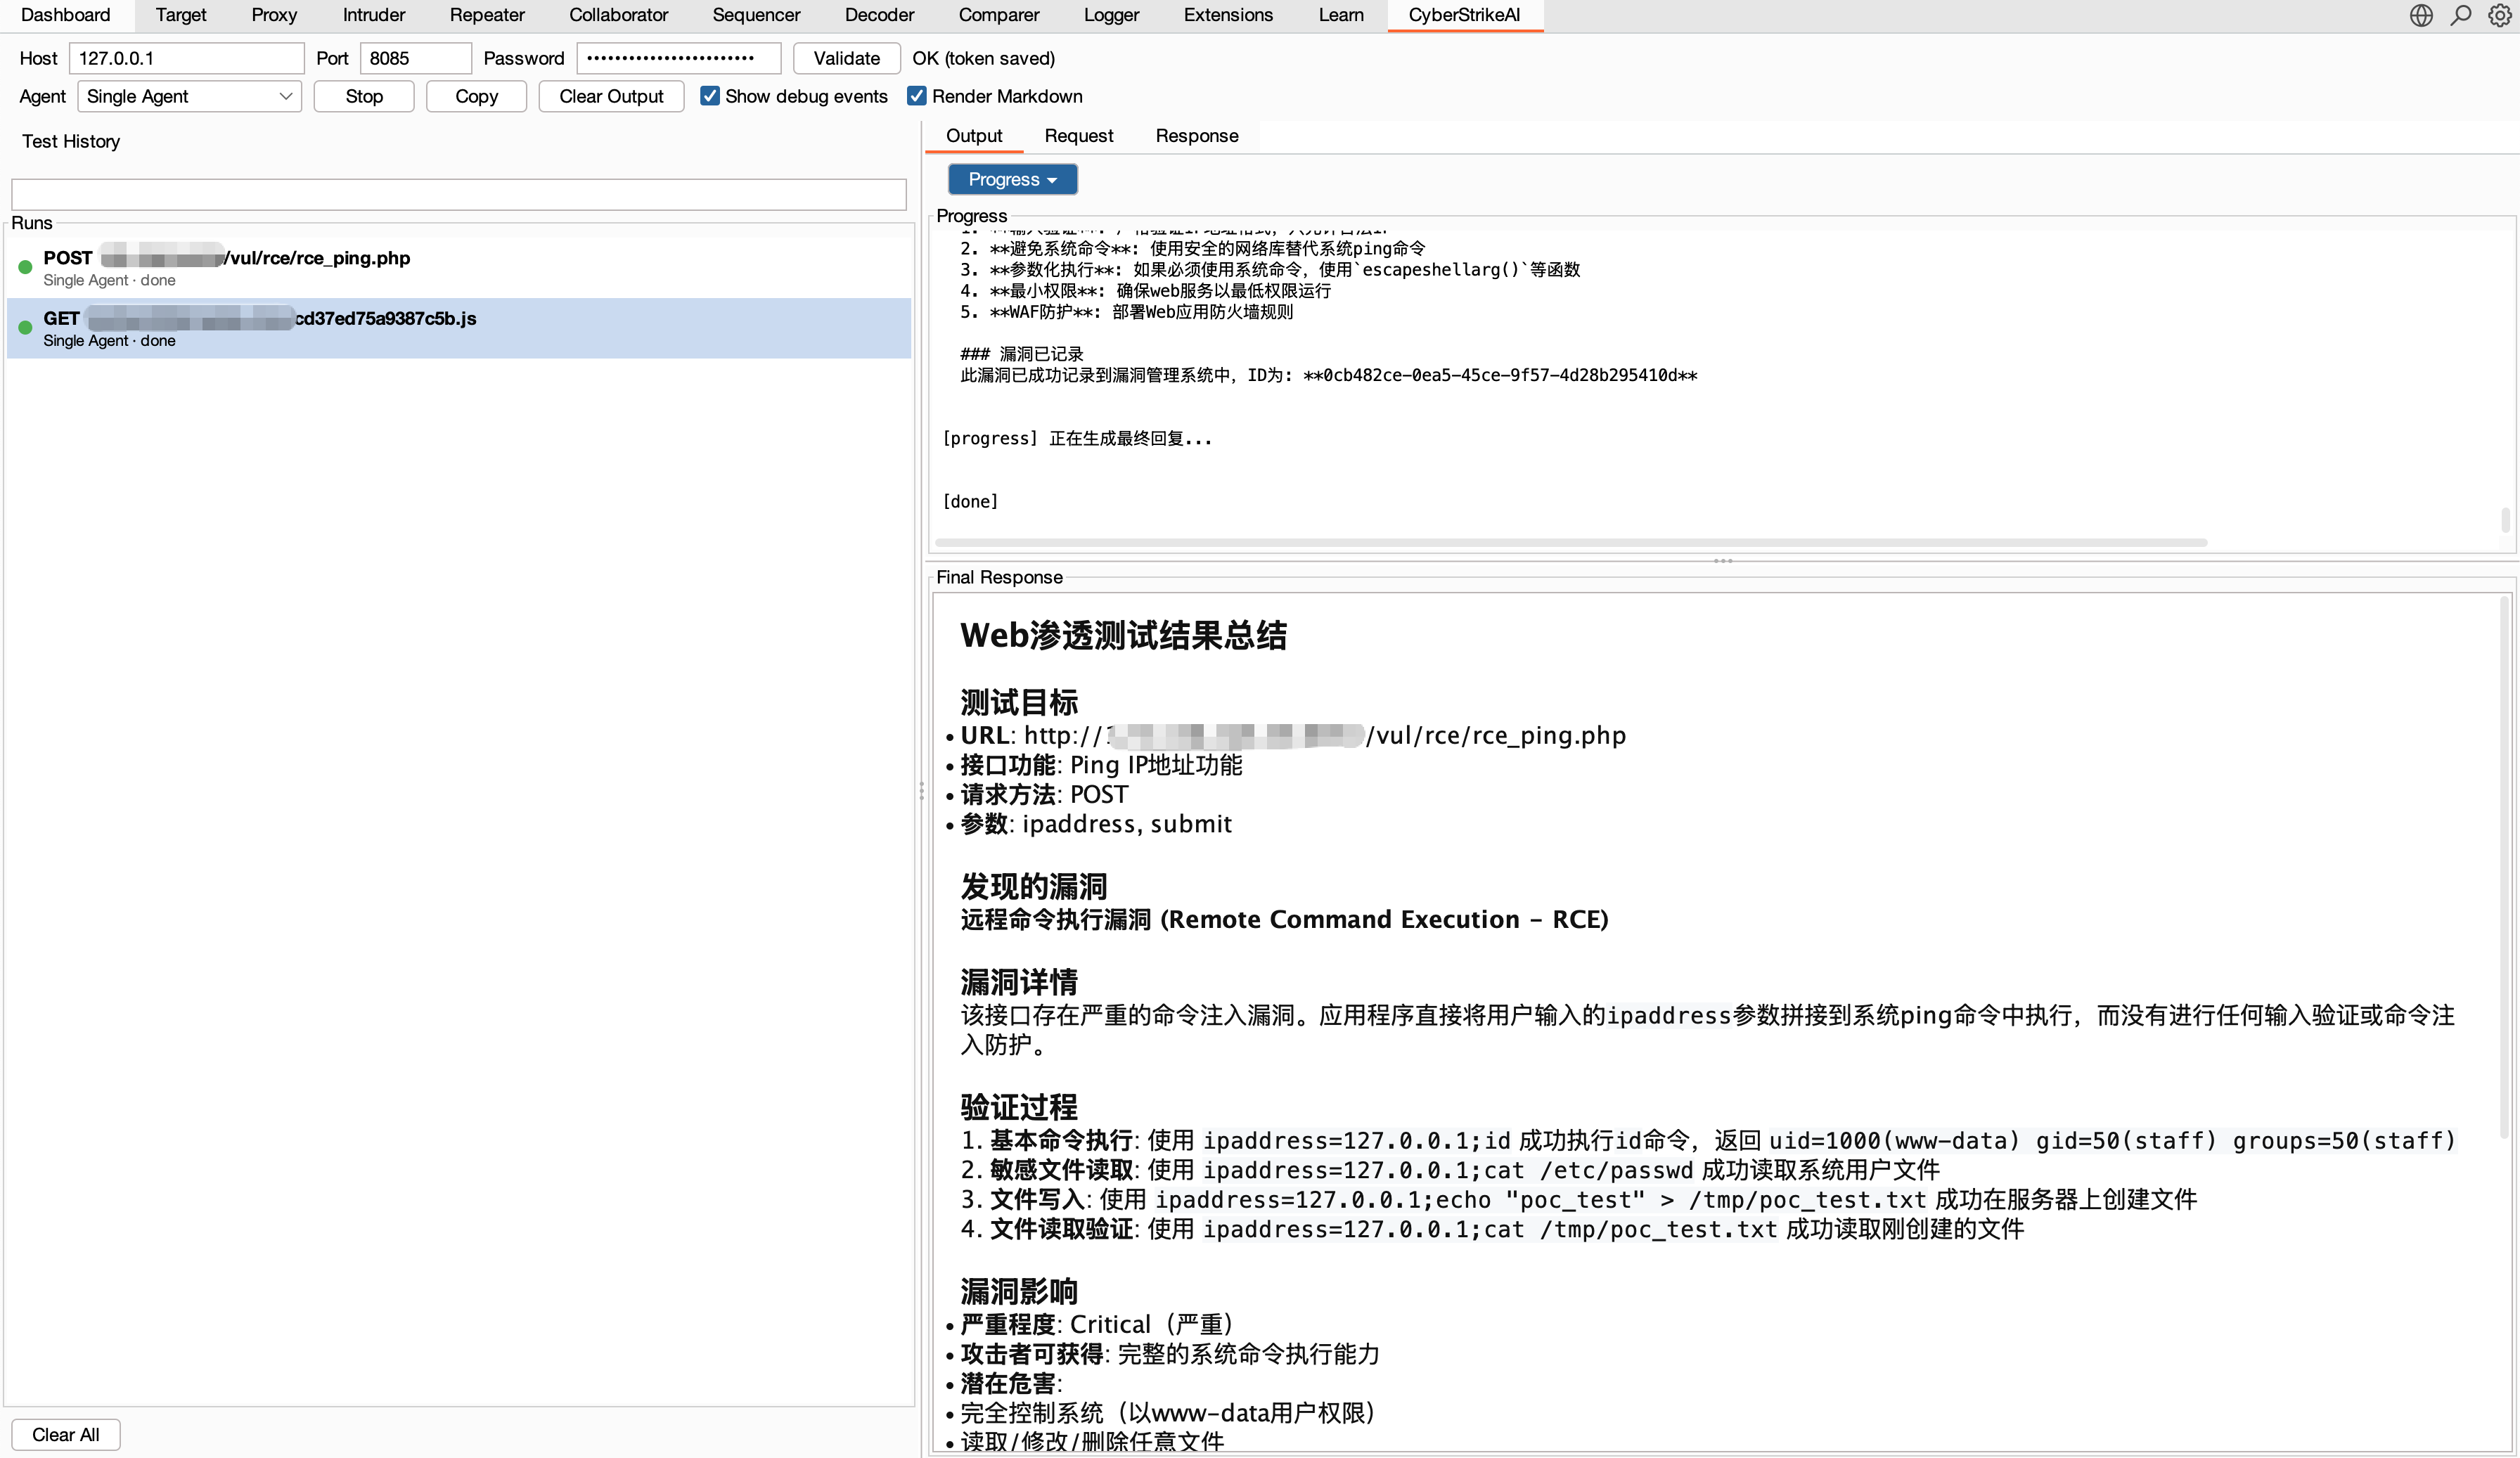
CyberStrikeAI में plugins/ के अंतर्गत वैकल्पिक एकीकरण शामिल हैं।
plugins/burp-suite/cyberstrikeai-burp-extension/plugins/burp-suite/cyberstrikeai-burp-extension/dist/cyberstrikeai-burp-extension.jarplugins/burp-suite/cyberstrikeai-burp-extension/README.mdplugins/browser-extension/cyberstrikeai-browser-extension/chrome://extensions/ → अनपैक्ड लोड करें → F12 → CyberStrikeAI टैबplugins/browser-extension/cyberstrikeai-browser-extension/dist/cyberstrikeai-browser-extension.zipplugins/browser-extension/cyberstrikeai-browser-extension/README.md / README.zh-CN.mdCyberStrikeAI पूरी किल चेन को कवर करने वाले 100+ क्यूरेटेड उपकरणों के साथ आता है:
उपकरण परिभाषाओं, अनुकूलन और उपयोग नोट्स के लिए tools/README_EN.md देखें।
पूर्वापेक्षाएँ:
go.mod द्वारा आवश्यक)एक-कमांड तैनाती:```bash git clone https://github.com/Ed1s0nZ/CyberStrikeAI.git cd CyberStrikeAI chmod +x run.sh && ./run.sh
The `run.sh` script will automatically:
- ✅ Check and validate Go & Python environments
- ✅ Create Python virtual environment
- ✅ Install Python dependencies
- ✅ Download Go dependencies
- ✅ Build the project
- ✅ Start the server
**Verify the startup:**
1. Confirm the terminal displays `● ONLINE` followed by the actual Web UI URL.
2. Open that URL; the default HTTPS mode uses a local self-signed certificate, so accept the browser warning once.
3. On a new installation, store the one-time `admin` password shown under `ADMIN SETUP REQUIRED`, sign in, and change it immediately.
**Networking defaults:** `run.sh` starts the server with **`--https`** and the repo **`config.yaml`** (local self-signed TLS; better for many concurrent streams). Use **`./run.sh --http`** for plain HTTP. In production, set **`server.tls_cert_path`** / **`server.tls_key_path`** in **`config.yaml`** (see comments there). For manual runs, add **`--https`** or **`CYBERSTRIKE_HTTPS=1`**; if **`-config`** is wrong, the binary prints a short usage hint on stderr.
**First-Time Configuration:**
1. **Configure AI channels** (required before first use)
- After launch, open **`https://127.0.0.1:8080/`** (or **`https://localhost:8080/`**; replace **8080** with `server.port` in `config.yaml`) and accept the self-signed certificate warning once. If you used `./run.sh --http`, use **`http://`** instead.
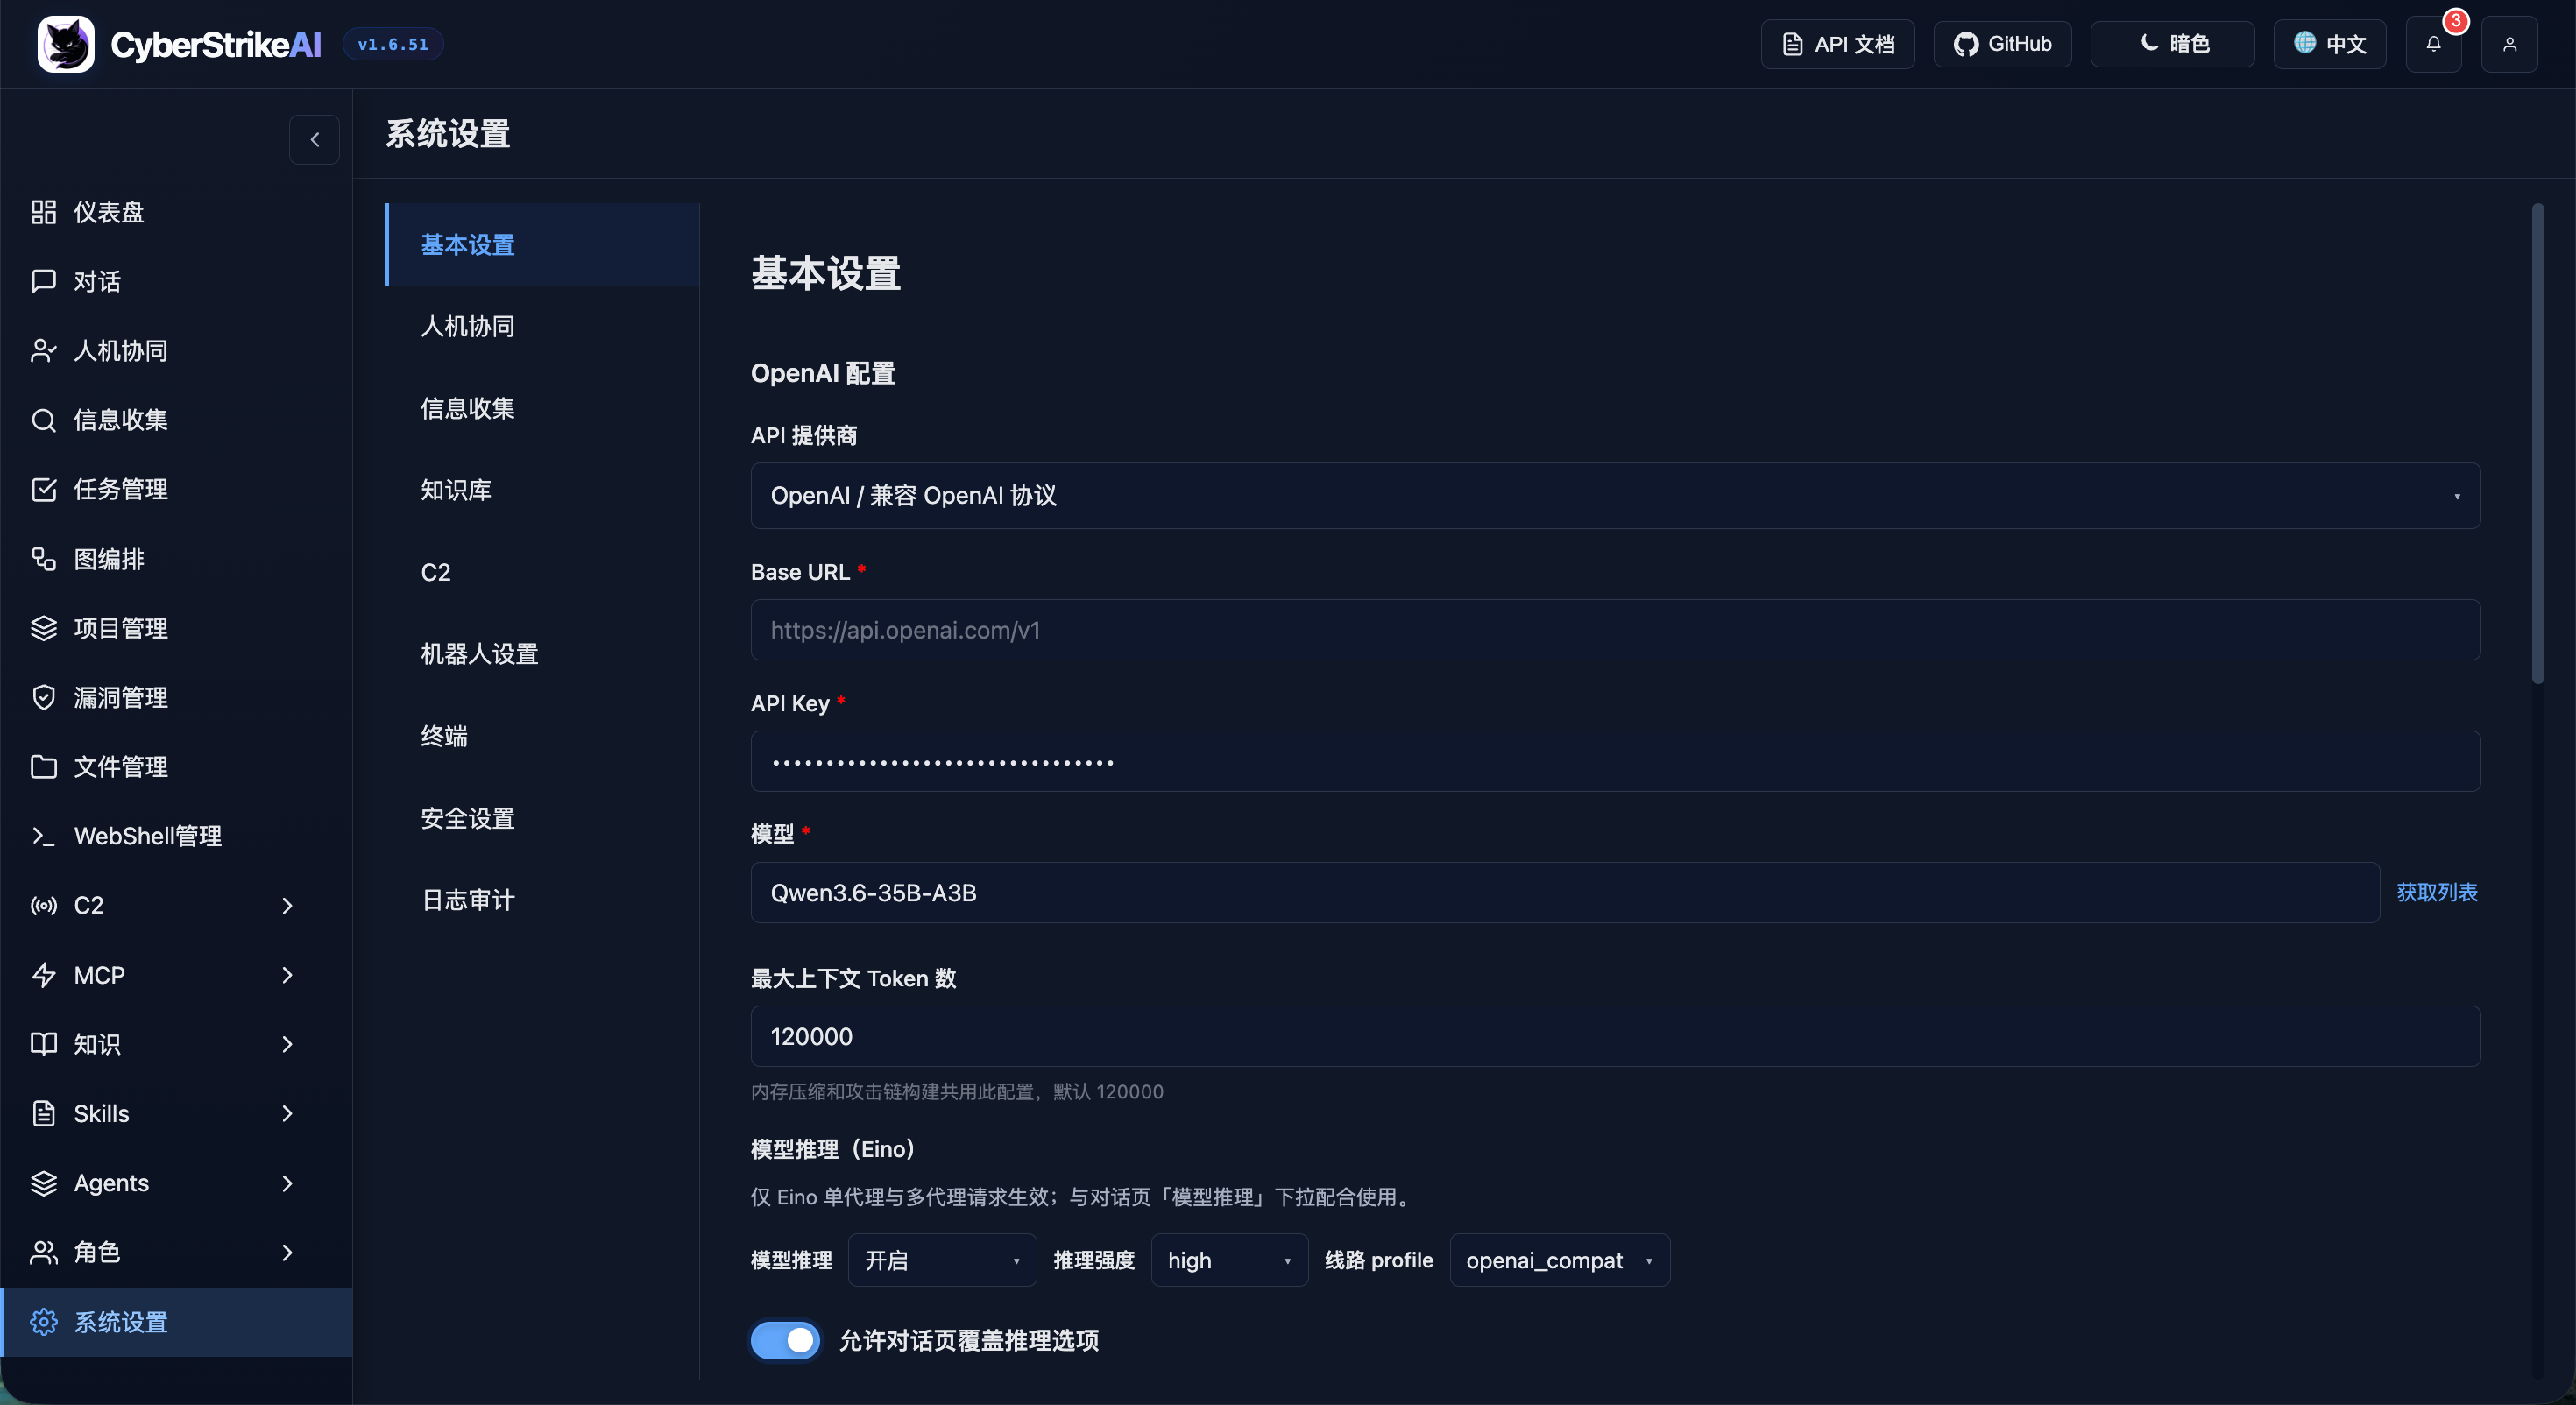
- Go to `System Settings` → `Basic Settings` → `AI Channel Configuration`, add or edit a channel, then fill in provider, Base URL, API key, model, and token limits. Click **Save changes**. The left channel list supports setting a default, copy, delete, and bulk probe.
```yaml
ai:
default_channel: openai-main
channels:
openai-main:
name: OpenAI Main
provider: openai_compatible
api_key: "${OPENAI_API_KEY}"
base_url: "https://api.openai.com/v1" # or https://api.deepseek.com/v1
model: "gpt-4o" # or deepseek-chat, qwen3-max, etc.
max_total_tokens: 120000
max_completion_tokens: 16384
```
- Or edit `config.yaml` directly before launching. `ai.default_channel` is used for new conversations and tasks that do not explicitly select a channel; the chat page can also select any saved channel per session.
2. **Login** - On first startup the console prints an auto-generated initial `admin` password; create accounts from **Platform permissions → User management**
3. **Install security tools (optional)** - Install tools from `tools/` as needed; missing tools are skipped or substituted at runtime. Common examples:
**macOS (Homebrew):** ```bash
brew install nmap masscan sqlmap nikto gobuster ffuf hydra hashcat nuclei subfinder
लिनक्स (काली / डेबियन / उबंटू): ```bash sudo apt update sudo apt install -y nmap masscan sqlmap nikto gobuster hydra hashcat john binwalk
पूरी सूची के लिए `tools/` निर्देशिका देखें; इंस्टॉलेशन विवरण के लिए प्रत्येक टूल के आधिकारिक दस्तावेज़ देखें।
**वैकल्पिक लॉन्च विधियाँ:**```bash
# Direct Go run (set up env yourself); add --https to match run.sh defaults
go run cmd/server/main.go --https
# Manual build
go build -o cyberstrike-ai cmd/server/main.go
./cyberstrike-ai --https
यदि सर्वर लॉग दिखाते हैं client sent an HTTP request to an HTTPS server, तो कोई क्लाइंट अभी भी TLS-मात्र पोर्ट पर http:// उपयोग कर रहा है—URL को https:// में बदलें।
नोट: पायथन वर्चुअल एनवायरनमेंट (venv/) स्वचालित रूप से run.sh द्वारा बनाया और प्रबंधित किया जाता है। जिन टूल्स को पायथन की आवश्यकता होती है (जैसे api-fuzzer, http-framework-test, आदि) स्वचालित रूप से इस एनवायरनमेंट का उपयोग करेंगे।
CyberStrikeAI एक-क्लिक अपग्रेड:
chmod +x upgrade.sh./upgrade.sh (वैकल्पिक फ्लैग: --tag vX.Y.Z, --no-venv, --yes)। स्थानीय tools/, roles/, और skills/ हमेशा संरक्षित रहते हैं।config.yaml और data/ का बैकअप लेगी, GitHub Release से कोड अपग्रेड करेगी, config.yaml का version अपडेट करेगी, और फिर सर्वर को पुनरारंभ करेगी।अनुशंसित वन-लाइनर:
chmod +x upgrade.sh && ./upgrade.sh --yes
यदि कुछ गलत हो जाता है, तो आप .upgrade-backup/ से पुनर्स्थापित कर सकते हैं (या /data और config.yaml को मैन्युअल रूप से वापस कॉपी करें) और ./run.sh फिर से चलाएँ।
आवश्यकताएँ / टिप्स:
curl या wget की आवश्यकता है।rsync अनुशंसित/आवश्यक है।./upgrade.sh चलाने से पहले export GITHUB_TOKEN="..." सेट करें।⚠️ अपग्रेड करने से पहले: कॉन्फ़िगरेशन, डेटाबेस, और API परिवर्तनों के लिए लक्षित रिलीज़ नोट्स की समीक्षा करें। पैच अपग्रेड के लिए भी बैकअप आवश्यक है; केवल एक संस्करण संख्या संगतता की गारंटी नहीं है।
अपने वातावरण के लिए आवश्यक मानों की प्रति बनाने हेतु config.example.yaml को प्राधिकृत कॉन्फ़िगरेशन टेम्पलेट के रूप में उपयोग करें। न्यूनतम रूप से, सर्वर और एक AI चैनल कॉन्फ़िगर करें:```yaml
server:
host: "127.0.0.1"
port: 8080
ai:
default_channel: openai-main
channels:
openai-main:
provider: openai_compatible
api_key: "${OPENAI_API_KEY}"
base_url: "https://api.openai.com/v1"
model: "your-model"
`openai` एक बैकवर्ड-संगत रनटाइम फ़ील्ड है; नए मॉडल सेटिंग्स को `ai.channels` में बनाए रखें। वास्तविक क्रेडेंशियल कमिट न करें। सेवा को localhost के बाहर उजागर करने से पहले [कॉन्फ़िगरेशन संदर्भ](https://github.com/ed1s0nz/cyberstrikeai/blob/HEAD/docs/en-US/configuration.md), [अनुशंसित प्रोफ़ाइलें](https://github.com/ed1s0nz/cyberstrikeai/blob/HEAD/docs/en-US/configuration-profiles.md) और [सुरक्षा सख्तीकरण मार्गदर्शिका](https://github.com/ed1s0nz/cyberstrikeai/blob/HEAD/docs/en-US/security-hardening.md) की समीक्षा करें।
## संबंधित दस्तावेज़
- **नए उपयोगकर्ता:** [परिनियोजन](https://github.com/ed1s0nz/cyberstrikeai/blob/HEAD/docs/en-US/deployment.md) → [कॉन्फ़िगरेशन](https://github.com/ed1s0nz/cyberstrikeai/blob/HEAD/docs/en-US/configuration.md) → [समस्या निवारण](https://github.com/ed1s0nz/cyberstrikeai/blob/HEAD/docs/en-US/troubleshooting.md)
- **ऑपरेटर:** [कॉन्फ़िगरेशन प्रोफ़ाइलें](https://github.com/ed1s0nz/cyberstrikeai/blob/HEAD/docs/en-US/configuration-profiles.md) → [सुरक्षा सख्तीकरण](https://github.com/ed1s0nz/cyberstrikeai/blob/HEAD/docs/en-US/security-hardening.md) → [रनबुक](https://github.com/ed1s0nz/cyberstrikeai/blob/HEAD/docs/en-US/runbooks.md)
- **एकीकरणकर्ता:** [API संदर्भ](https://github.com/ed1s0nz/cyberstrikeai/blob/HEAD/docs/en-US/api-reference.md) → [API रेसिपी](https://github.com/ed1s0nz/cyberstrikeai/blob/HEAD/docs/en-US/api-recipes.md) → [MCP फ़ेडरेशन](https://github.com/ed1s0nz/cyberstrikeai/blob/HEAD/docs/en-US/mcp-federation.md)
- **योगदानकर्ता:** [डेवलपर गाइड](https://github.com/ed1s0nz/cyberstrikeai/blob/HEAD/docs/en-US/developer-guide.md) → [परीक्षण](https://github.com/ed1s0nz/cyberstrikeai/blob/HEAD/docs/en-US/testing.md) → [योगदान](https://github.com/ed1s0nz/cyberstrikeai/blob/HEAD/docs/en-US/contributing-guide.md)
- **सभी विषय:** [अंग्रेज़ी दस्तावेज़](https://github.com/ed1s0nz/cyberstrikeai/blob/HEAD/docs/en-US/README.md) · [द्विभाषी दस्तावेज़ अनुक्रमणिका](https://github.com/ed1s0nz/cyberstrikeai/blob/HEAD/docs/README.md)
## प्रोजेक्ट लेआउट```
CyberStrikeAI/
├── cmd/ # Server, MCP stdio entrypoints, tooling
├── internal/ # Agent, MCP core, handlers, C2 (`internal/c2`), security executor
├── web/ # Static SPA + templates
├── tools/ # YAML tool recipes (100+ examples provided)
├── roles/ # Role configurations (12+ predefined security testing roles)
├── skills/ # Agent Skills dirs (SKILL.md + optional files; demo: cyberstrike-eino-demo)
├── agents/ # Multi-agent Markdown (orchestrator.md + sub-agent *.md)
├── docs/ # Topic docs (deployment, config, security, API, knowledge base, C2, WebShell, etc.)
├── images/ # Docs screenshots & diagrams
├── scripts/ # Repository maintenance checks, including documentation validation
├── config.yaml # Runtime configuration
├── run.sh # Convenience launcher
└── README*.md
Scan open ports on 192.168.1.1 Perform a comprehensive port scan on 192.168.1.1 focusing on 80,443,22 Check if https://example.com/page?id=1 is vulnerable to SQL injection Scan https://example.com for hidden directories and outdated software Enumerate subdomains for example.com, then run nuclei against the results
## उन्नत प्लेबुक्स```
Load the recon-engagement template, run amass/subfinder, then brute-force dirs on every live host.
Use external Burp-based MCP server for authenticated traffic replay, then pass findings back for graphing.
Compress the 5 MB nuclei report, summarize critical CVEs, and attach the artifact to the conversation.
Build an attack chain for the latest engagement and export the node list with severity >= high.
CyberStrikeAI 404Starlink में शामिल हो गया है
CyberStrikeAI Apache License 2.0 के तहत लाइसेंस प्राप्त है।
विवरण के लिए LICENSE फ़ाइल देखें।
यह उपकरण केवल शैक्षिक और अधिकृत परीक्षण उद्देश्यों के लिए है!
CyberStrikeAI एक पेशेवर सुरक्षा परीक्षण मंच है जिसे सुरक्षा शोधकर्ताओं, पैठ परीक्षकों और आईटी पेशेवरों को स्पष्ट प्राधिकरण के साथ सुरक्षा मूल्यांकन और भेद्यता अनुसंधान करने में सहायता करने के लिए डिज़ाइन किया गया है।
इस उपकरण का उपयोग करके, आप सहमत हैं:
डेवलपर्स किसी भी दुरुपयोग के लिए ज़िम्मेदार नहीं हैं! कृपया सुनिश्चित करें कि आपका उपयोग स्थानीय कानूनों और विनियमों का अनुपालन करता है, और आपने लक्ष्य प्रणाली के स्वामी से स्पष्ट प्राधिकरण प्राप्त किया है।
भेद्यता रिपोर्टिंग और परिनियोजन सख्तीकरण मार्गदर्शन के लिए, SECURITY.md देखें।
सहायता चाहिए या योगदान करना चाहते हैं? एक issue या PR खोलें—सामुदायिक टूलिंग परिवर्धन का स्वागत है!
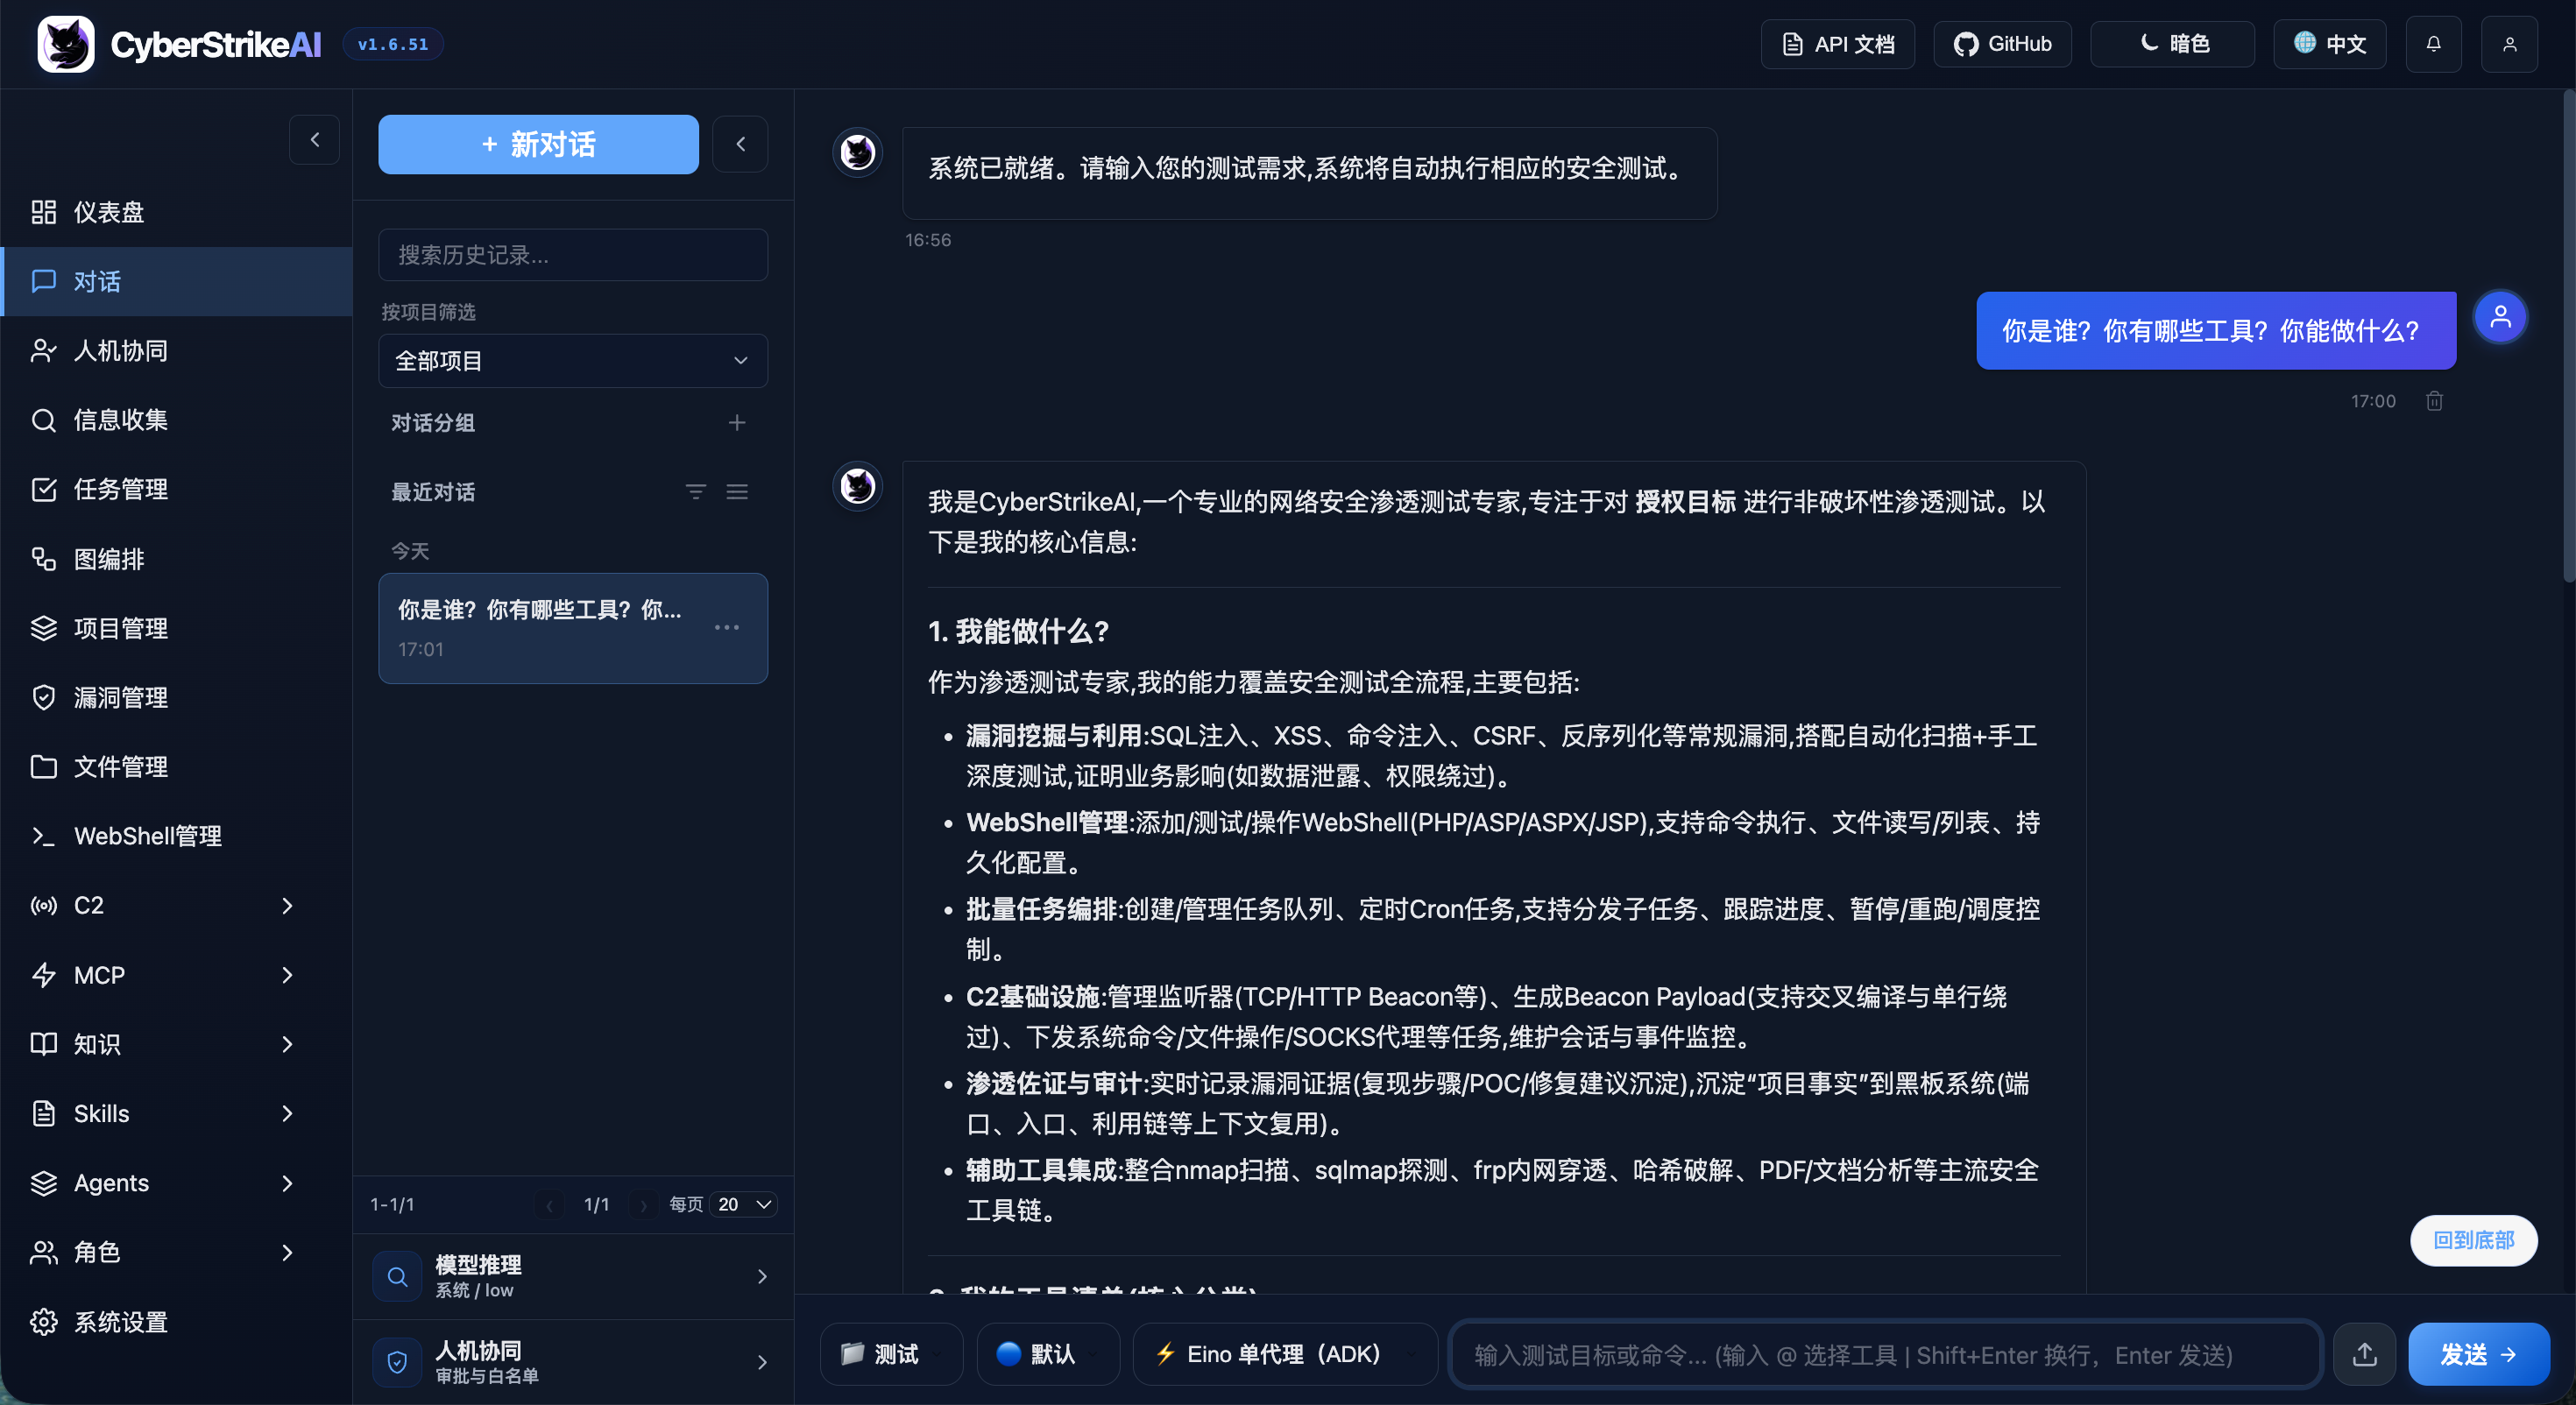
वेब कंसोल
|
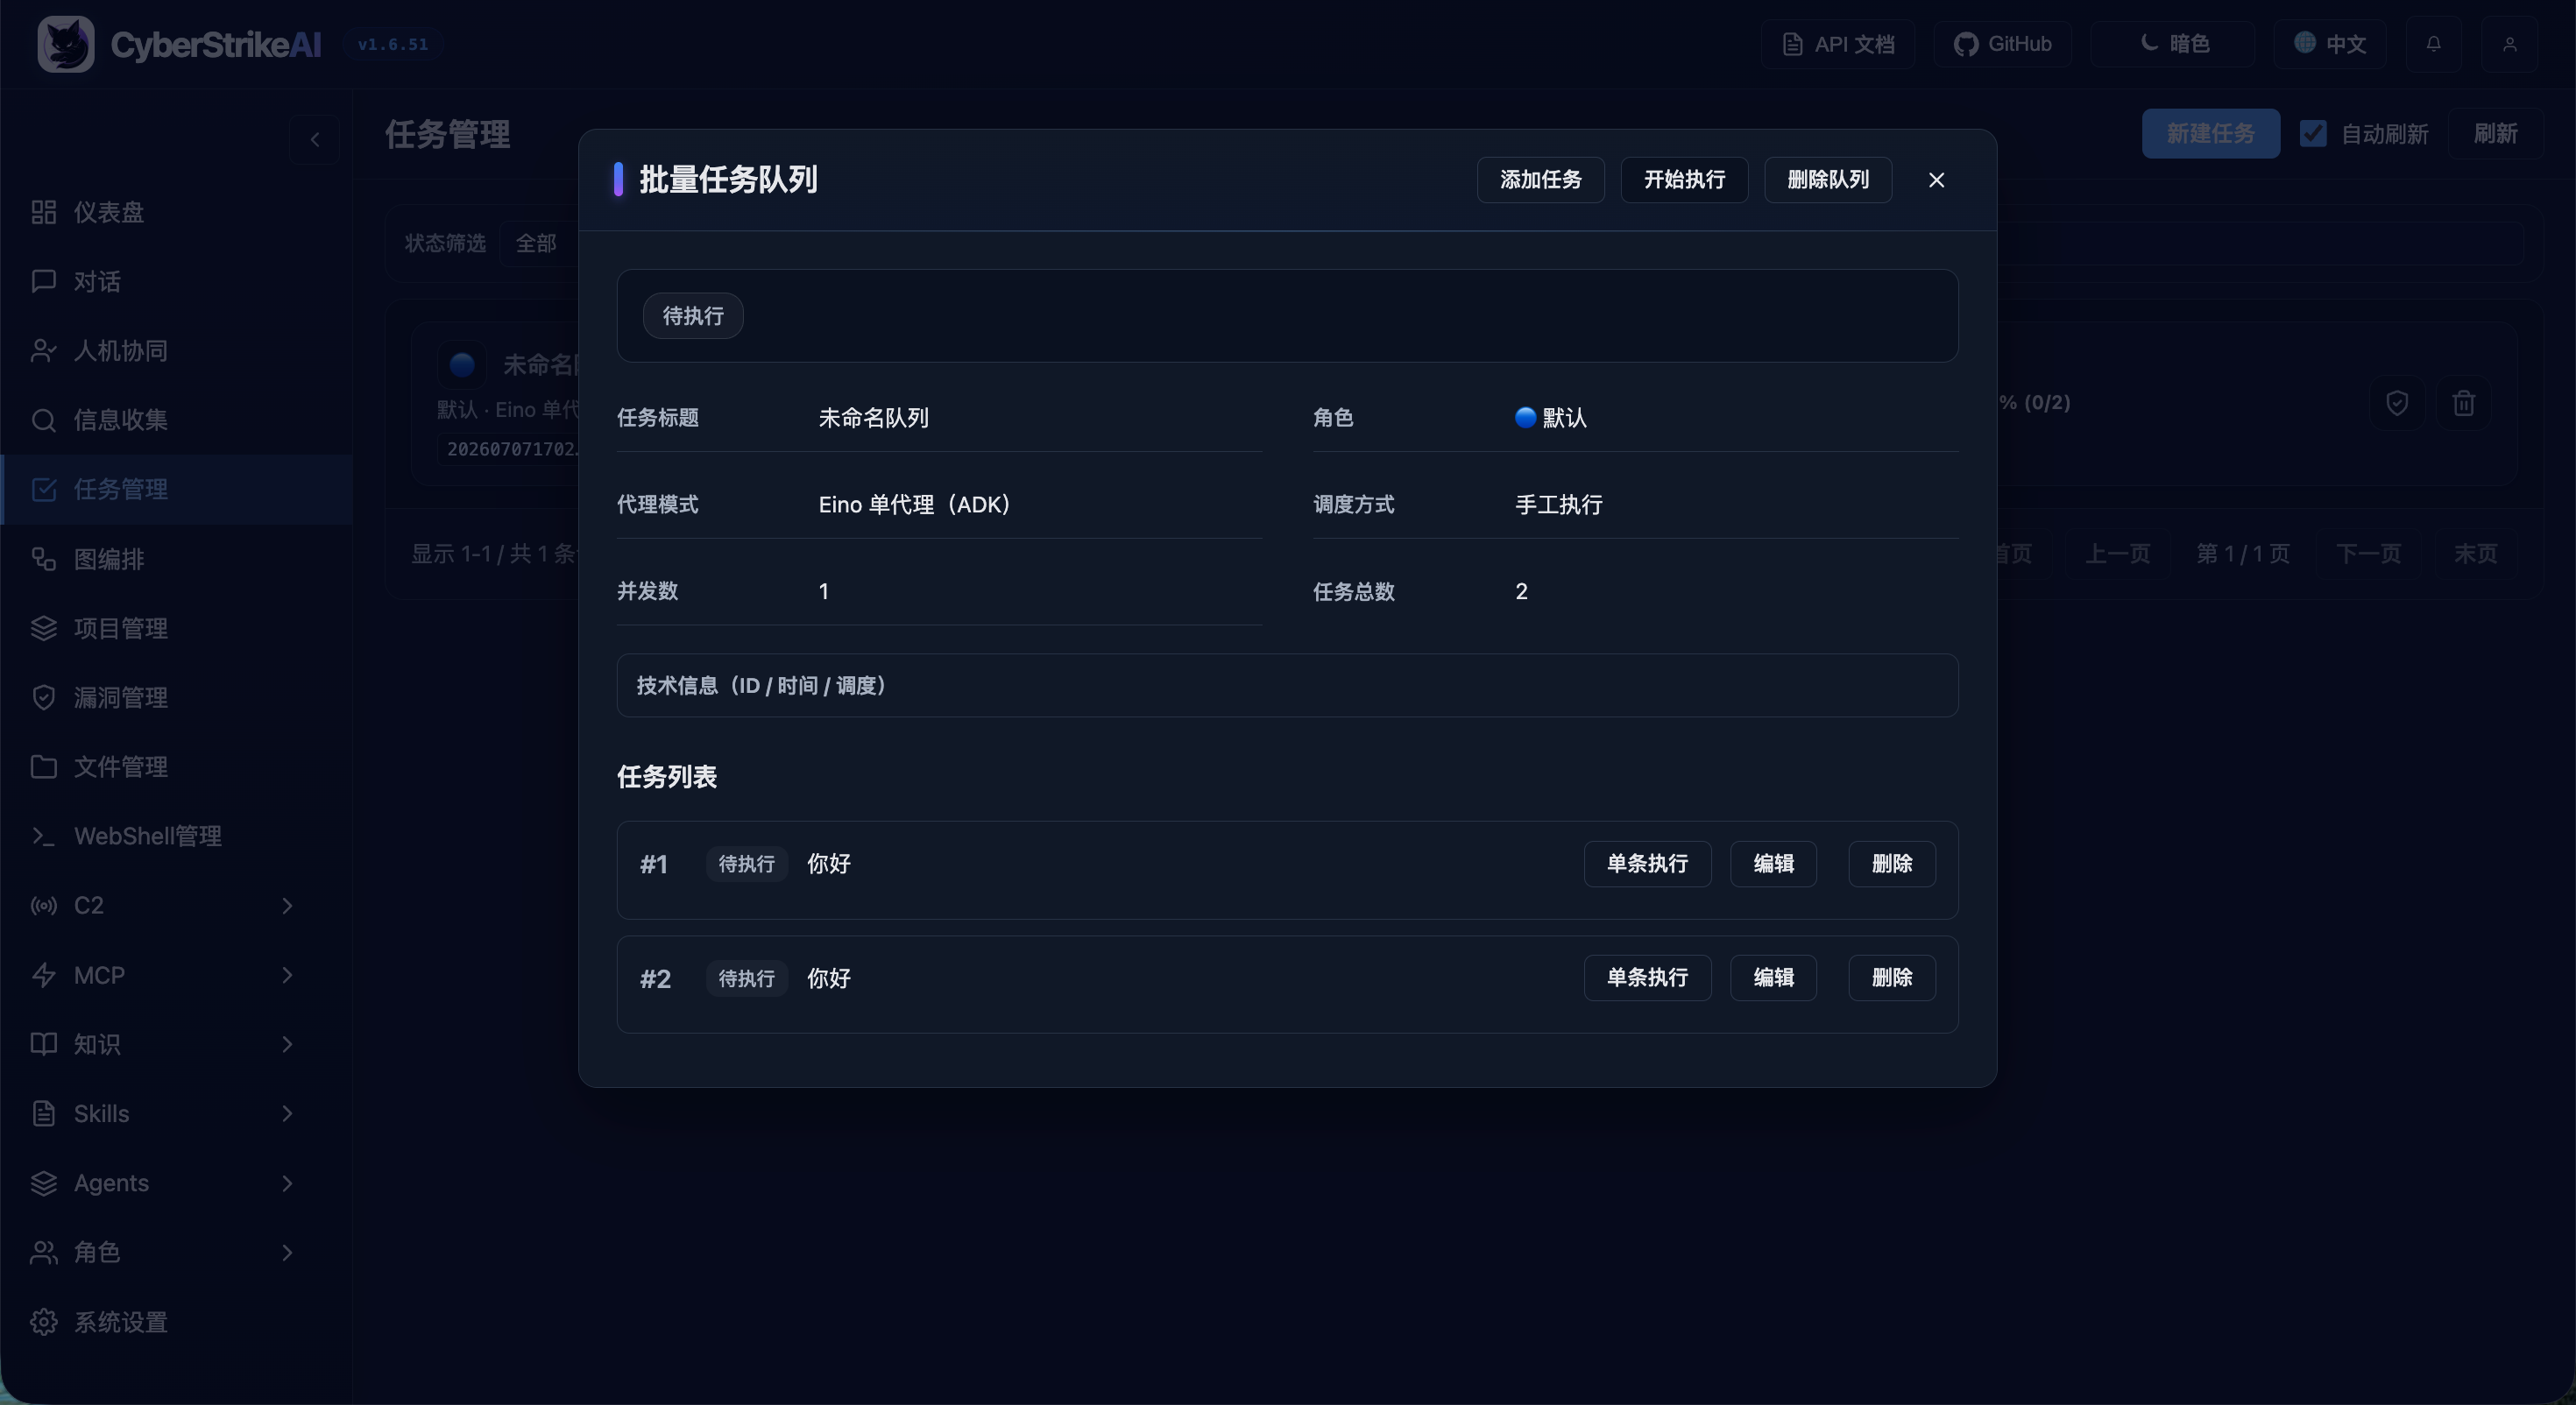
कार्य प्रबंधन
|
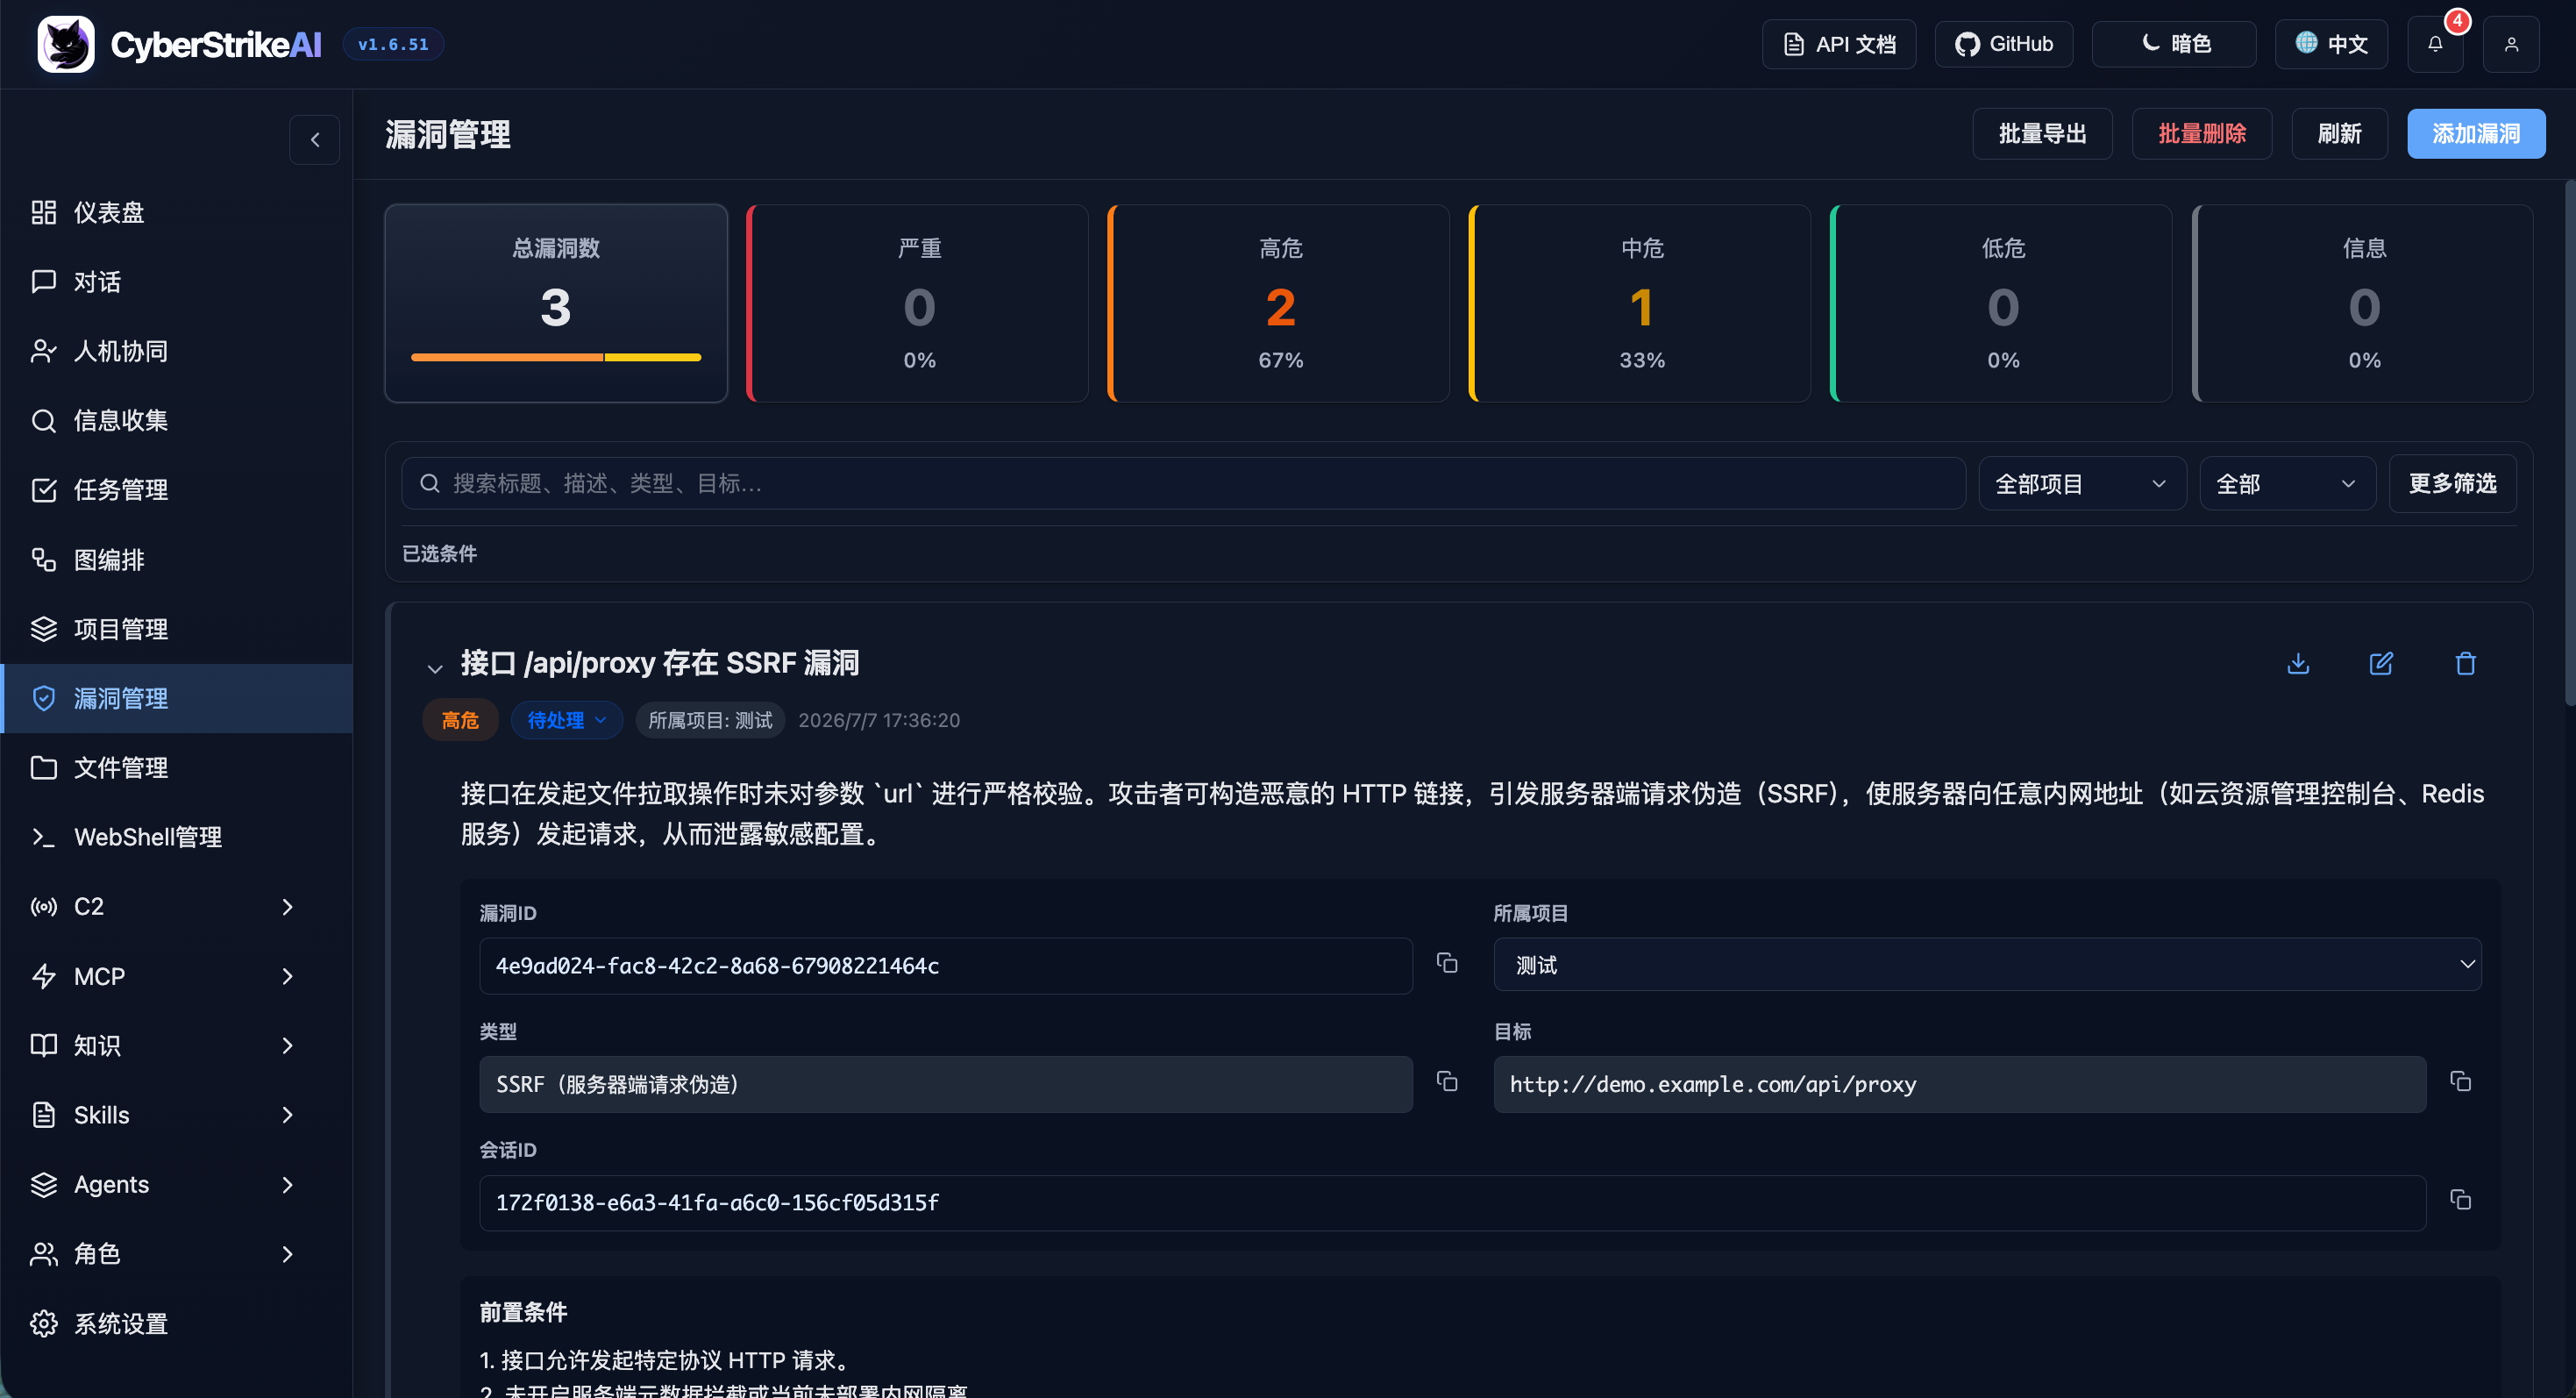
भेद्यता प्रबंधन
|
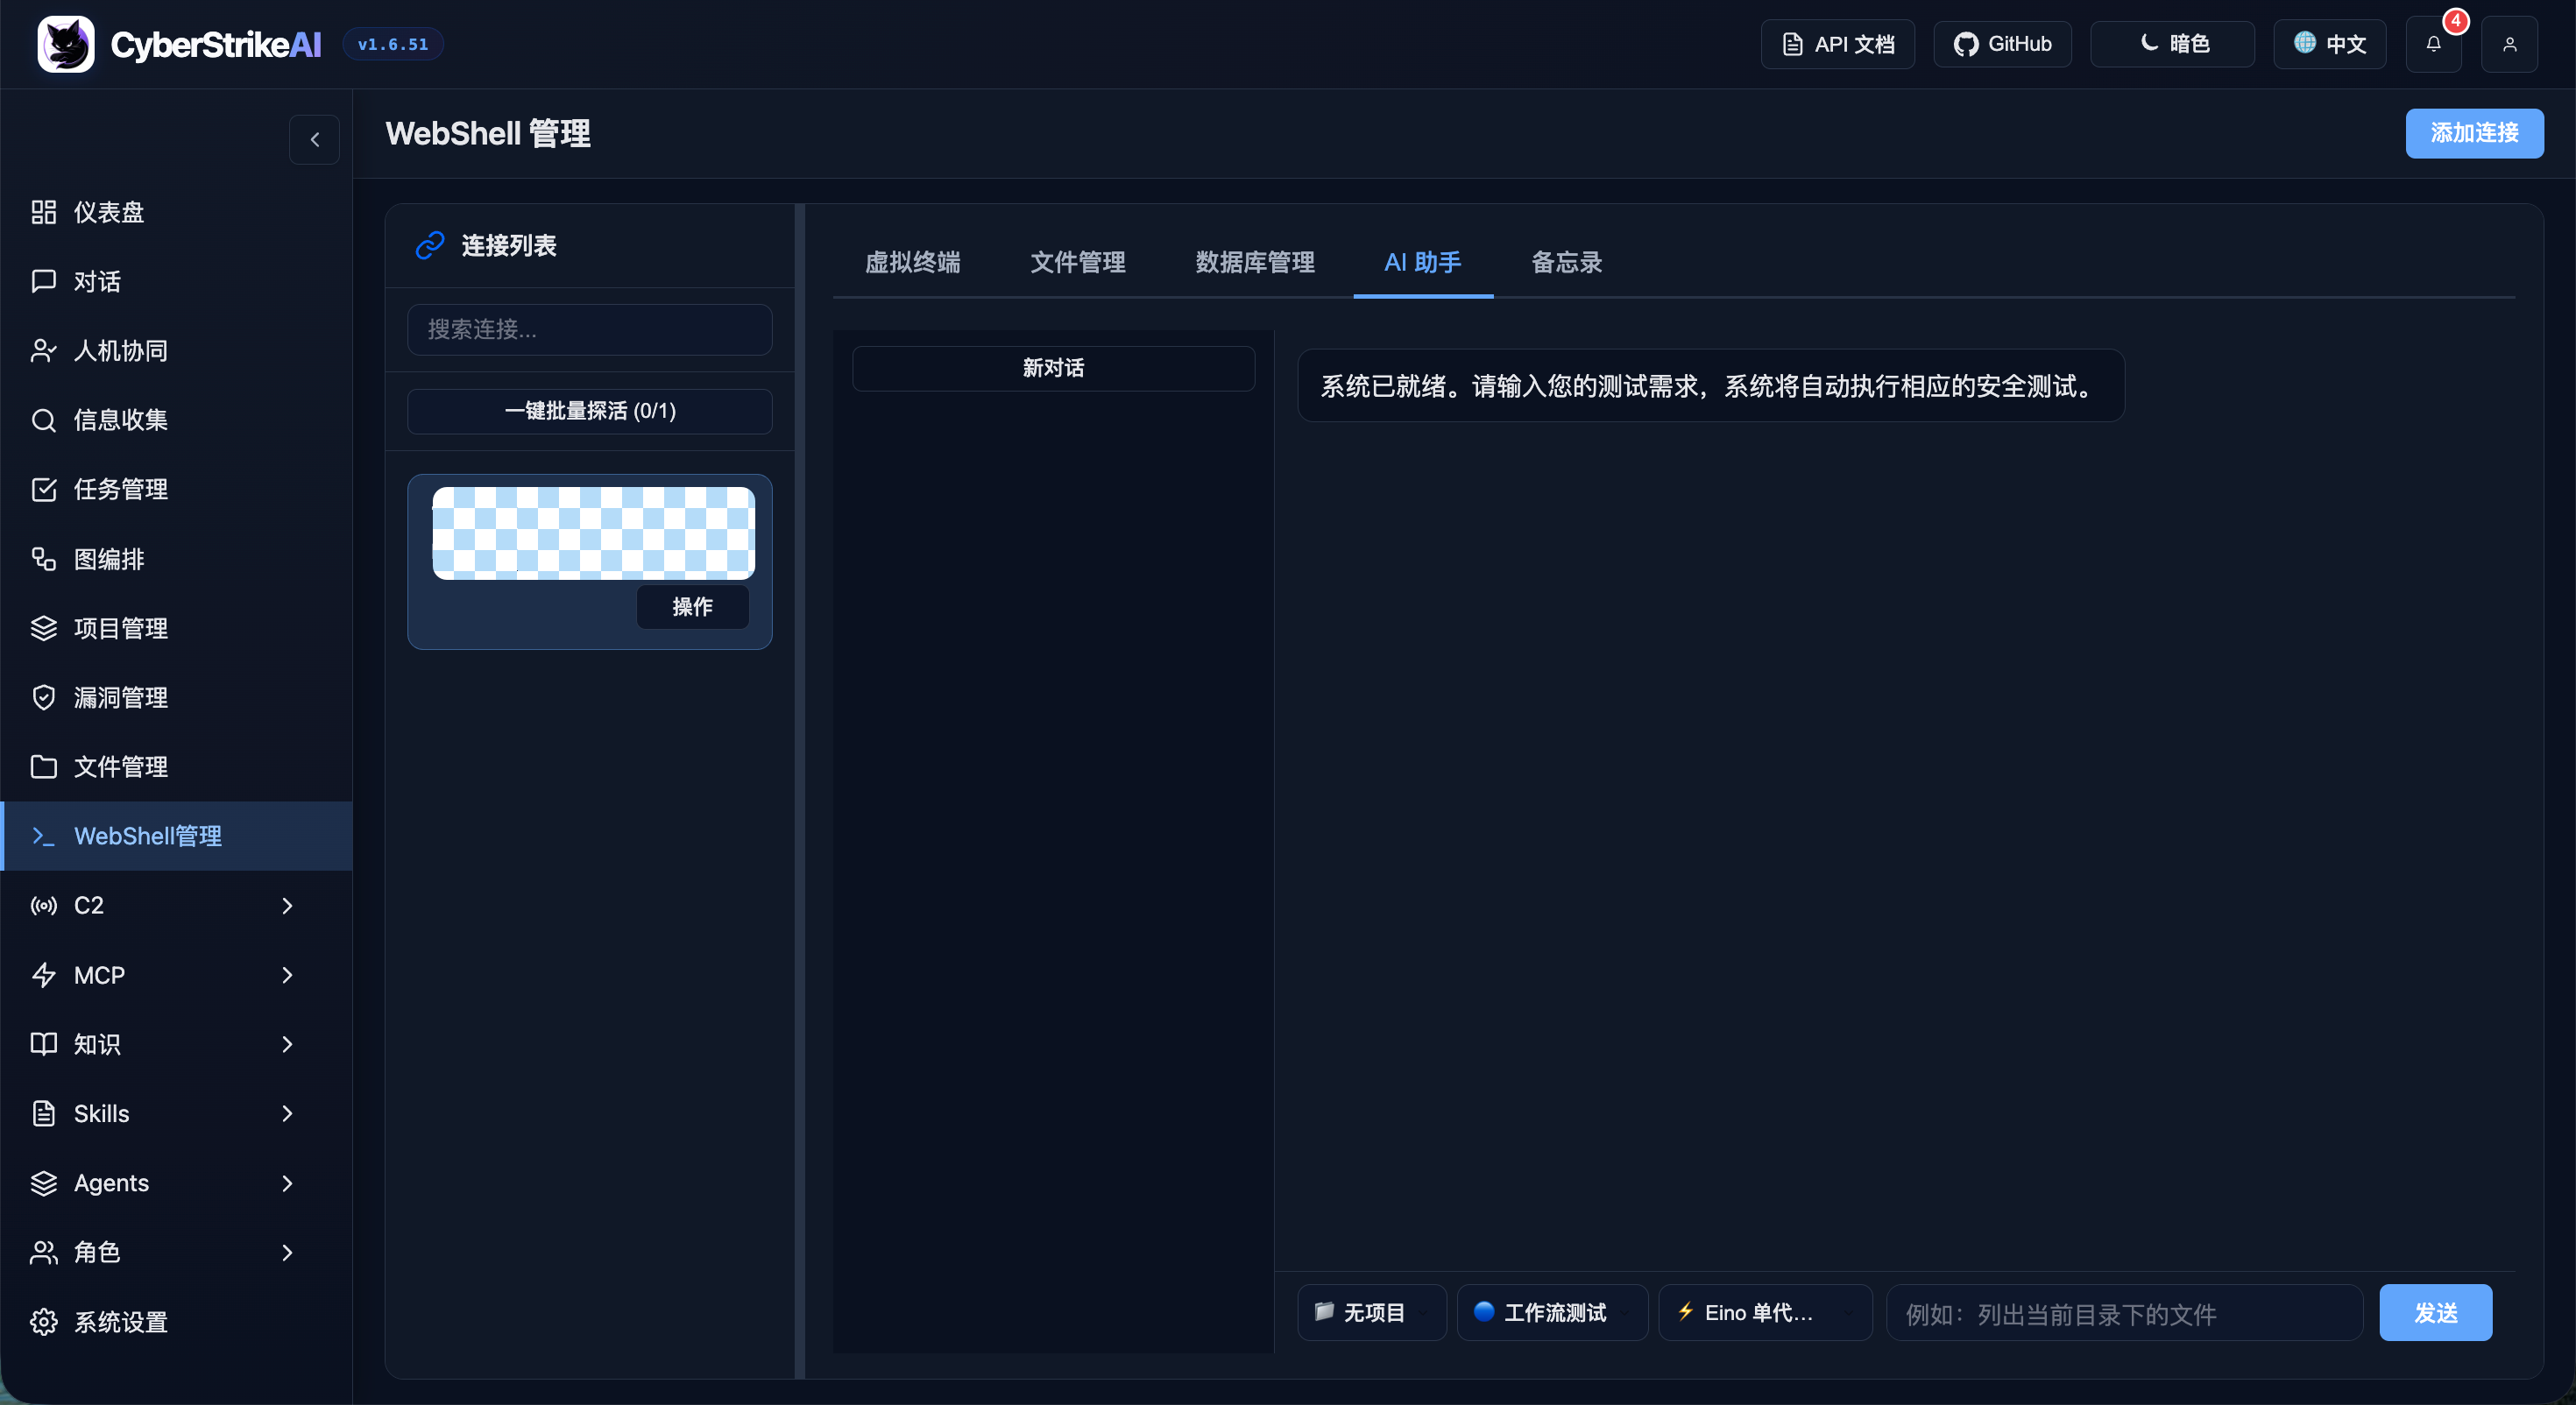
WebShell प्रबंधन
|
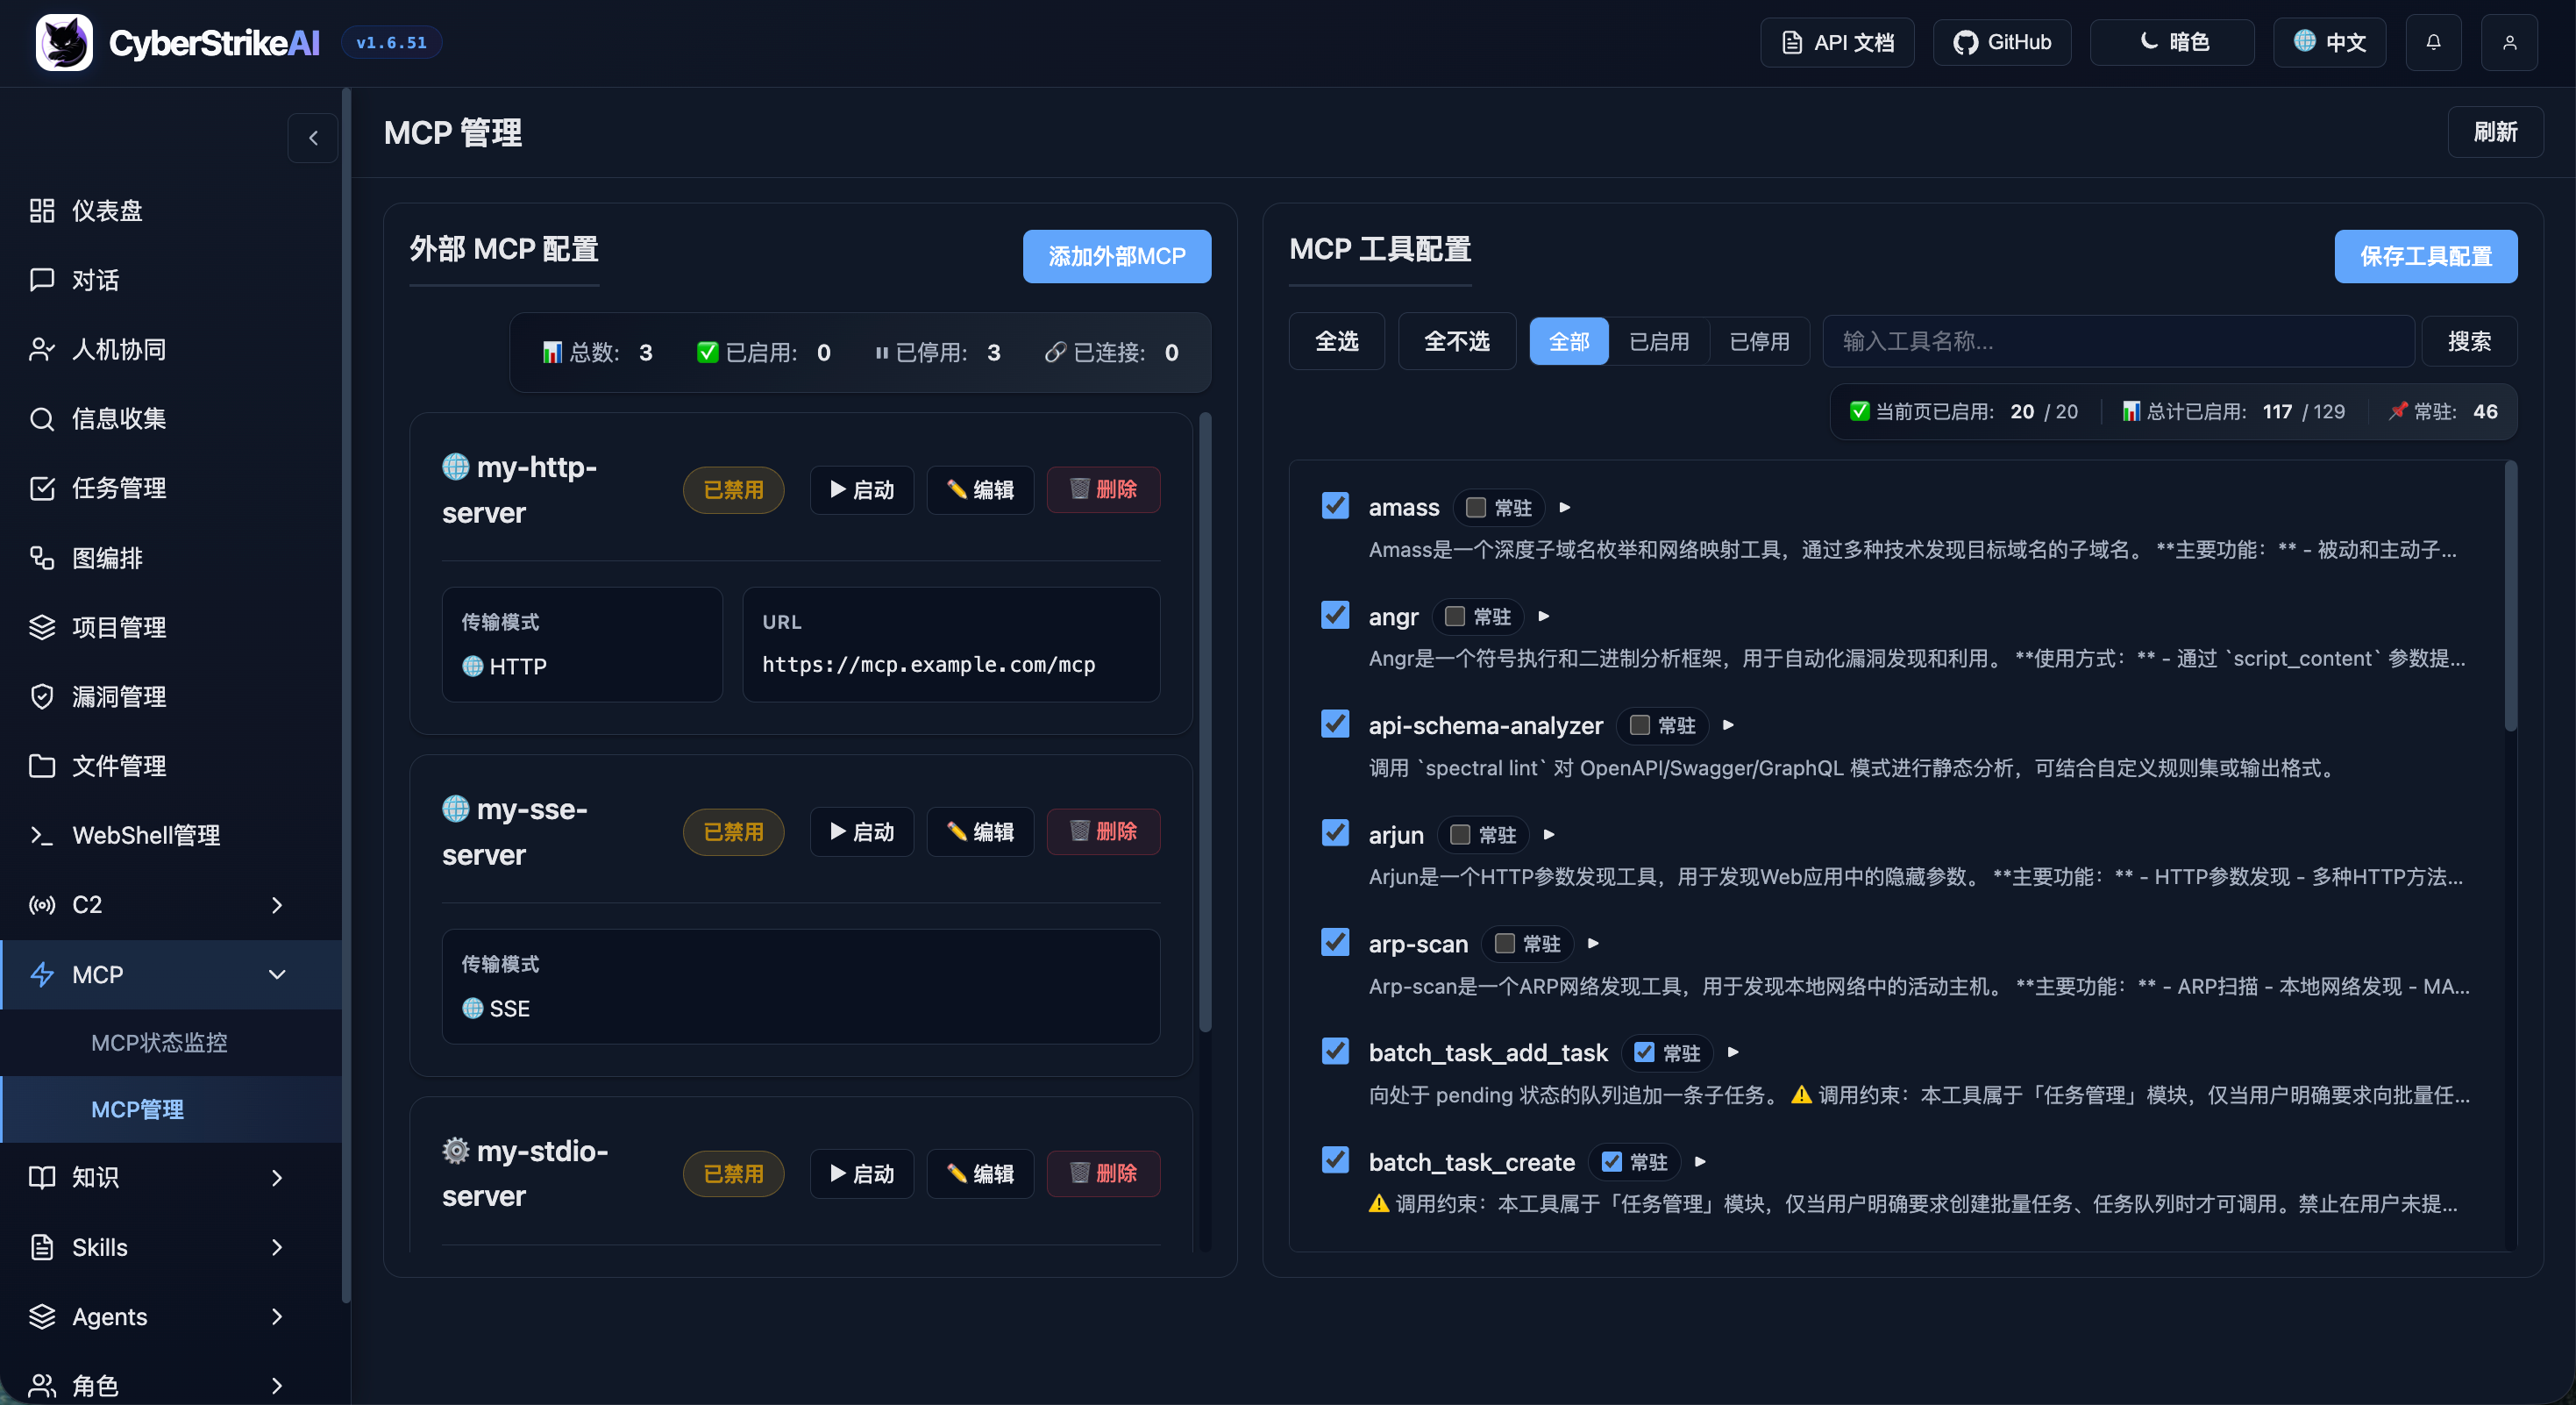
MCP प्रबंधन
|
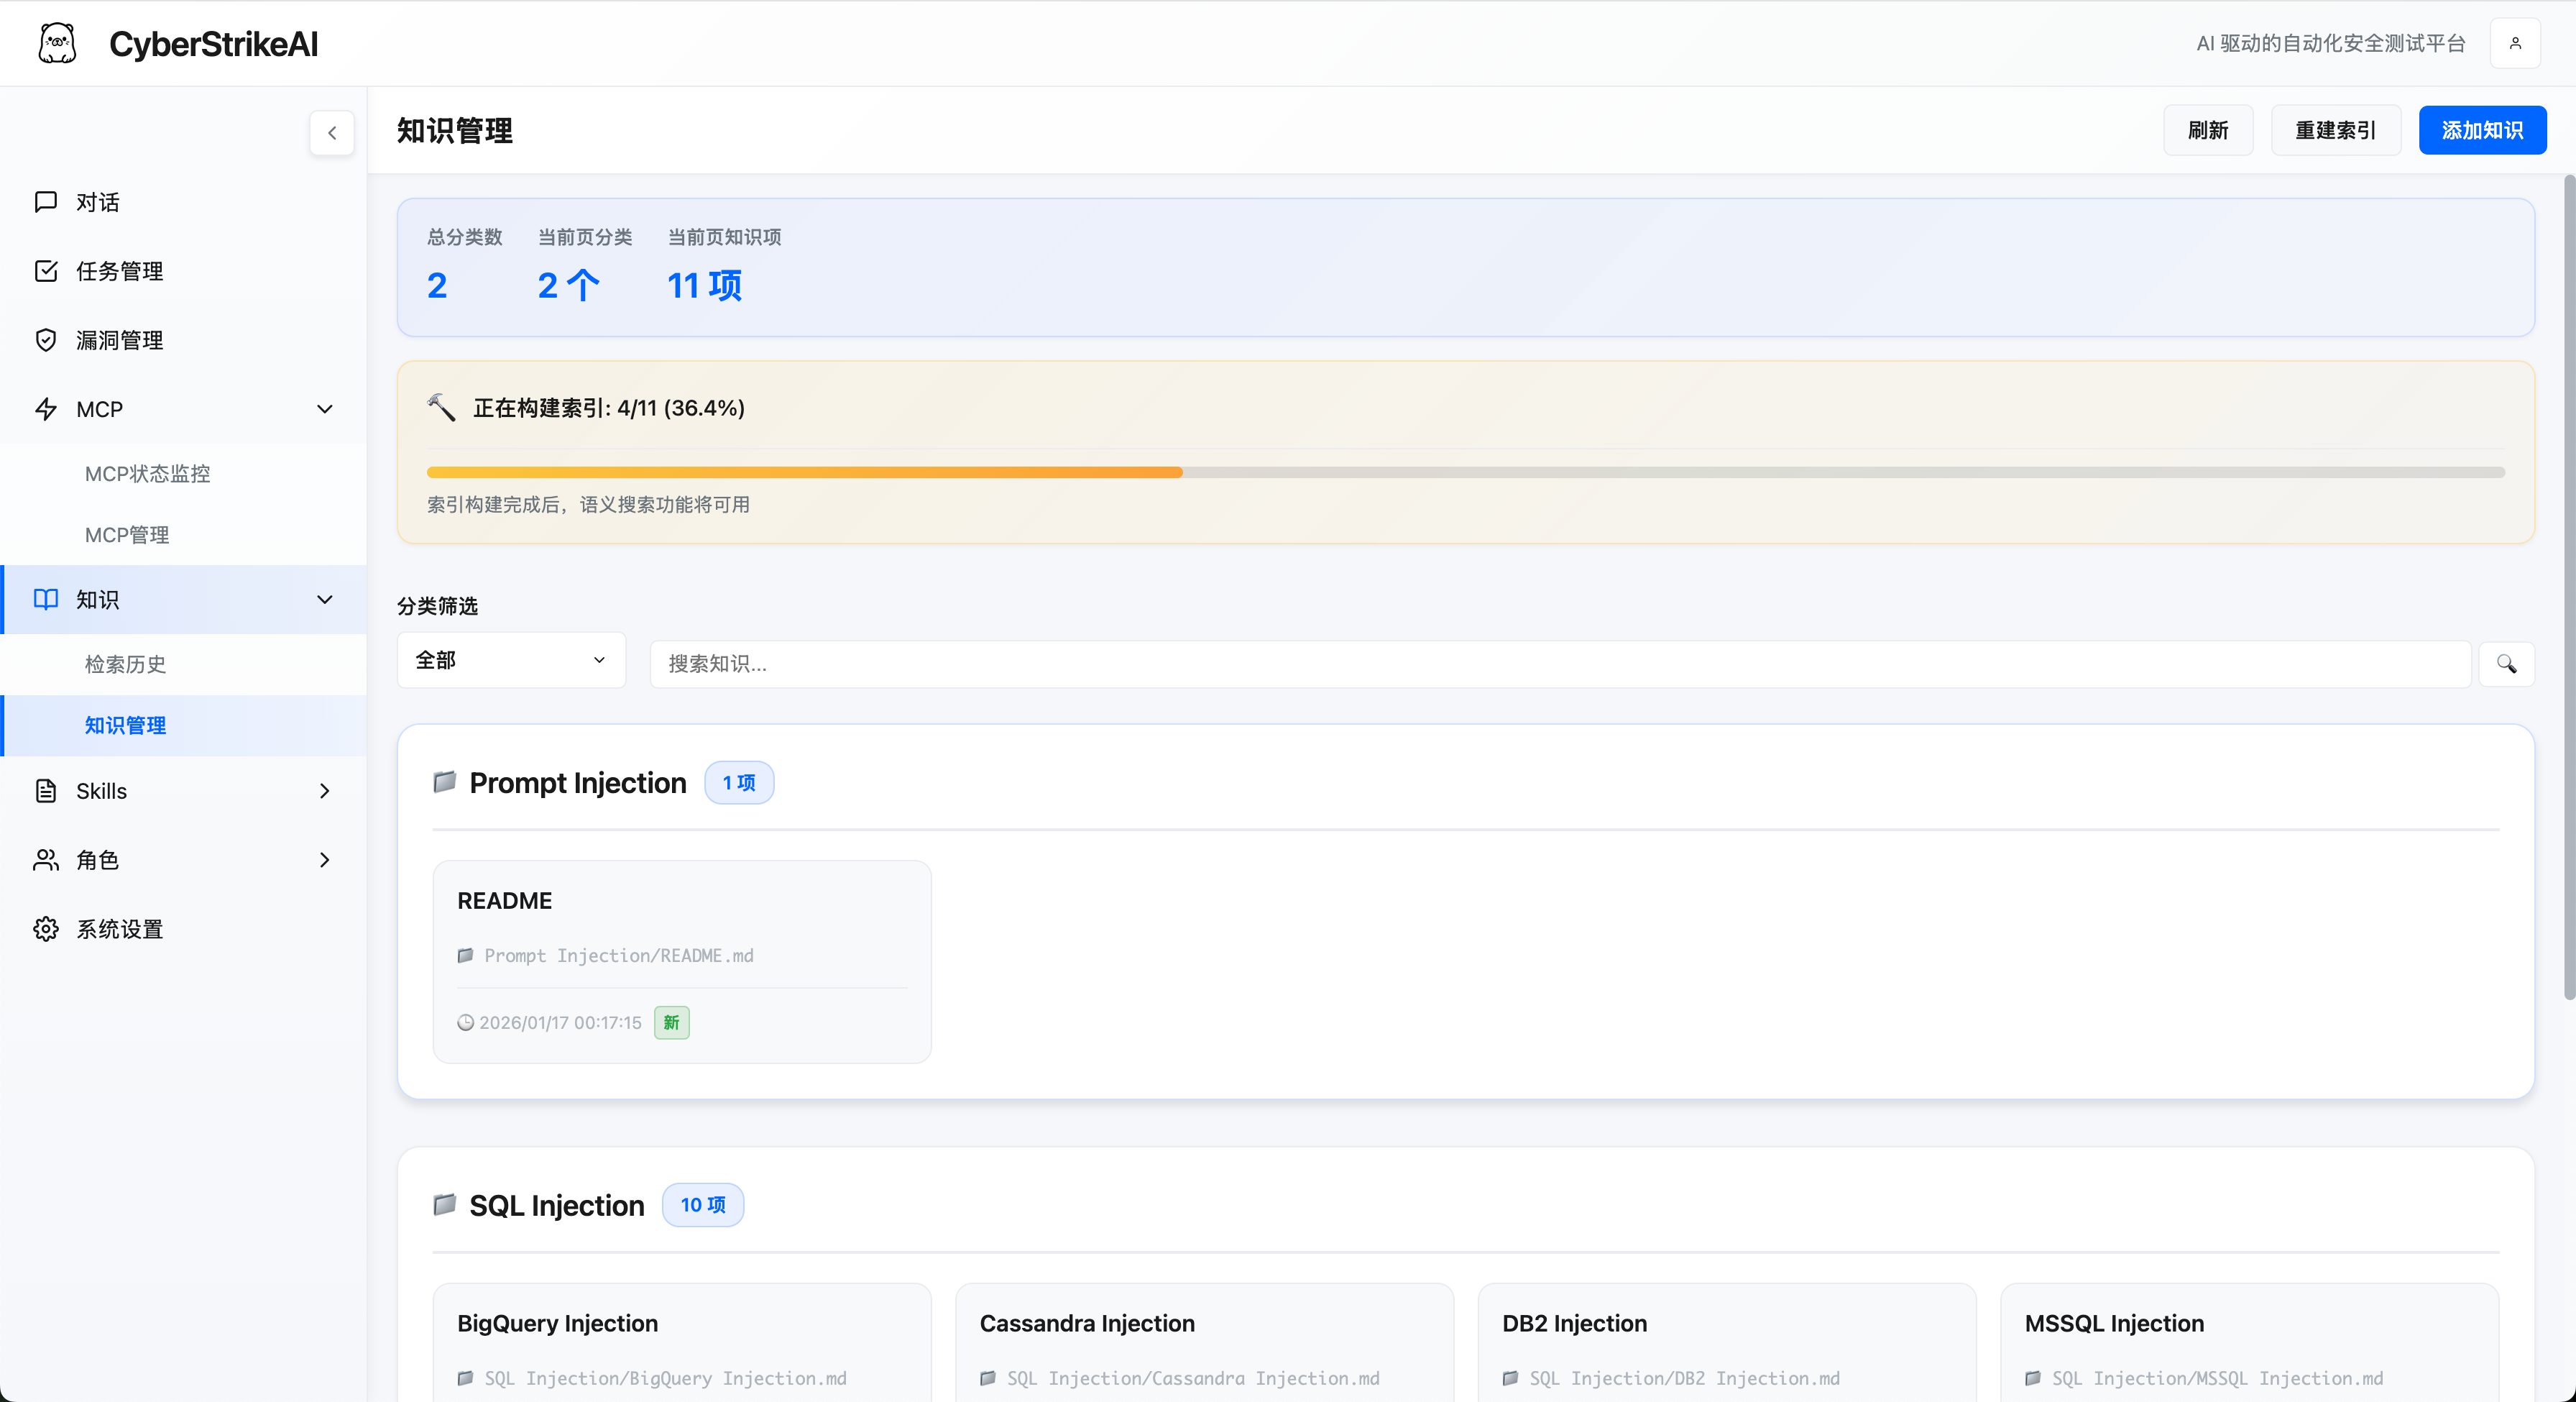
ज्ञान आधार
|
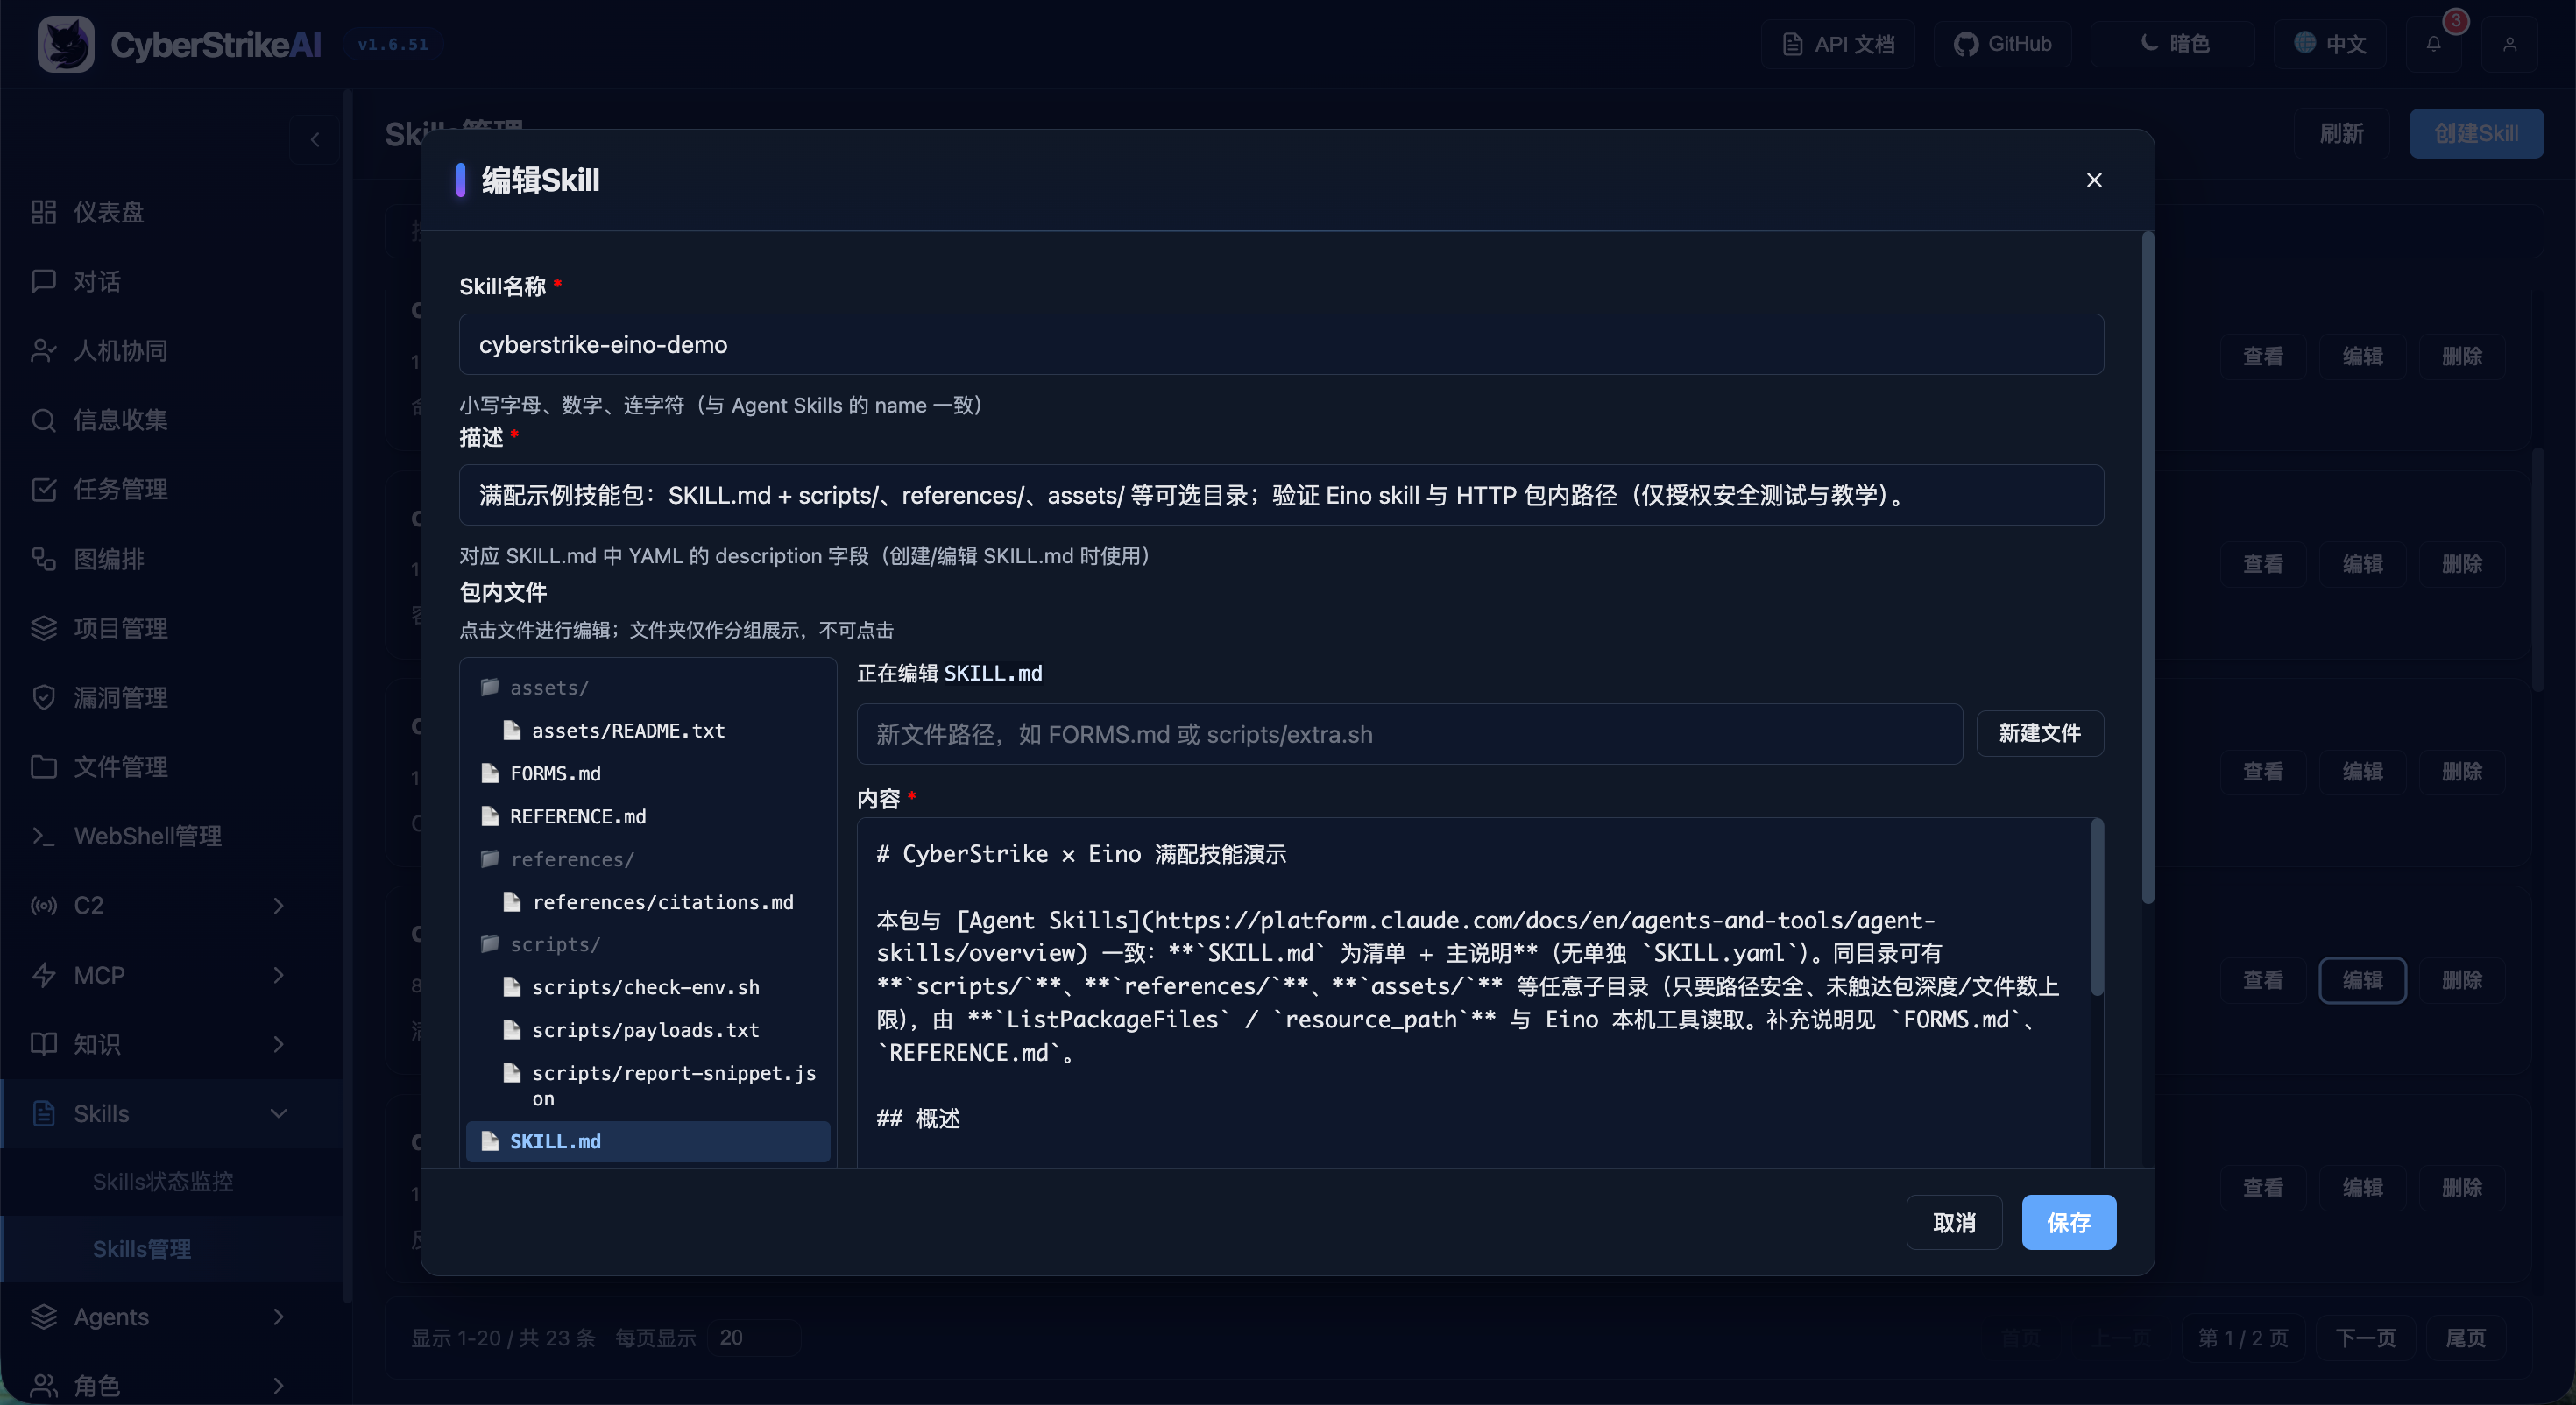
कौशल प्रबंधन
|
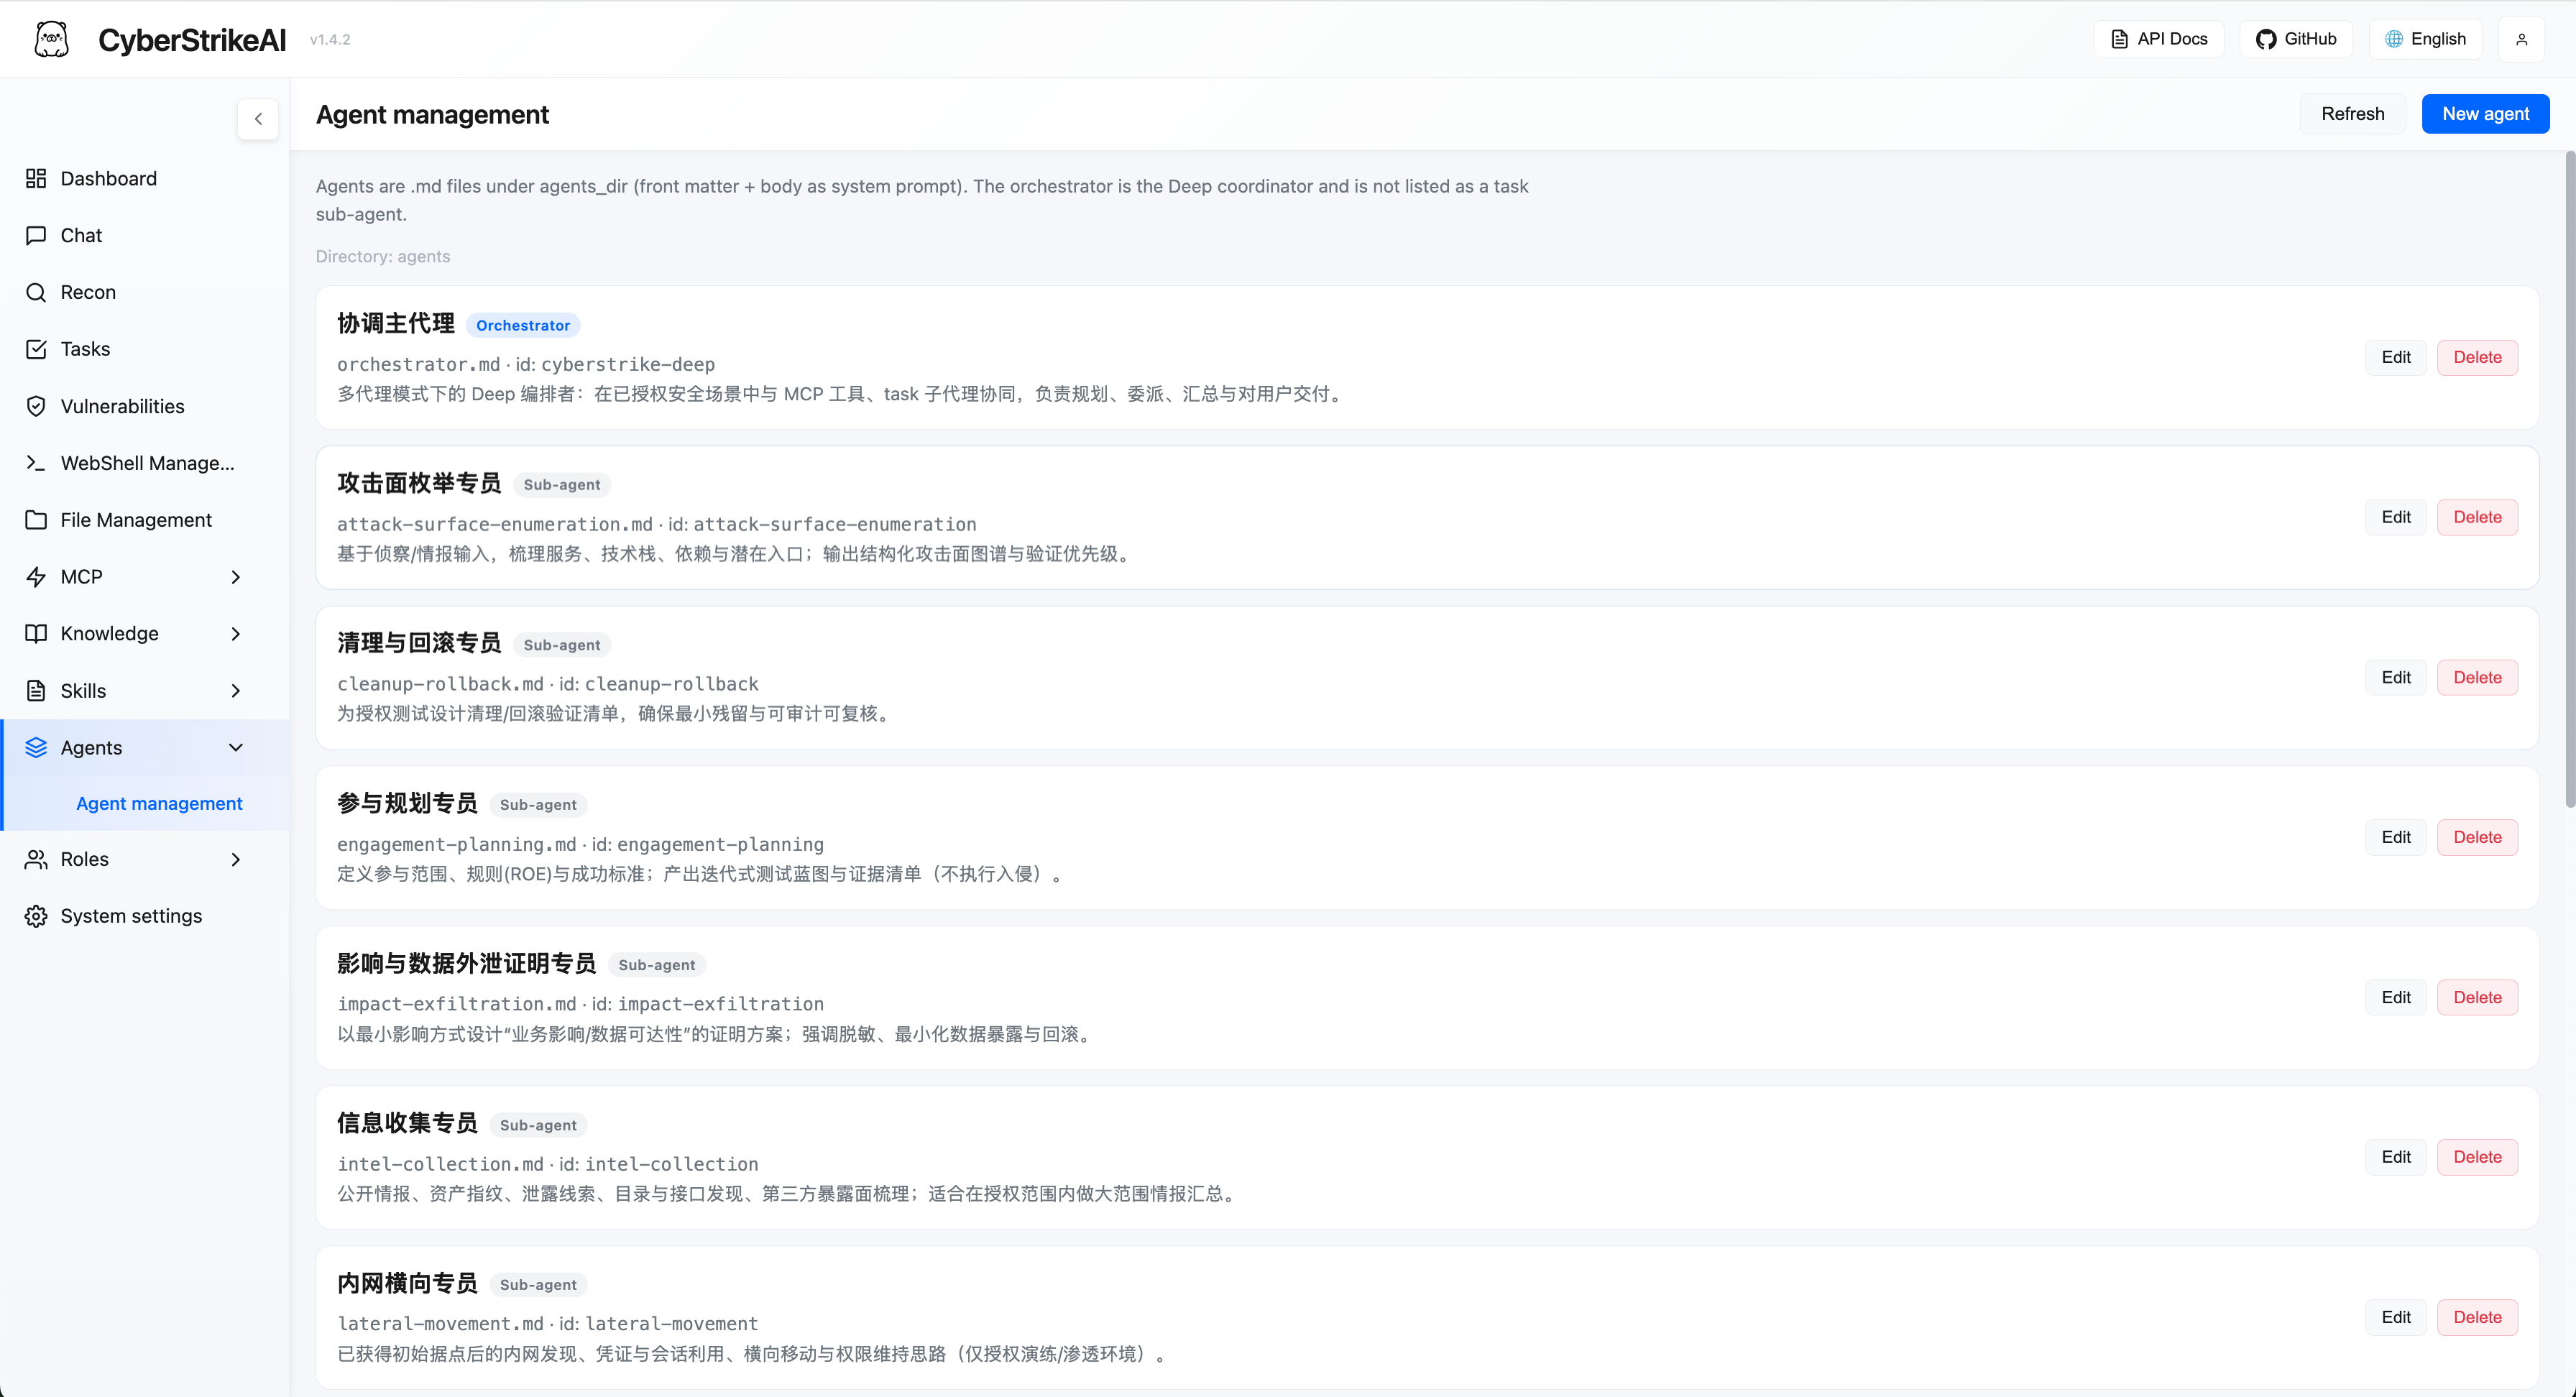
एजेंट प्रबंधन
|
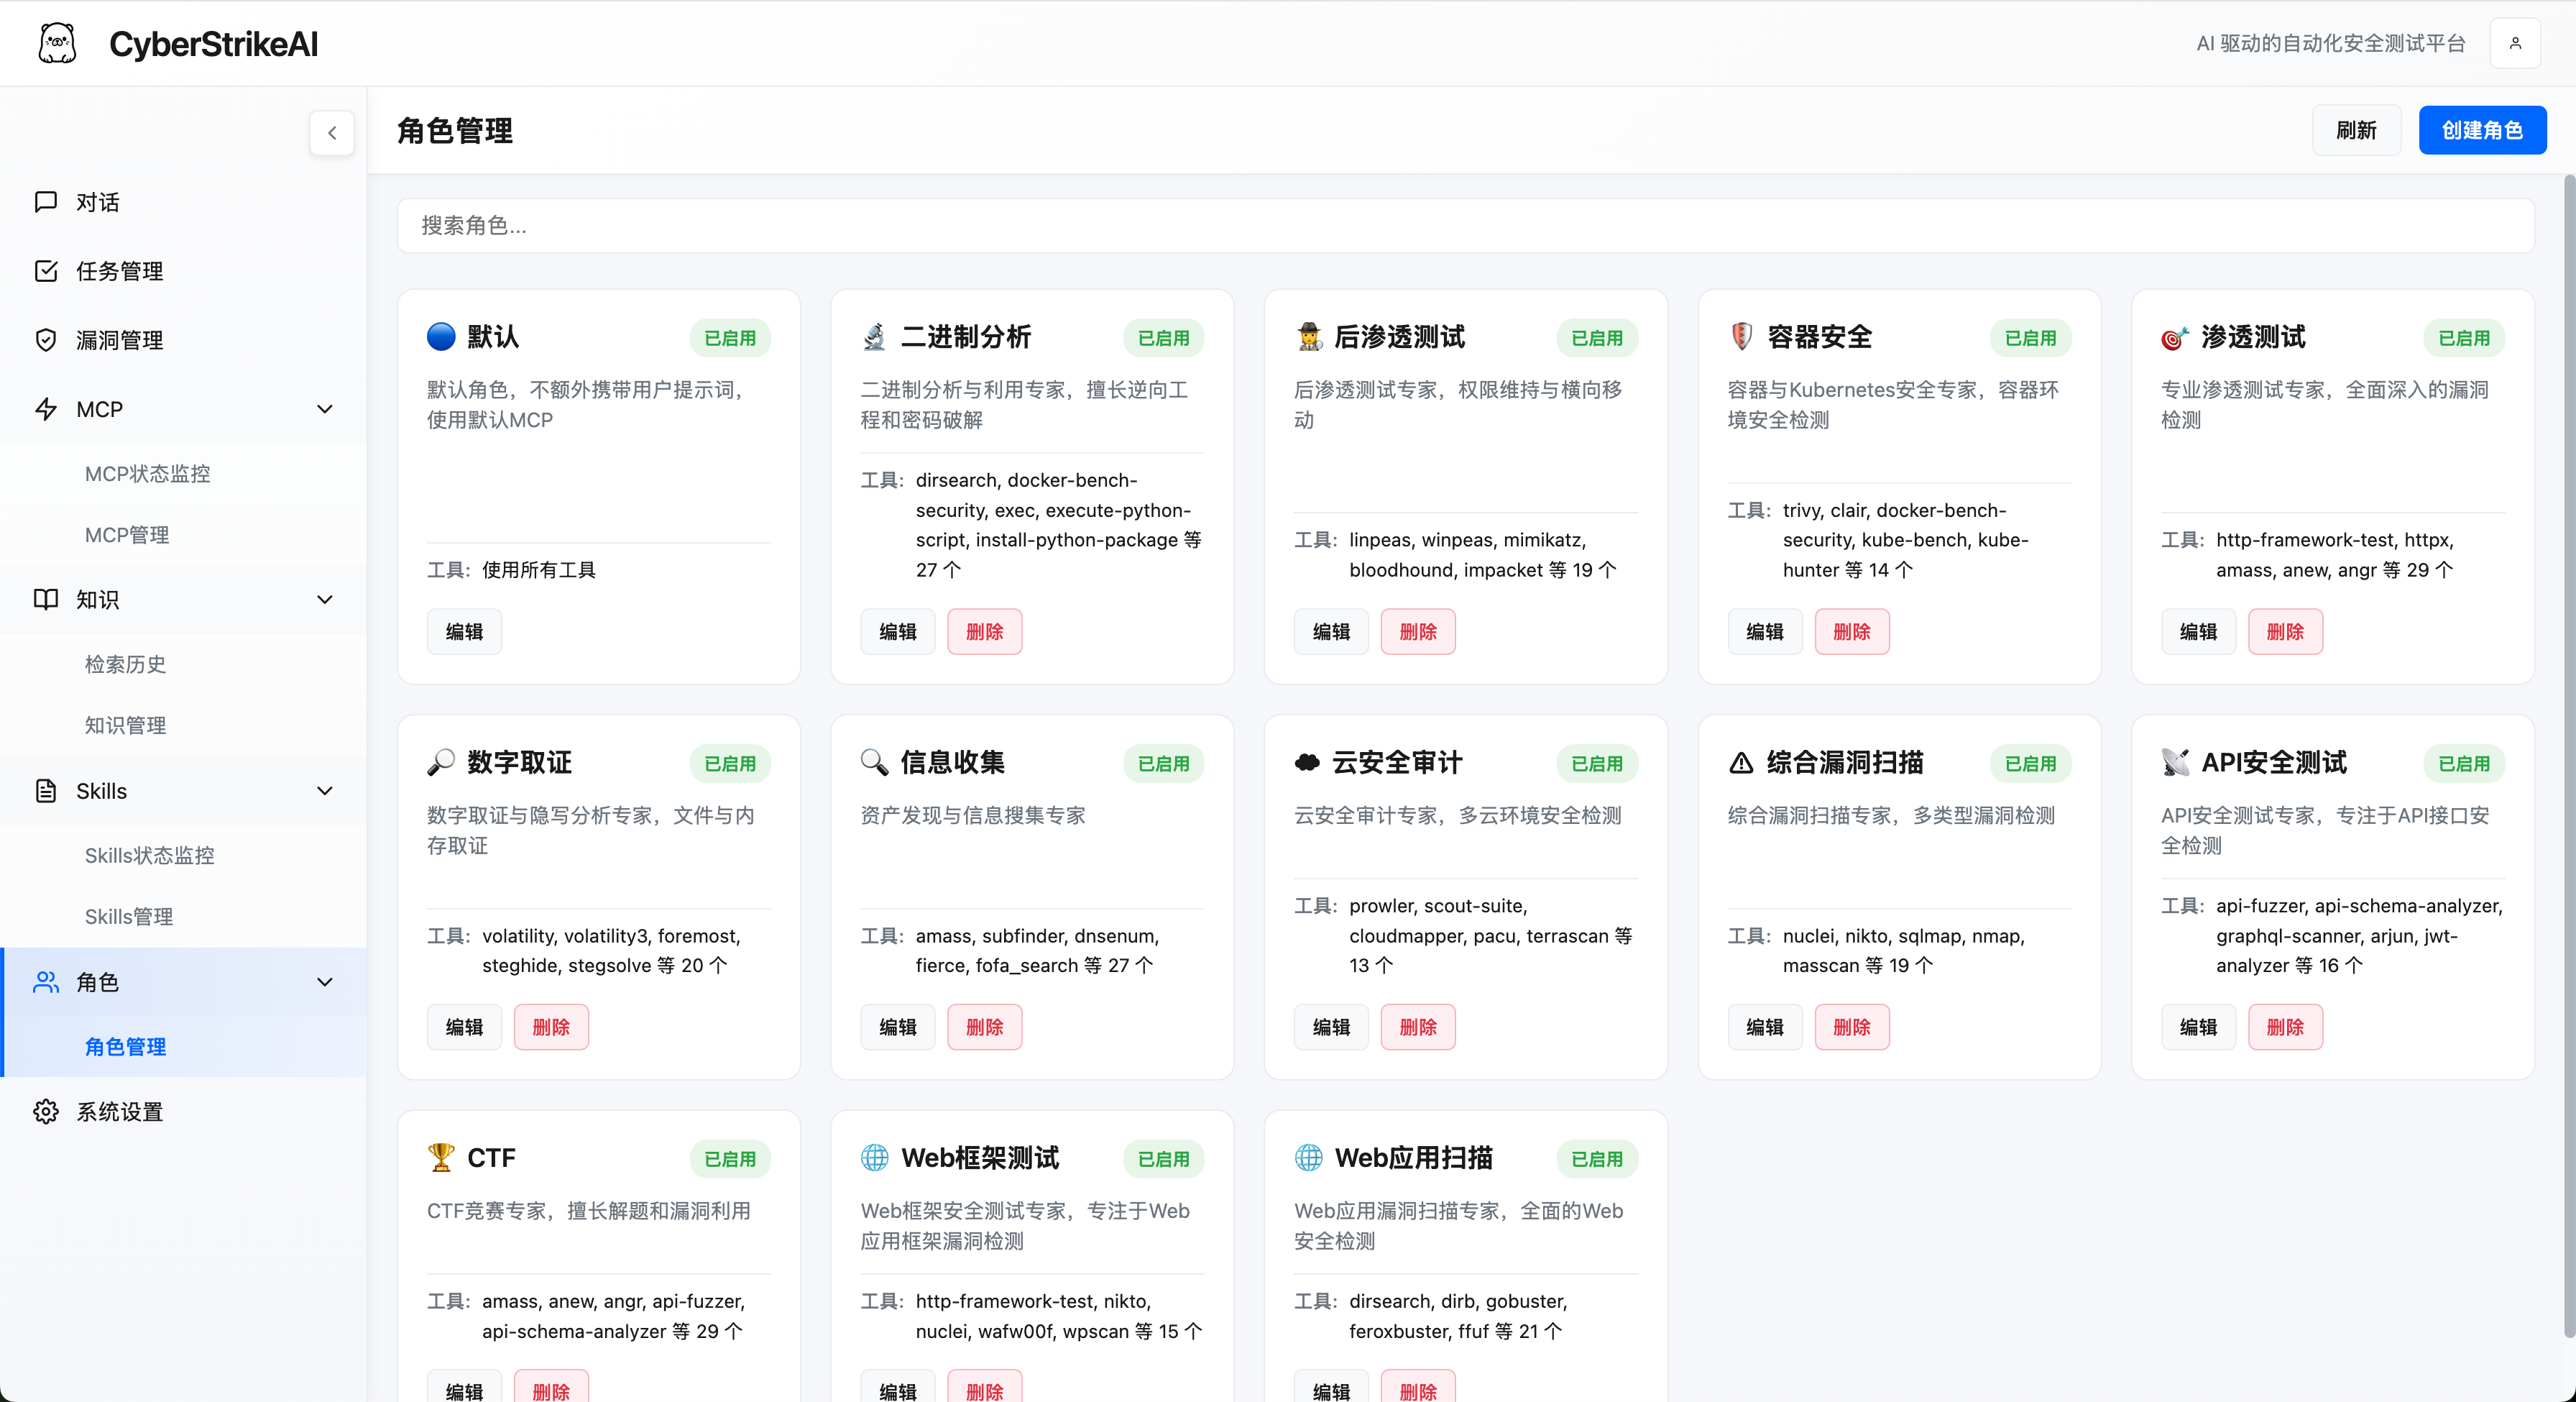
भूमिका प्रबंधन
|
सिस्टम सेटिंग्स
|
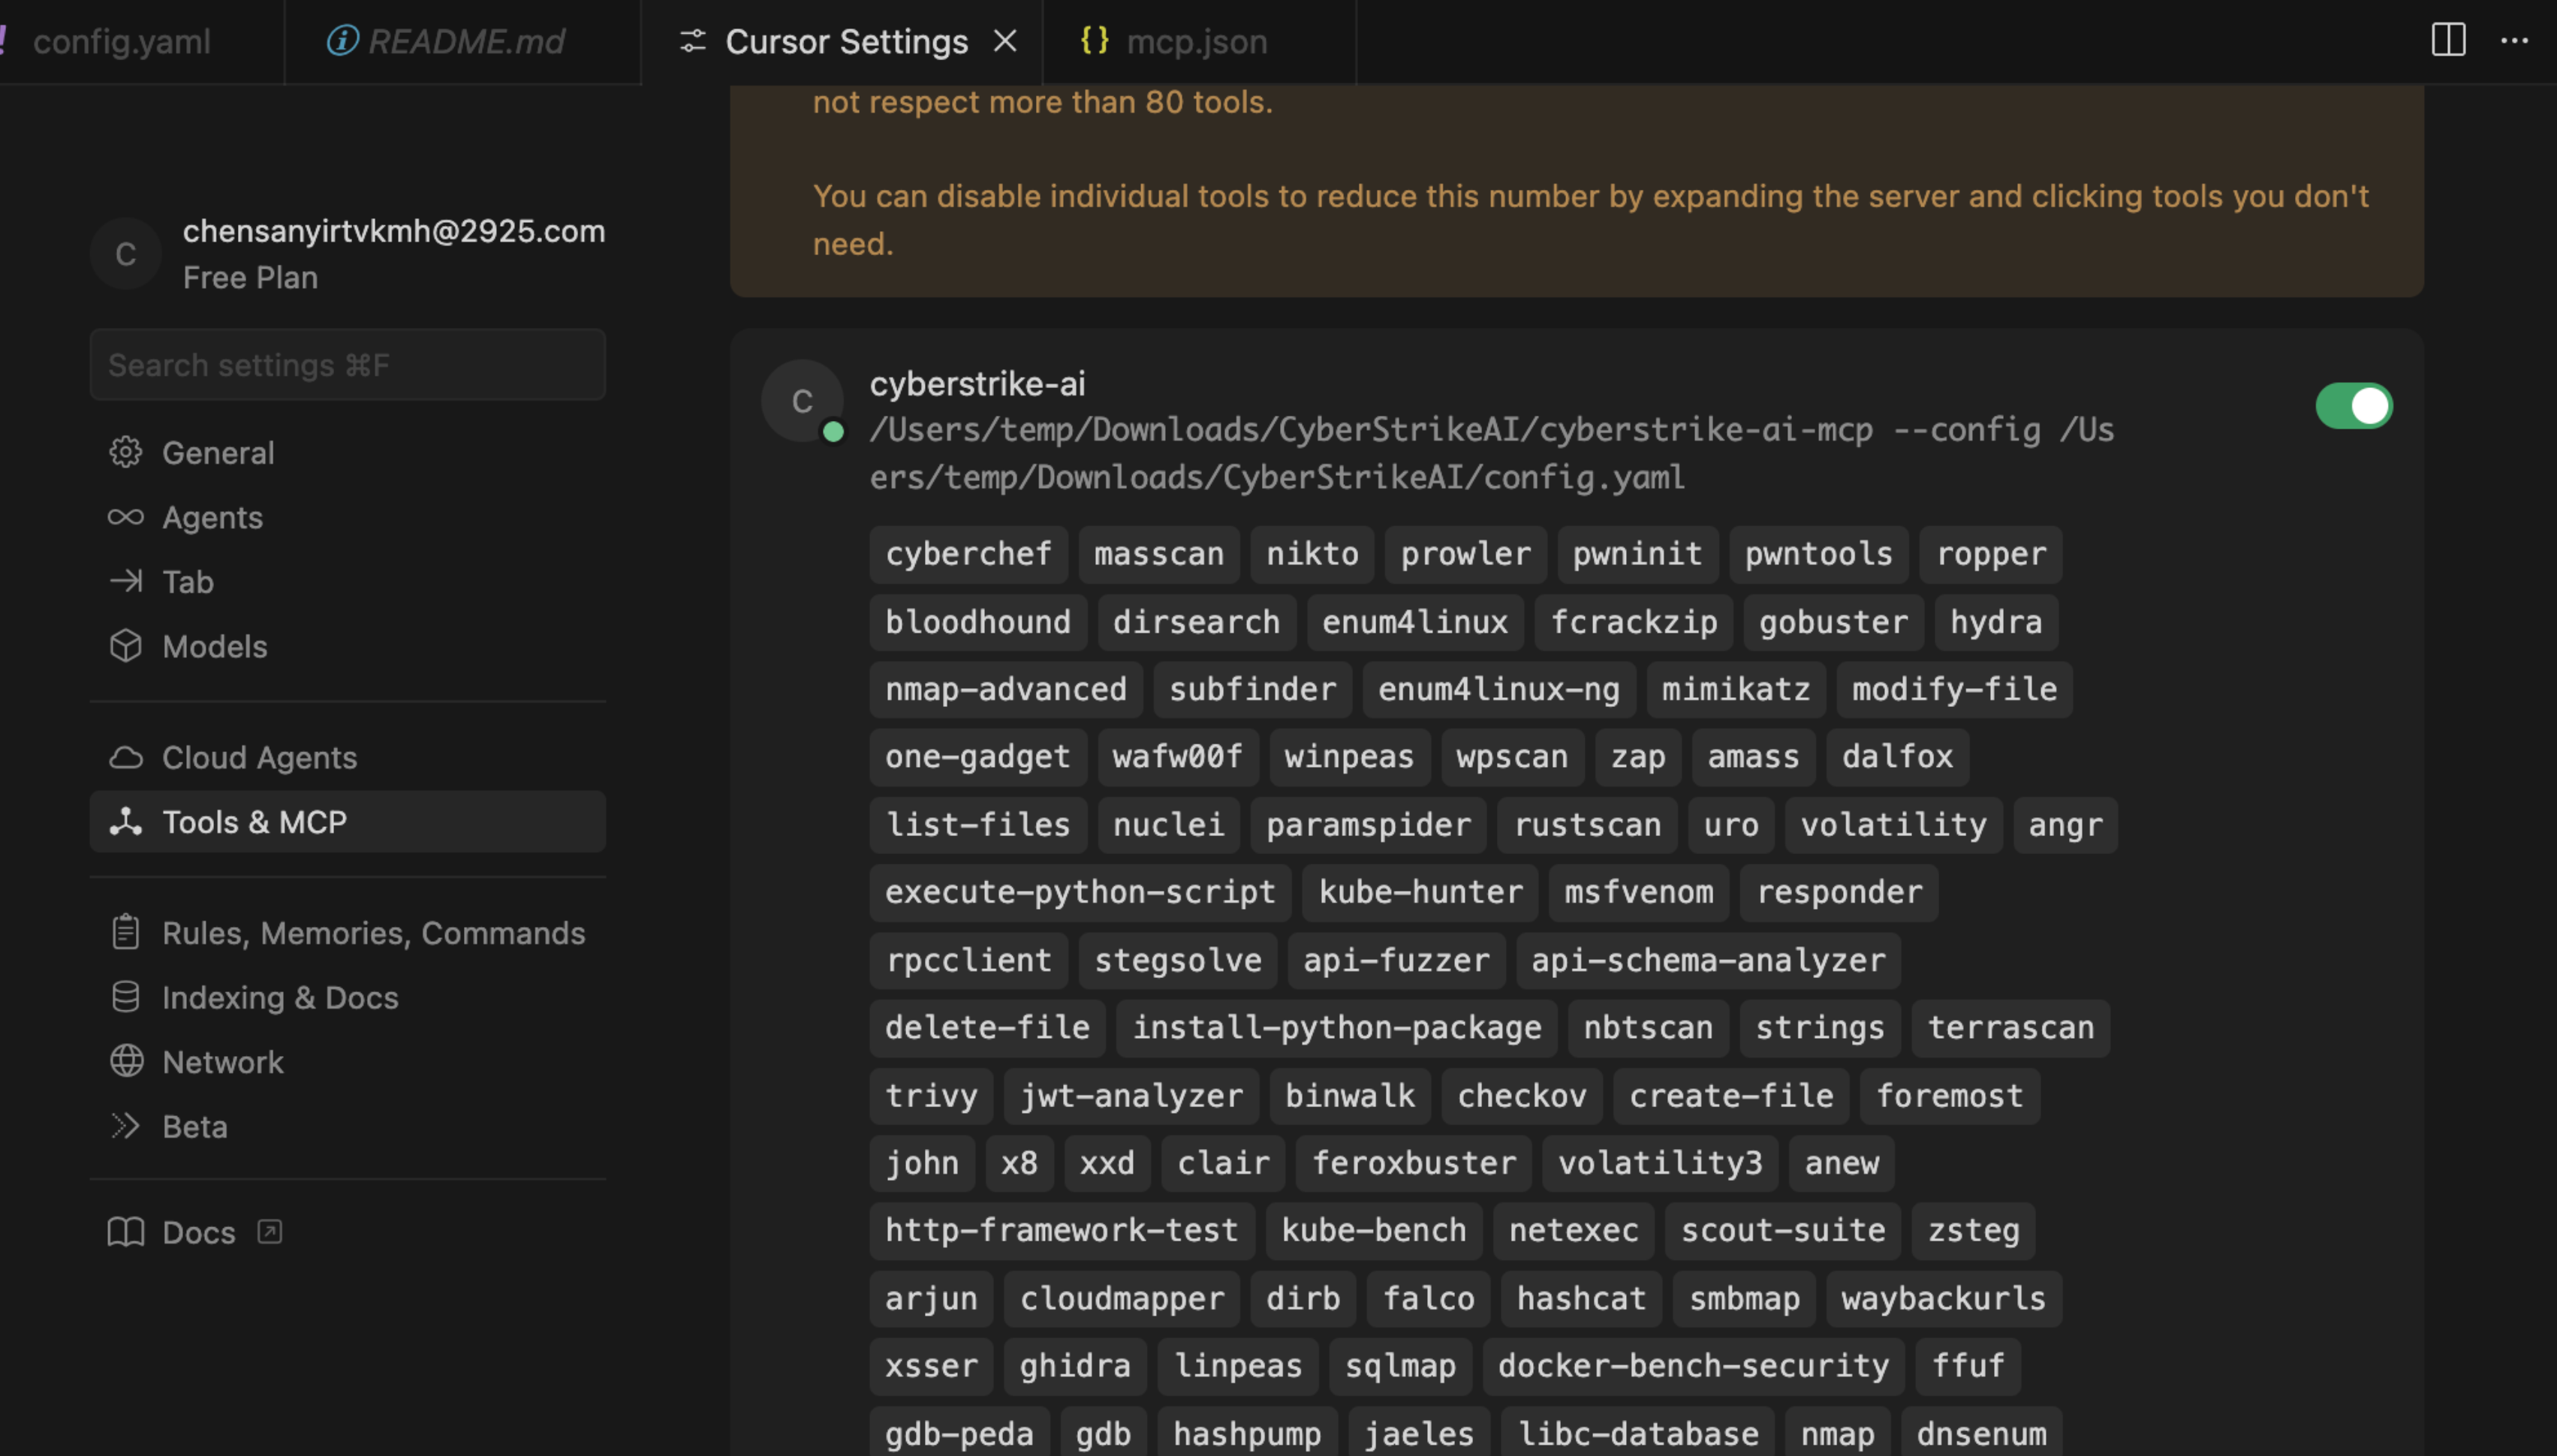
MCP stdio मोड
|
Burp Suite प्लगइन
|