
Quick WAF "paranoid" Doctor Evaluation | WAFPARAN01D3 Tool
L'outil de test du niveau de paranoïa des pare-feu d'applications Web.
— De alt3kx.github.io

En substance, le niveau de paranoïa (PL) vous permet de définir le degré d'agressivité du Core Rule Set.
Référence : https://coreruleset.org/20211028/working-with-paranoia-levels/
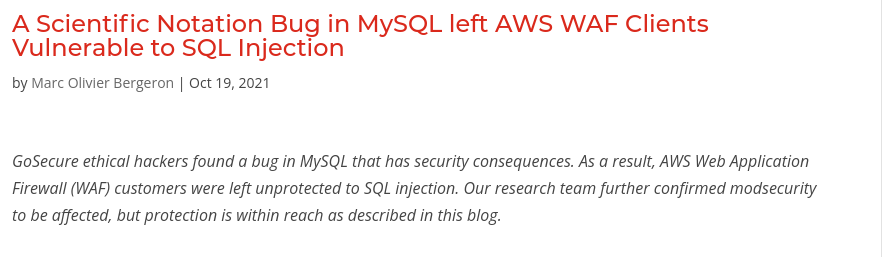
wafparan01d3.py envoie des requêtes malveillantes à l'aide de charges utiles encodées placées dans différentes parties des requêtes HTTP, en se basant sur les paramètres GET. Les résultats de l'évaluation sont consignés dans le fichier journal de débogage wafparan01d3.log créé sur votre machine.mysql_gosecure.txt, en référence à la recherche « A Scientific Notation Bug in MySQL left AWS WAF Clients Vulnerable to SQL Injection » de gosecure, disponible ici https://www.gosecure.net/blog/2021/10/19/a-scientific-notation-bug-in-mysql-left-aws-waf-clients-vulnerable-to-sql-injection/ évaluant nos WAF utilisant modsecurity à leurs différents niveaux de paranoïa, que ce soit dans une configuration par défaut ou en désactivant différentes règles / ID de manière échelonnée et rapide.
Pentesters : périmètre GreyBox avec accès limité à la machine Linux du WAF via un « shell » disposant des privilèges pour démarrer/recharger et modifier les fichiers de configuration Apache du WAF sur les environnements DEV/STG/TEST, en envoyant différentes charges utiles.Security Officers : prenez la meilleure décision quant au niveau de paranoïa du WAF à appliquer pour chaque solution de votre organisation. Blueteamers : application des règles, meilleure alerte, moins de faux positifs dans votre organisation. Integrators : effectuez un dépannage plus approfondi et définissez rapidement le niveau de paranoïa adéquat du WAF en personnalisant les règles ou en créant des correctifs virtuels. Référence : https://www.inmotionhosting.com/support/server/apache/install-modsecurity-apache-module/
$ sudo apt update -y && sudo apt dist-upgrade -y
$ sudo apt-get install build-essential -y
$ sudo apt-get install apache2 -y
$ sudo apt install libapache2-mod-security2 -y
$ sudo apt-get install curl vim gridsite-clients net-tools -y
$ sudo systemctl restart apache2
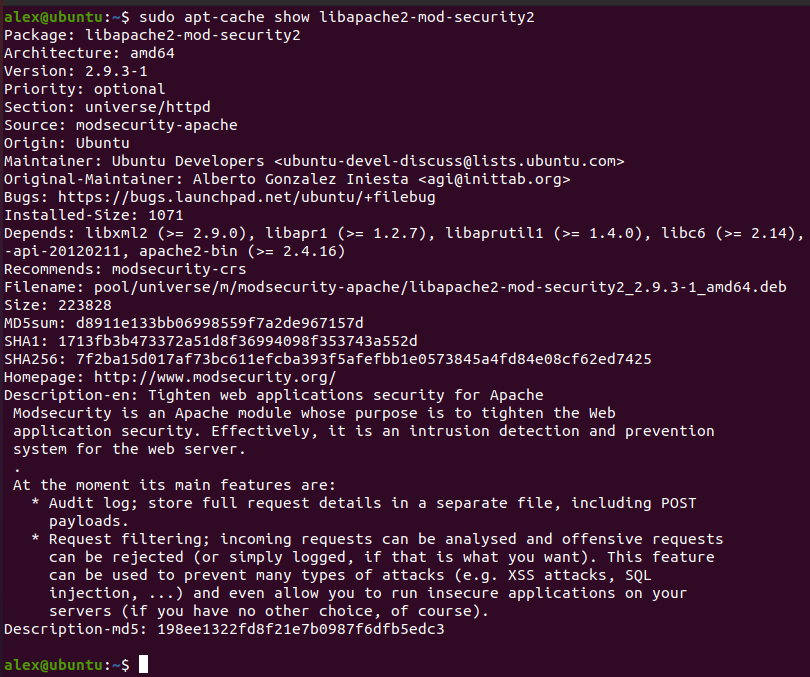
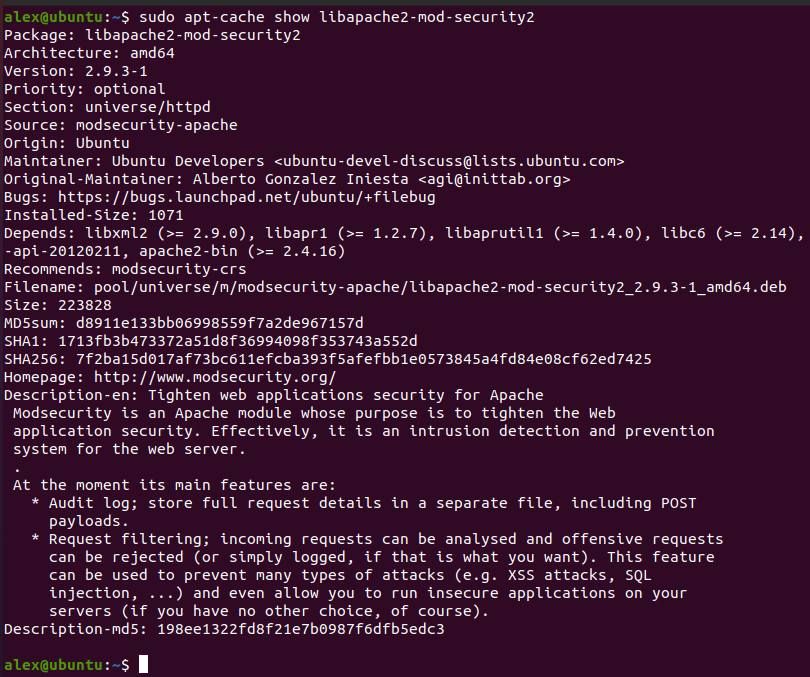
$ sudo apt-cache show libapache2-mod-security2
$ sudo cp /etc/modsecurity/modsecurity.conf-recommended /etc/modsecurity/modsecurity.conf
Ensuite, changez le mode de détection de ModSecurity. Tout d'abord, déplacez-vous dans le dossier cd /etc/modsecurity
2. Modifiez le fichier de configuration de ModSecurity avec vi, vim, emacs ou nano.
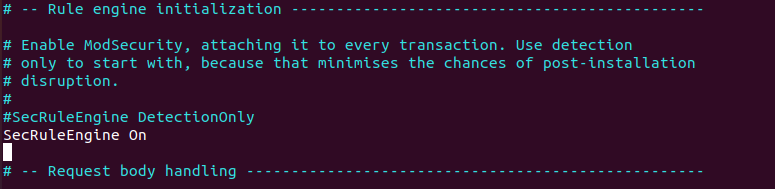
$ sudo vim /etc/modsecurity/modsecurity.conf
SecRuleEngine DetectionOnly. Remplacez DetectionOnly par On. Valeur d'origine : SecRuleEngine DetectionOnly
Nouvelle valeur : SecRuleEngine On
$ sudo systemctl restart apache2
$ cd ~
$ wget https://github.com/coreruleset/coreruleset/archive/refs/tags/v3.3.2.zip
$ sha1sum v3.3.2.zip && echo ProvidedChecksum
88f336ba32a89922cade11a4b8e986f2e46a97cf v3.3.2.zip
ProvidedChecksum
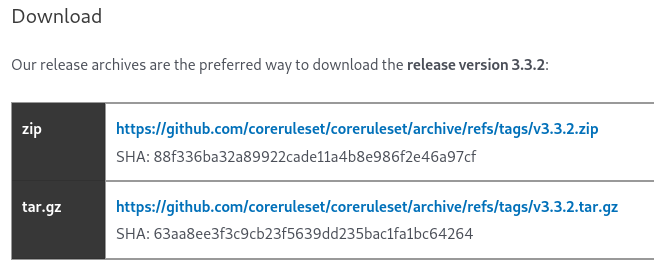
$ unzip v3.3.2.zip
$ sudo mv coreruleset-3.3.2/crs-setup.conf.example /etc/modsecurity/crs/crs-setup.conf
$ sudo mv coreruleset-3.3.2/rules/ /etc/modsecurity/crs/
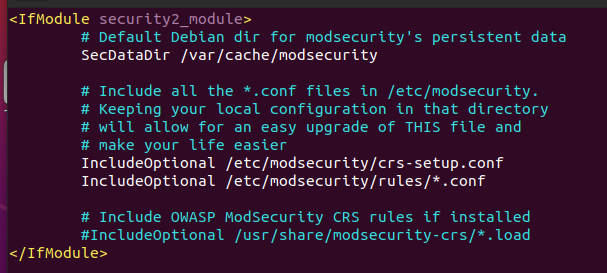
$ sudo vim /etc/apache2/mods-enabled/security2.conf
<IfModule security2_module>
# Default Debian dir for modsecurity's persistent data
SecDataDir /var/cache/modsecurity
# Include all the *.conf files in /etc/modsecurity.
# Keeping your local configuration in that directory
# will allow for an easy upgrade of THIS file and
# make your life easier
IncludeOptional /etc/modsecurity/crs-setup.conf
IncludeOptional /etc/modsecurity/rules/*.conf
# Include OWASP ModSecurity CRS rules if installed
#IncludeOptional /usr/share/modsecurity-crs/*.load
</IfModule>
$ sudo vim /etc/apache2/apache2.conf
Copiez et collez le code suivant, puis enregistrez-le.
# Include list of ports to listen on
Include ports.conf
Include /etc/modsecurity/modsecurity.conf
Include /etc/modsecurity/crs/crs-setup.conf
Include /etc/modsecurity/crs/rules/*.conf

$ cd /etc/apache2
$ sudo cp mods-available/proxy_http.load mods-enabled
$ sudo cp mods-available/proxy.load mods-enabled/
$ sudo cp mods-available/rewrite.load mods-enabled/
$ sudo systemctl restart apache2
/etc/apache2/ports.conf $ sudo vim /etc/apache2/ports.conf
Copiez et collez le code suivant, puis enregistrez-le.
# If you just change the port or add more ports here, you will likely also
# have to change the VirtualHost statement in
# /etc/apache2/sites-enabled/000-default.conf
Listen 8080
Listen 18080
<IfModule ssl_module>
Listen 443
</IfModule>
<IfModule mod_gnutls.c>
Listen 443
</IfModule>

/etc/apache2/sites-enabled, créez le fichier 001-test.conf $ cd /etc/apache2/sites-enabled/
$ sudo touch 001-test.conf
$ sudo vim 001-test.conf
Copiez et collez le code suivant, puis enregistrez-le.
<VirtualHost *:8080>
ServerName test.domain:8080
SecRuleEngine On
ErrorLog ${APACHE_LOG_DIR}/test_error.log
CustomLog ${APACHE_LOG_DIR}/test_access.log combined
SecAuditLog ${APACHE_LOG_DIR}/test_audit.log
ProxyPass / http://127.0.0.1:18080/
ProxyPassReverse / http://127.0.0.1:18080/
</VirtualHost>
/etc/apache2/sites-enabled, créez le fichier 002-moc.conf $ cd /etc/apache2/sites-enabled/
$ sudo touch 002-moc.conf
$ sudo vim 002-moc.conf
Copiez et collez le code suivant, puis enregistrez-le.
<VirtualHost 127.0.0.1:18080>
ErrorLog ${APACHE_LOG_DIR}/moc_error.log
CustomLog ${APACHE_LOG_DIR}/moc_access.log combined
RewriteEngine On
RewriteRule ^(.*)$ $1 [R=200,L]
</VirtualHost>
$ sudo systemctl restart apache2
wafparan01d3_rulesremove.conf dans /etc/apache2/conf-enabled $ sudo touch /etc/apache2/conf-enabled/wafparan01d3_rulesremove.conf
$ sudo service apache2 reload
Must be specify a domain , edit the following lines
Windows:
C:\Windows\System32\drivers\etc\hosts
192.168.56.106 test.domain <-- add this line and specify your IP address
Linux:
/etc/hosts
192.168.1.23 test.domain <-- add this line and specify your IP address
$ curl -i -k -s -XGET http://test.domain:8080/
HTTP/1.1 200 OK
Date: Mon, 22 Nov 2021 06:31:41 GMT
Server: Apache/2.4.41 (Ubuntu)
Content-Length: 571
Content-Type: text/html; charset=iso-8859-1
Vary: Accept-Encoding
<!DOCTYPE HTML PUBLIC "-//IETF//DTD HTML 2.0//EN">
<html><head>
<title>200 OK</title>
</head><body>
<h1>OK</h1>
<p>The server encountered an internal error or
misconfiguration and was unable to complete
your request.</p>
<p>Please contact the server administrator at
[no address given] to inform them of the time this error occurred,
and the actions you performed just before this error.</p>
<p>More information about this error may be available
in the server error log.</p>
<hr>
<address>Apache/2.4.41 (Ubuntu) Server at 127.0.0.1 Port 18080</address>
</body></html>
$ curl -i -k -s -XGET http://localhost:18080/
HTTP/1.1 200 OK
Date: Mon, 22 Nov 2021 06:27:17 GMT
Server: Apache/2.4.41 (Ubuntu)
Content-Length: 571
Content-Type: text/html; charset=iso-8859-1
<!DOCTYPE HTML PUBLIC "-//IETF//DTD HTML 2.0//EN">
<html><head>
<title>200 OK</title>
</head><body>
<h1>OK</h1>
<p>The server encountered an internal error or
misconfiguration and was unable to complete
your request.</p>
<p>Please contact the server administrator at
[no address given] to inform them of the time this error occurred,
and the actions you performed just before this error.</p>
<p>More information about this error may be available
in the server error log.</p>
<hr>
<address>Apache/2.4.41 (Ubuntu) Server at localhost Port 18080</address>
</body></html>
Pour obtenir de l'aide, vous pouvez utiliser l'option help. L'utilisation de base consiste à passer différents arguments définis.
Exemple :
$ sudo python3 wafparan01d3.py -h
( ) ) ( )
( ( ))\ ) ) ( ) ( /(( /( )\ ) ( /(
)\))( ( /(()/( ` ) ( /( )( ( /( ( )\())\()|()/( )\())
((_)()\ )(_))(_))/(/( )(_)|()\ )(_)) )\ ) ((_)((_)\ ((_)|(_)\
_(()((_|(_)(_) _((_)_\((_)_ ((_|(_)_ _(_/( / (_) (_)_| |__ (_)
\ V V / _` | _| '_ \) _` | '_/ _` | ' \)) () || |/ _` ||_ \
\_/\_/\__,_|_| | .__/\__,_|_| \__,_|_||_| \__/ |_|\__,_|___/
|_|
~ WAFPARANO1D3 : v1.1 ~
The Web Application Firewall Paranoia Level Test Tool.
usage: wafparan01d3.py [-h] [--run [_RUN]] [--debug [_DEBUG]] [--pl [_PARANOIALEVEL ...]] [--proxy [_PROXY]] [--payload [_PAYLOAD]] [--rules-remove [_RULESREMOVE]] [--log [_LOG]] [--domain [_DOMAIN]] [--conf-file [_CONF_FILE]]
[--time-sleep [_TIME_TO_SLEEP]] [--time-sleep-request [_TIME_TO_SLEEP_REQUEST]] [--desc [_DESC]] [--output-desc [_OUTPUT_DESC]]
optional arguments:
-h, --help show this help message and exit
--run [_RUN] Run script
--debug [_DEBUG] Debug mode
--pl [_PARANOIALEVEL ...]
Define paranoia level Ex. -pl 2
--proxy [_PROXY] Define Proxy. Ex: http://127.0.0.1:8081
--payload [_PAYLOAD] Define payload file. Ex. --payload payload2.txt
--rules-remove [_RULESREMOVE]
Define rules remove file. Ex. --rules-remove rules1.txt
--log [_LOG] Define path of the log file. Ex. --log /var/log/apache/wafparan01d3.log
--domain [_DOMAIN] Define your domain. Ex. --domain example.domain:8080
--conf-file [_CONF_FILE]
Define configuration file. Ex. --conf-file /opt/modsecurity/crs/rules/INITIALIZATION.conf
--time-sleep [_TIME_TO_SLEEP]
Sleep time per PL. Ex. --time-sleep 3
--time-sleep-request [_TIME_TO_SLEEP_REQUEST]
Sleep time per Request. Ex. --time-sleep-request 3
--desc [_DESC] Description of the script and authors
--output-desc [_OUTPUT_DESC]
Description of the output on console mode.
$ sudo python3 wafparan01d3.py -h
- show the help message
$ sudo python3 wafparan01d3.py --run
- run the script with default options.
$ sudo python3 wafparan01d3.py --run --debug
- Print every line on console.
$ sudo python3 wafparan01d3.py --run --pl 1
- Run the script in assigned Paranoia Level.
- By default runs on Paranoia Level 1, 2, 3, 4
$ sudo python3 wafparan01d3.py --run --payload file_payload2.txt
- Define the payload file that you want to send to WAF.
- By default takes the file mysql_gosecure.txt
$ sudo python3 wafparan01d3.py --run --rules-remove rules_removex.txt
- Define the rules that you want to remove on GWAF.
- Example of the file:
- Default 920000 920001 920002
- By default takes the files: rules_remove1.txt, rules_remove2.txt, rules_remove3.txt, rules_remove4.txt
$ sudo python3 wafparan01d3.py --run --log /home/waf_user/paranoia.log
- Define LOG File.
- By default print the log on paranoia_debug.log
$ sudo python3 wafparan01d3.py --run --domain mydomain.test.com
- Define Domain of Front End WAF.
- By default runs over domain domain.test:8080
$ sudo python3 wafparan01d3.py --run --conf-file /opt/modsecurity/crs/rules/INITIALIZATION.conf
- Define the configuration file to update the Paranoia Level
- By default takes /etc/modsecurity/crs/rules/REQUEST-901-INITIALIZATION.conf
$ sudo python3 wafparan01d3.py --run --time-sleep 3
- Define the time to sleep per Paranoia Level.
$ sudo python3 wafparan01d3.py --run --time-sleep-request 2
- Define the time to sleep per request send to WAF.
$ sudo python3 wafparan01d3.py --desc
- Print the description of the script and the authors.
Vous pouvez essayer wafparan01d3.py en exécutant l'environnement VM (Ubuntu) qui déploie WAF ModSecurity & « Mock » en utilisant la dernière version de l'OWASP Core Rule Set CRS 3.3.2, évaluant les niveaux de paranoïa de ModSecurity facilement personnalisables.
Pour l'exécuter :
$ git clone https://github.com/alt3kx/wafparan01d3.git
$ cd wafparan01d3
$ sudo python3 wafparan01d3.py --help
$ sudo python3 wafparan01d3.py --run

$ sudo python3 wafparan01d3.py --run --debug --proxy http://192.168.56.1:8081

$ sudo python3 wafparan01d3.py --run --debug --pl 1 2 --proxy http://192.168.56.1:8081 --log test.log --domain vulnerable.domain:8080 --time-sleep-request 1 --time-sleep 1 --rules-remove my_rules_remove.txt --payload my_payload.txt

https://github.com/mindhack03d/WAF-Rule-Scientific-Notation
Alex Hernandez alias (@_alt3kx_)
Jesus Huerta alias @mindhack03d