Skip to content
KitploitKITPLOIT
ToolsBlog
Submit
ToolsBlog
Submit

Hacking, PenTest, and Cybersecurity Tools for Your Security Arsenal!

Kitploit is a directory of hacking, cybersecurity, and pentesting tools. Discover the latest project updates to find vulnerabilities, analyze systems, automate testing, and strengthen your security.

··Feeds·Contact·Privacy·© 2026 Kitploit

Tool Directory

Categories

View all categories
Loading categories
DetectPacket-CVE-2017-8464 — Exploit vulnerabilities and vulnerability prevention implementation | Kitploit
Tools/GitHubGitHub/trg-1999/detectpacket-cve-2017-8464
Packet Sniffing & AnalysisStatic AnalysisVulnerability AnalysisExploitationForensicsNetwork SecurityMalware AnalysisIntrusion DetectionLearning & Education
GitHubtrg-1999/detectpacket-cve-2017-8464

DetectPacket-CVE-2017-8464

Exploit vulnerabilities and vulnerability prevention implementation

View Repository
21444 years agoNot yet reviewed

Most Popular

View all →

Discover the most used tools by our community.

Explore all tools

Browse our collection of tools

View all tools →
Share

Building a Vulnerability Detection Application for CVE-2017-8464

Source (click here)

CONTENTS:

PART 1: OVERVIEW OF CVE-2017-8464

  1. CONCEPT OF LNK FILE
  2. CREATING A SYSTEM VULNERABLE TO CVE-2017-8464
  3. TOOLS FOR EXPLOITING CVE-2017-8464

PART 2: USING METASPLOIT TO EXPLOIT CVE-2017-8464

2.1. EXPLOITATION MODEL FOR CVE-2017-8464

2.2. EXECUTING THE EXPLOIT FOR CVE-2017-8464

PART 3: BUILDING A CVE-2017-8464 DETECTION TOOL USING PYTHON

3.1. ANALYZING THE SIGNATURE OF CVE-2017-8464 BASED ON CAPTURED NETWORK PACKETS

3.2. FUNCTION TO DETECT CVE-2017-8464 EXPLOITS BASED ON PACKET SIGNATURE ANALYSIS

CONCLUSION

**

PART 1: OVERVIEW OF CVE-2017-8464

  1. CONCEPT OF LNK FILE

LNK is a System File - Windows Shortcut, in Binary format developed by Microsoft.

Figure 1: Shortcut icon on Windows

An LNK file is a shortcut or "link" used by Windows as a reference to an original file, folder, or application, similar to an alias on the Macintosh platform. It contains the shortcut's target type, location, and filename, as well as the programs that open the target files and an optional shortcut key. These files can be created in Windows by right-clicking a file, folder, or executable and then selecting Create shortcut.

This vulnerability exists in Microsoft Windows and allows an attacker to execute remote code if the icon of a specially crafted shortcut is processed.

Figure 2: Manually creating a shortcut that executes, loads, and runs attack code via .LNK file

The vulnerable component is linked to the network stack. Such a vulnerability is often called “remotely exploitable” and can be considered an attack that can be exploited at the protocol level or across multiple network hops (e.g., through one or more routers).

  1. CREATING A SYSTEM VULNERABLE TO CVE-2017-8464

Systems affected by CVE-2017-8464 are the Windows Shell in Microsoft Windows Server 2008 SP2 and R2 SP1, Windows 7 SP1, Windows 8, Windows 8.1, Windows Server 2012 Gold and R2, Windows RT 8.1, Windows 10 Gold, 1511, 1607, 1703, and Windows Server 2016, which allow local users or remote attackers to execute arbitrary code via a specially crafted .LNK file that is not properly handled when displaying icons in Windows Explorer or any other application that parses shortcut icons. Also known as the "LNK Remote Code Execution Vulnerability."

The security update fixes the vulnerability by correcting the validation of shortcut icon references. Microsoft Windows released an update for this vulnerability in June 2017. This vulnerability does not affect Windows XP and older Windows versions.

  1. TOOLS FOR EXPLOITING CVE-2017-8464

Metasploit

Metasploit Framework is an environment for testing, attacking, and exploiting services using the command line interface. This tool is available on Kali Linux VMware version.

Figure 3: Metasploit Tool

Armitage

A graphical interface tool based on the Metasploit project.
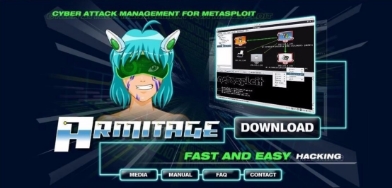
Figure 4: Armitage Tool.

PART 2: USING METASPLOIT TO EXPLOIT CVE-2017-8464

2.1. EXPLOITATION MODEL FOR CVE-2017-8464

Victim machine – Windows 7 Pro

Figure 5: Victim's operating system version

Figure 6: Victim machine IP address

Attacker machine – Kali Linux – Using Metasploit.

Figure 7: Attacker machine IP address

The active network is VMnet8 Subnet 192.168.169.0

2.2. EXECUTING THE EXPLOIT FOR CVE-2017-8464

  • Create reverse_tcp payloads and listen for TCP connections to the Kali machine.
  • With LHOST being the listening address from the attacker machine.

Figure 8: Creating payloads and listening for TCP connections to the attacker machine

  • Create a shortcut file containing the CVE-2017-8464 vulnerability to automatically run the embedded reverse_tcp payload.

Figure 9: Creating a .lnk file that automatically runs malicious code

Figure 10: Payload setup information

  • Run the exploit command to initialize the vulnerable shortcuts pointing to the payload file.
  • Specifically, as described above, there will be a payload file named FlashPlayerCPApp.cpl and a shortcut file containing the vulnerability that automatically runs the payload file.
  • After creating all these necessary files, it will save them to the /root/.msf4/local/ folder on the attacker's machine. Then the attacker will copy all files in that folder to any USB drive.

Figure 11: Creating the .lnk file along with malicious code

Figure 12: Copying all malicious code to USB

  • After tricking the victim into plugging the USB into their computer, the victim does not need to click any application on the USB, but the vulnerability in the .lnk file (shortcut file) automatically triggers the malicious payload to execute the remote code execution exploit.

Figure 13: Victim plugs in USB containing malicious .lnk file

  • Observing the attacker machine, we see that the victim machine has connected to the attacker machine. At this point, the attacker has successfully exploited CVE-2017-8464 and executed malicious code remotely on the victim machine.

Figure 14: Attacker successfully exploited and gained access to the victim machine

**

PART 3: BUILDING A CVE-2017-8464 DETECTION TOOL USING PYTHON

3.1. ANALYZING THE SIGNATURE OF CVE-2017-8464 BASED ON CAPTURED NETWORK PACKETS

  • When capturing packets during the attack, we see that when the .lnk file automatically runs, the victim machine initiates a TCP connection to the attacker machine's address as set in the payload.

Figure 15: Attack packet on CVE-2017-8464 captured

  • A packet with the PSH flag allows direct sending to the victim machine instead of buffering.

Figure 16: Packet with PSH flag after successful TCP connection to attacker

  • Next, a packet with the suspicious "MZ" signature indicates that this is likely a malicious PE file being sent to the victim.

Figure 17: Suspicious sign in captured packet sent by attacker to victim.

PE File Format (Portable Executable File Format): is the native Win32 file format. All executable files on Win32 such as *.EXE, *.DLL (32-bit), *.COM, *.NET, *.CPL,… are in PE format; except for VxDs and *.DLL (16-bit) files.

PE_File_Struct.png

Figure 18: Structure of a PE file.

DOS MZ Header

All PE files start with a simple DOS MZ Header. It occupies the first 64 bytes. This area is used when the program runs under DOS.

e_magic: Signature of the PE file, value: 4Dh, 5Ah (Characters "MZ", named after MS-DOS founder Mark Zbikowsky). This value marks a valid DOS Header and allows execution to continue.

Figure 19: PE file signature in captured packet

e_lfanew: is a DWORD at the end of the DOS Header, a field containing the offset of the PE Header from the beginning of the file.

DOS STUB

DOS Stub is just a small DOS EXE program that displays an error message, included for compatibility with 16-bit Windows.

Figure 20: Information in the DOS STUB packet captured from attacker sent to victim

PE Header

PE Header is essentially the IMAGE_NT_HEADERS structure, containing necessary information for the loader to load the file into memory.

Signature: is a DWORD at the start of the PE Header containing the PE signature: 50h, 45h, 00h, 00

Figure 21: Information from e_lfanew indicating the Signature portion of the PE header.

SECTION TABLE

Section Table is the component right after the PE Header, consisting of an array of IMAGE_SECTION_HEADER structures.

Figure 22: Content of the Section table in captured packet

  • Subsequent packets will contain data portions of the PE file's sections.
  • From there, we only take the HEADER part of this malicious PE file's structure, hash it with MD5 to create a signature for detecting this malware. Specifically, we take 1024 bytes of data from the packet we detected, which includes the HEADER. And related information about the malware will be stored in a CSV file as a dataset for detecting malware.

Figure 23: Storing signatures and related malware information in a CSV file

3.2. FUNCTION TO DETECT CVE-2017-8464 EXPLOITS BASED ON PACKET SIGNATURE ANALYSIS

  • The function will retrieve information about the relevant protocols in frame_info; if there is a data field, it will then get the protocol closest to the data field.

Figure 24: Function to retrieve protocol information of a packet

  • get_info will retrieve important information similar to the info field in Wireshark.

Figure 25: Function to retrieve the info field of a packet

  • The function to convert from pcap to csv first uses pyshark to load the temporary captured packet file (temp.pcap). Then it extracts information similar to the info fields in Wireshark and writes it to a temporary CSV file. In this function, it only retrieves packets from IP/IPv6 layer and above.
  • After conversion to a temporary CSV file, it will create a copy to the packet folder if needed for later reference.

Figure 26: Function to convert packets from Pcap to CSV file

  • First, the detectRemoteCode function will see the information in the sample file containing signatures (md5) that were previously collected and analyzed. The signatures will be aggregated in this sample file. Then it opens the CSV file containing the temporary captured data from network traffic, extracts 1024 bytes (equivalent to 2048 hex characters) of data from the TCP protocol, decodes it, and checks if it starts with "MZ". If so, it hashes that data and compares it with the stored signatures. If there is a match, it will alert and log this event, similar to static analysis performed by Antivirus tools.

Figure 27: Function to check for malware on network traffic

  • After the main functions, the next part is the monitoring code that runs continuously from line 88 to 109 at the end of the program.
  • The first line checks if the directory exists; if not, it creates it.
  • Next is an infinite loop until the user interrupts the program with Ctrl+C.
  • Inside the loop, the first line uses pyshark to capture packets, with the interface being the network card we want to listen on, and the output file being temp.pcap.
  • It will capture packets for 6 seconds, then run the conversion function from pcap to CSV.
  • After having the CSV file, it runs the CVE-2017-8464 detection function. It performs these operations repeatedly until the user terminates the program.

Figure 28: Loop for capturing traffic and checking for malware

*Testing the program's operation by executing the exploit.

  • Run the monitoring program on a Windows 10 machine (real machine) to monitor the network where we will re-enact the attack as in Part 2 above.

Figure 29: Launching the monitoring program on a real machine

  • Return to the two virtual machines and repeat the attack steps from Part 2. We can see that the captured network traffic has been analyzed and detected the attacker performing LNK Remote Code Execution, as shown in the figure below.
  • Finally, to end the scanning process on the network port, simply press Ctrl+C to terminate the program.

Figure 30: Detection and alert when monitoring network traffic

  • After scanning, in the monitoring program's folder, we see that a packet folder has been created containing the files converted to CSV after capturing packets using pyshark, and a log.txt file recording all detected activities during the monitoring run.
  • Additionally, two temporary files are created that the program uses for reading and converting; these files change frequently, so the converted packets are stored in the packet folder.
  • As for the sample-detect.csv file mentioned earlier, it stores the signatures we analyzed to support the program in detecting threats using the Static Analysis method commonly used by Antivirus tools.

Figure 31: Folder of the CVE-2017-8464 monitoring program

Figure 32: Packet folder with files recording packets after each conversion when capturing

  • Then check the log.txt file to review the activities and see if anything was detected. The detected attacks based on CVE-2017-8464 have also been recorded in the log with specific timestamps and IP addresses, just like the notifications during program execution.

Figure 33: All alerts saved to log

CONCLUSION

Through the process of exploiting and building a detection program for CVE-2017-8464, students understand how to exploit a vulnerability, thereby analyzing the signature as well as the behavioral patterns of the malware exploiting the vulnerability. With that behavioral and signature analysis, students will be able to write their own programs to automatically collect, analyze, and process network security monitoring information to issue malware detection alerts.

Download Tool