 synlace/ferret
The collaborative web app pentest suite


The collaborative MITM proxy for security testers.
Capture HTTP traffic, annotate requests with AI, run hunt sessions, replay traffic, and track findings from one interface.





Quick start · Features · Screenshots · Configuration · Security · Contributing
git clone https://github.com/synlace/ferret.git
cd ferret

cp .env.example .env   # optional
just up
Or use Docker Compose directly:
docker compose up --build -d
| Service | URL |
|---|---|
| UI | http://localhost:3000 |
| API | http://localhost:8000 |
| Proxy | 127.0.0.1:1337 |
Open:
http://localhost:3000
The first-run setup wizard will ask you to set a password and choose an AI provider.
justFerret is an AI-assisted HTTP interception proxy built for security testers.
Point your browser, CLI tool, or testing workflow at:
127.0.0.1:1337
Ferret captures requests and responses, stores them locally, annotates traffic with AI, and gives you tools to replay, modify, test, and turn interesting behaviour into findings.
It is designed for workflows where you want more than a passive proxy: you want something that helps you think, test, and document as you go.
| Feature | Description |
|---|---|
| Intercepting proxy | Capture HTTP and HTTPS traffic through mitmproxy. |
| Request history | Browse, filter, inspect, and replay captured traffic. |
| AI annotations | Enrich requests with security-relevant context. |
| Hunts | Run AI-assisted hunt sessions across captured traffic. |
| Findings | Track vulnerabilities with severity, host, type, evidence, and status. |
| Snare | Intercept and modify requests or responses in-flight. |
| Gnaw | Repeater-style tabs for editing and resending HTTP requests. |
| Workspaces | Per-session scripts/, tests/, and notes/ directories. |
| Projects | Separate request history, findings, workspaces, and API keys. |
| Authentication | Password login, session cookies, optional API key access, and TOTP 2FA. |
| Local-first storage | SQLite-backed data stored in a local bind-mounted directory. |
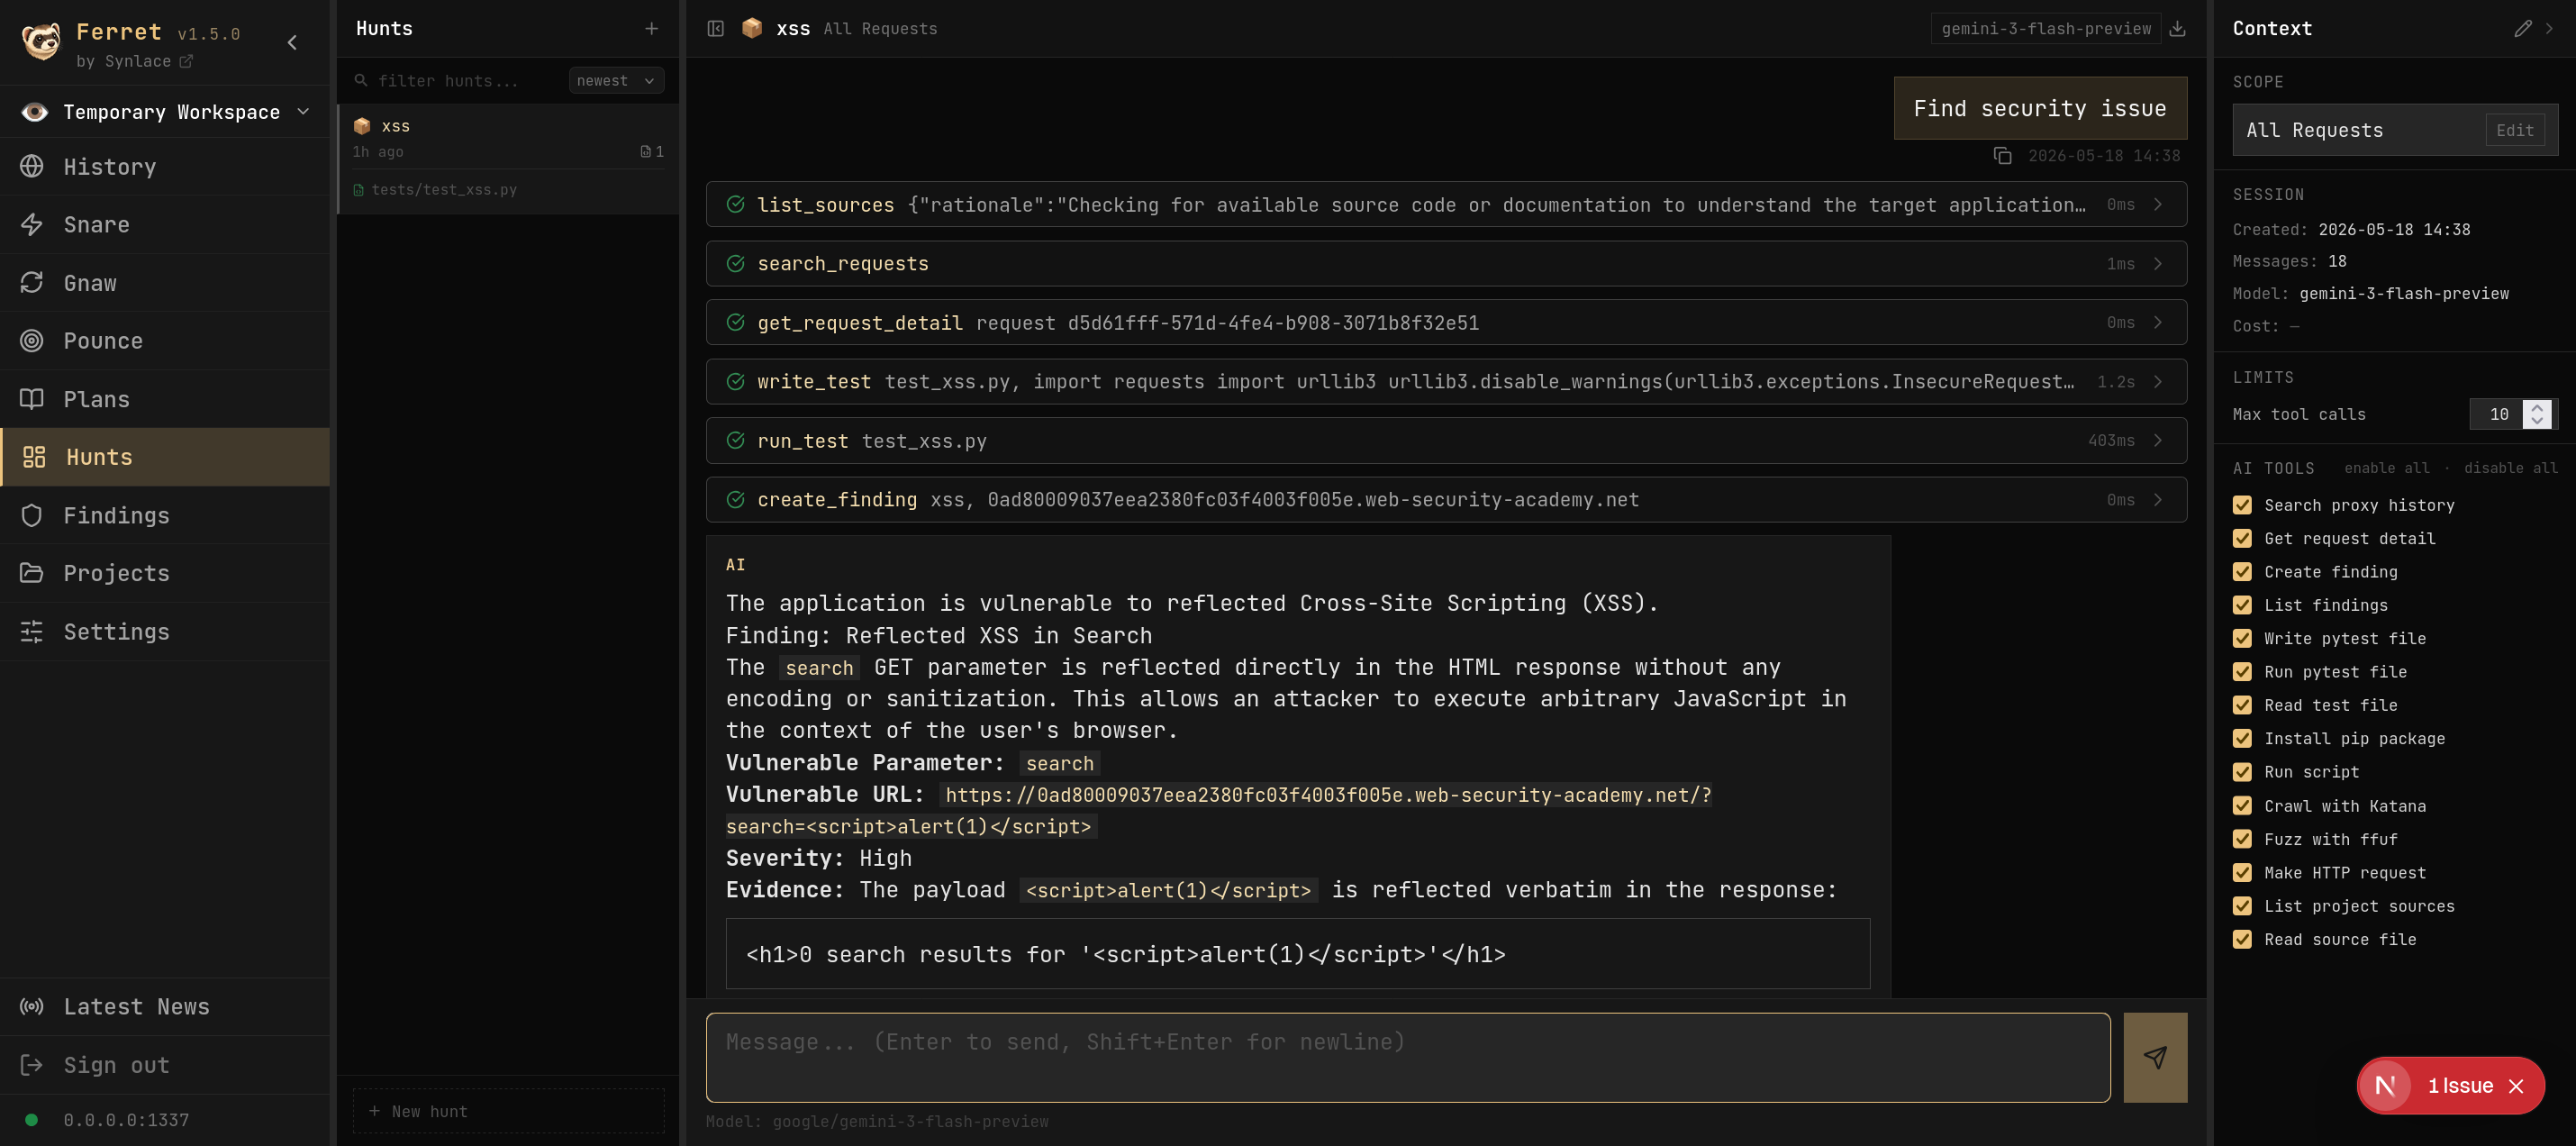
Hunts - AI-assisted hunt sessions that search request history, write and run tests, and create findings.
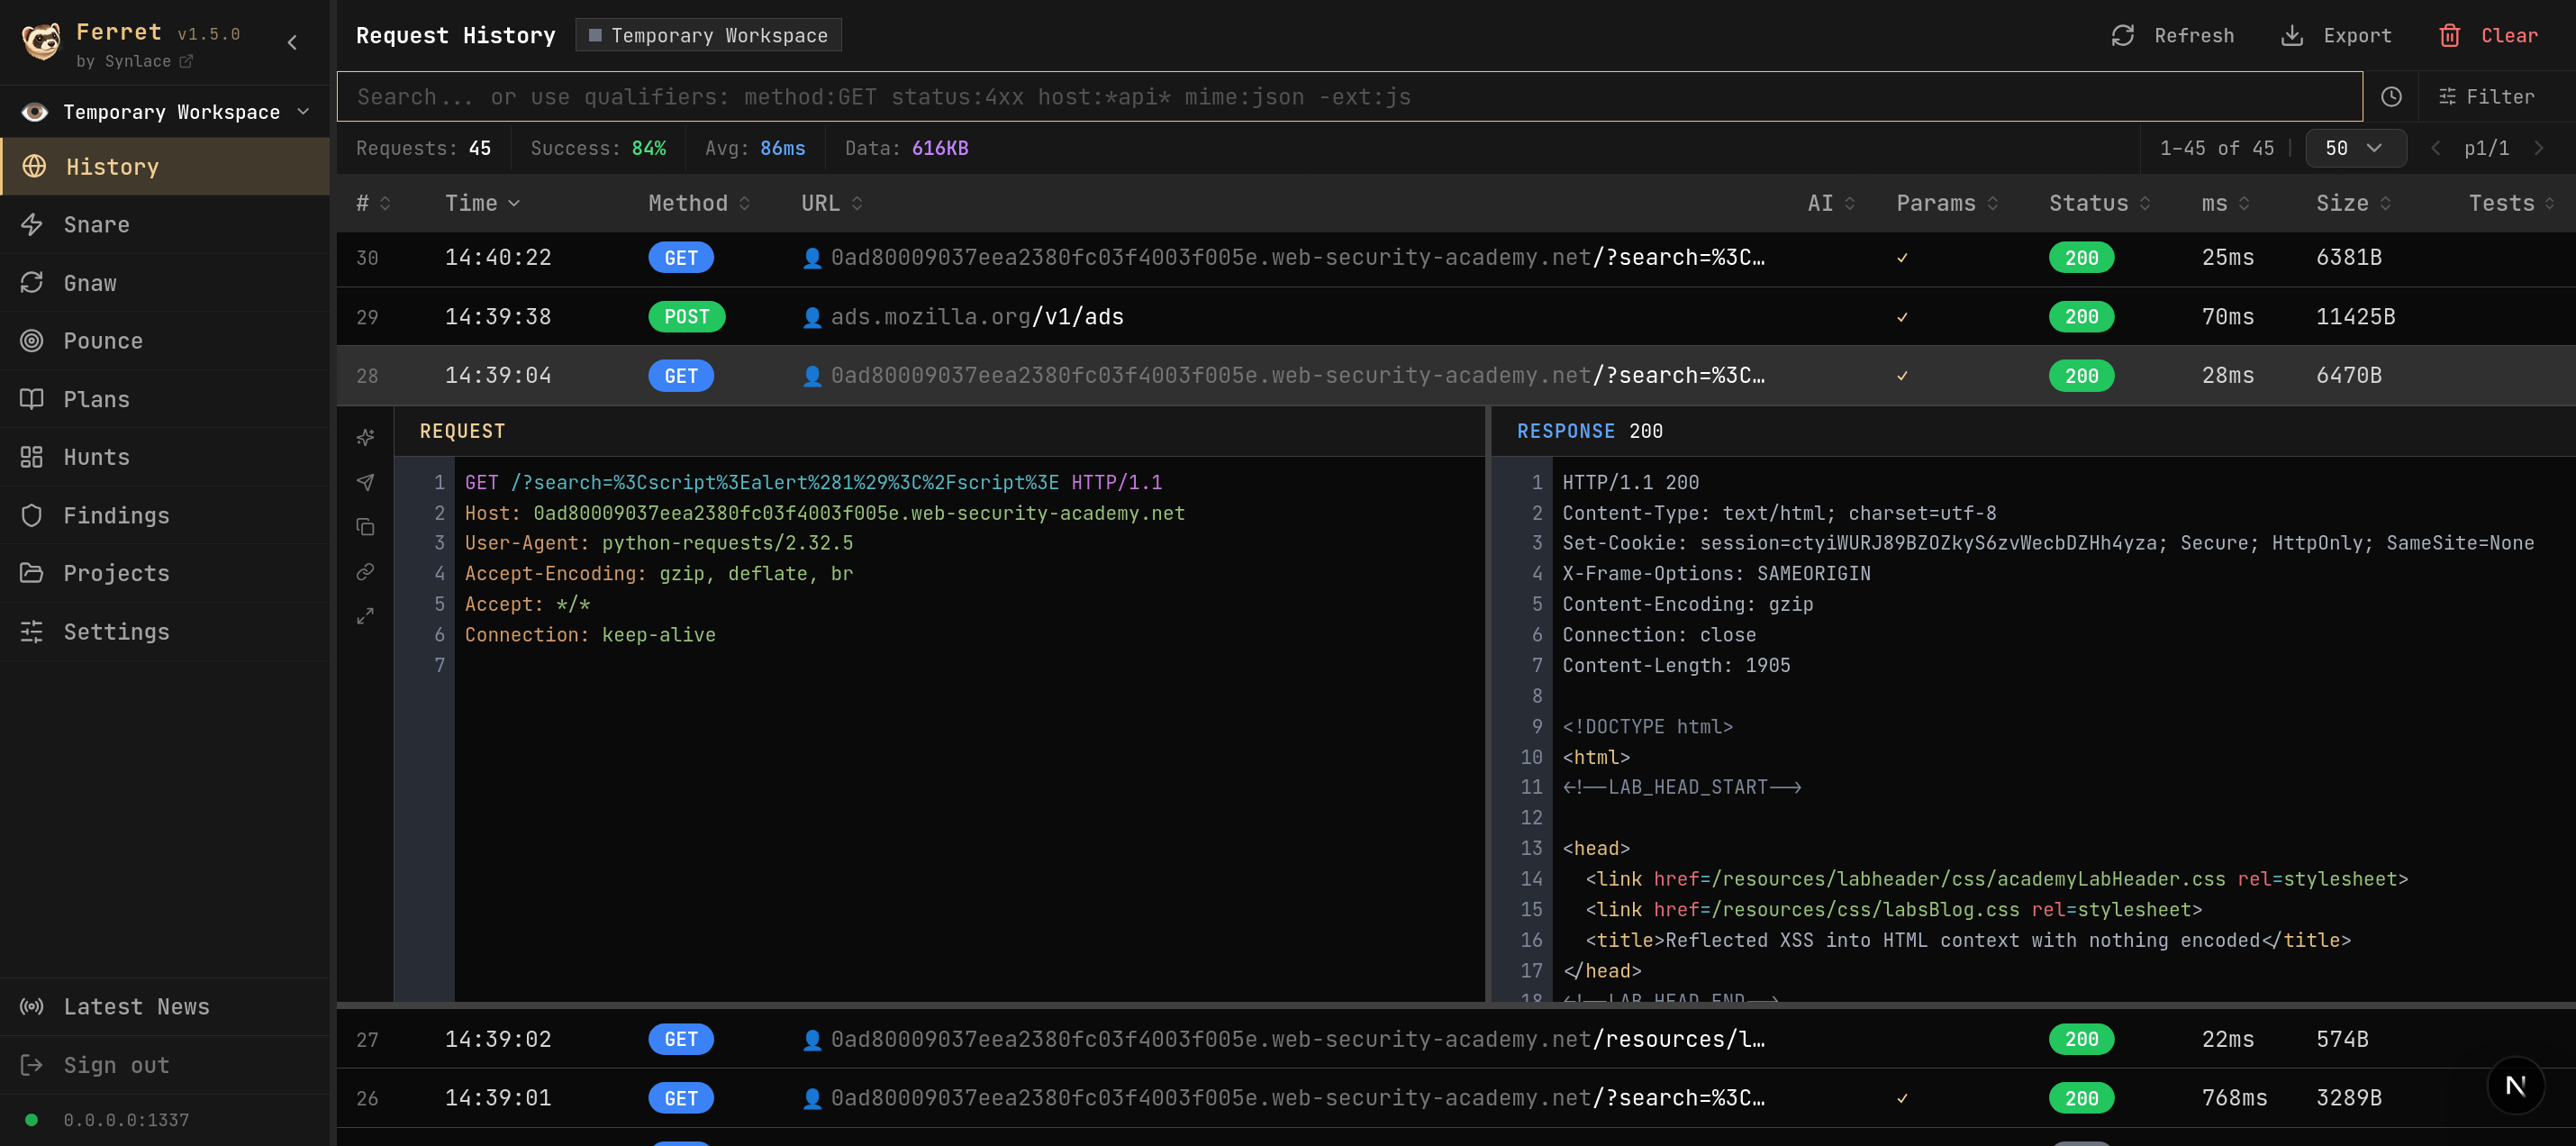
History - A full proxied request log with AI annotations, timings, status codes, and inline request/response editors.
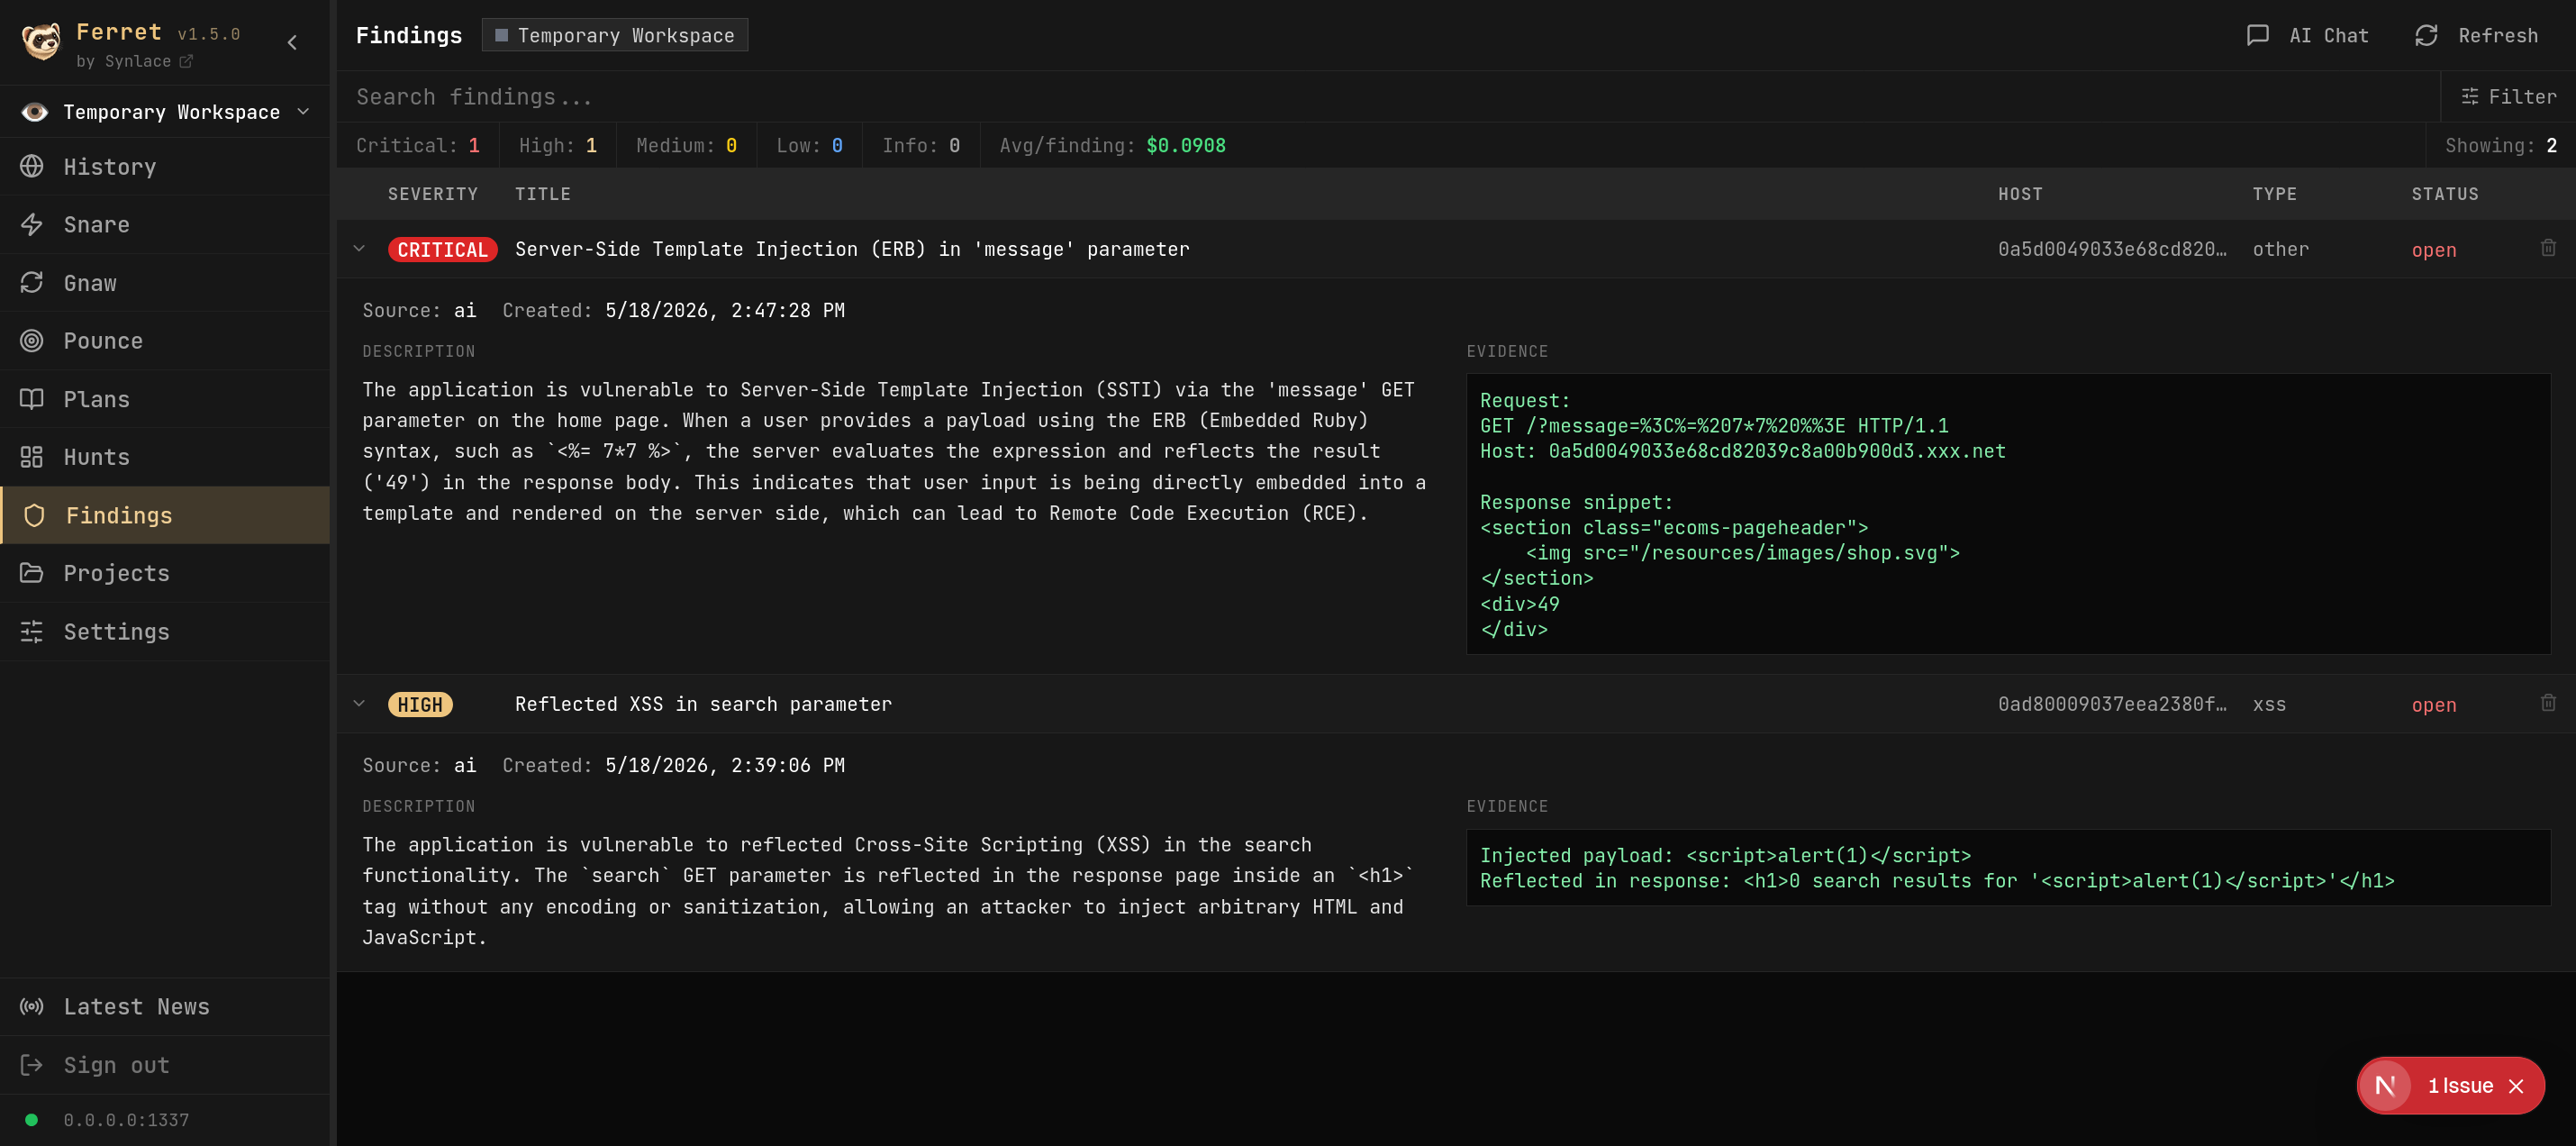
Findings - A vulnerability tracker with severity, host, type, AI-generated descriptions, and evidence snippets.
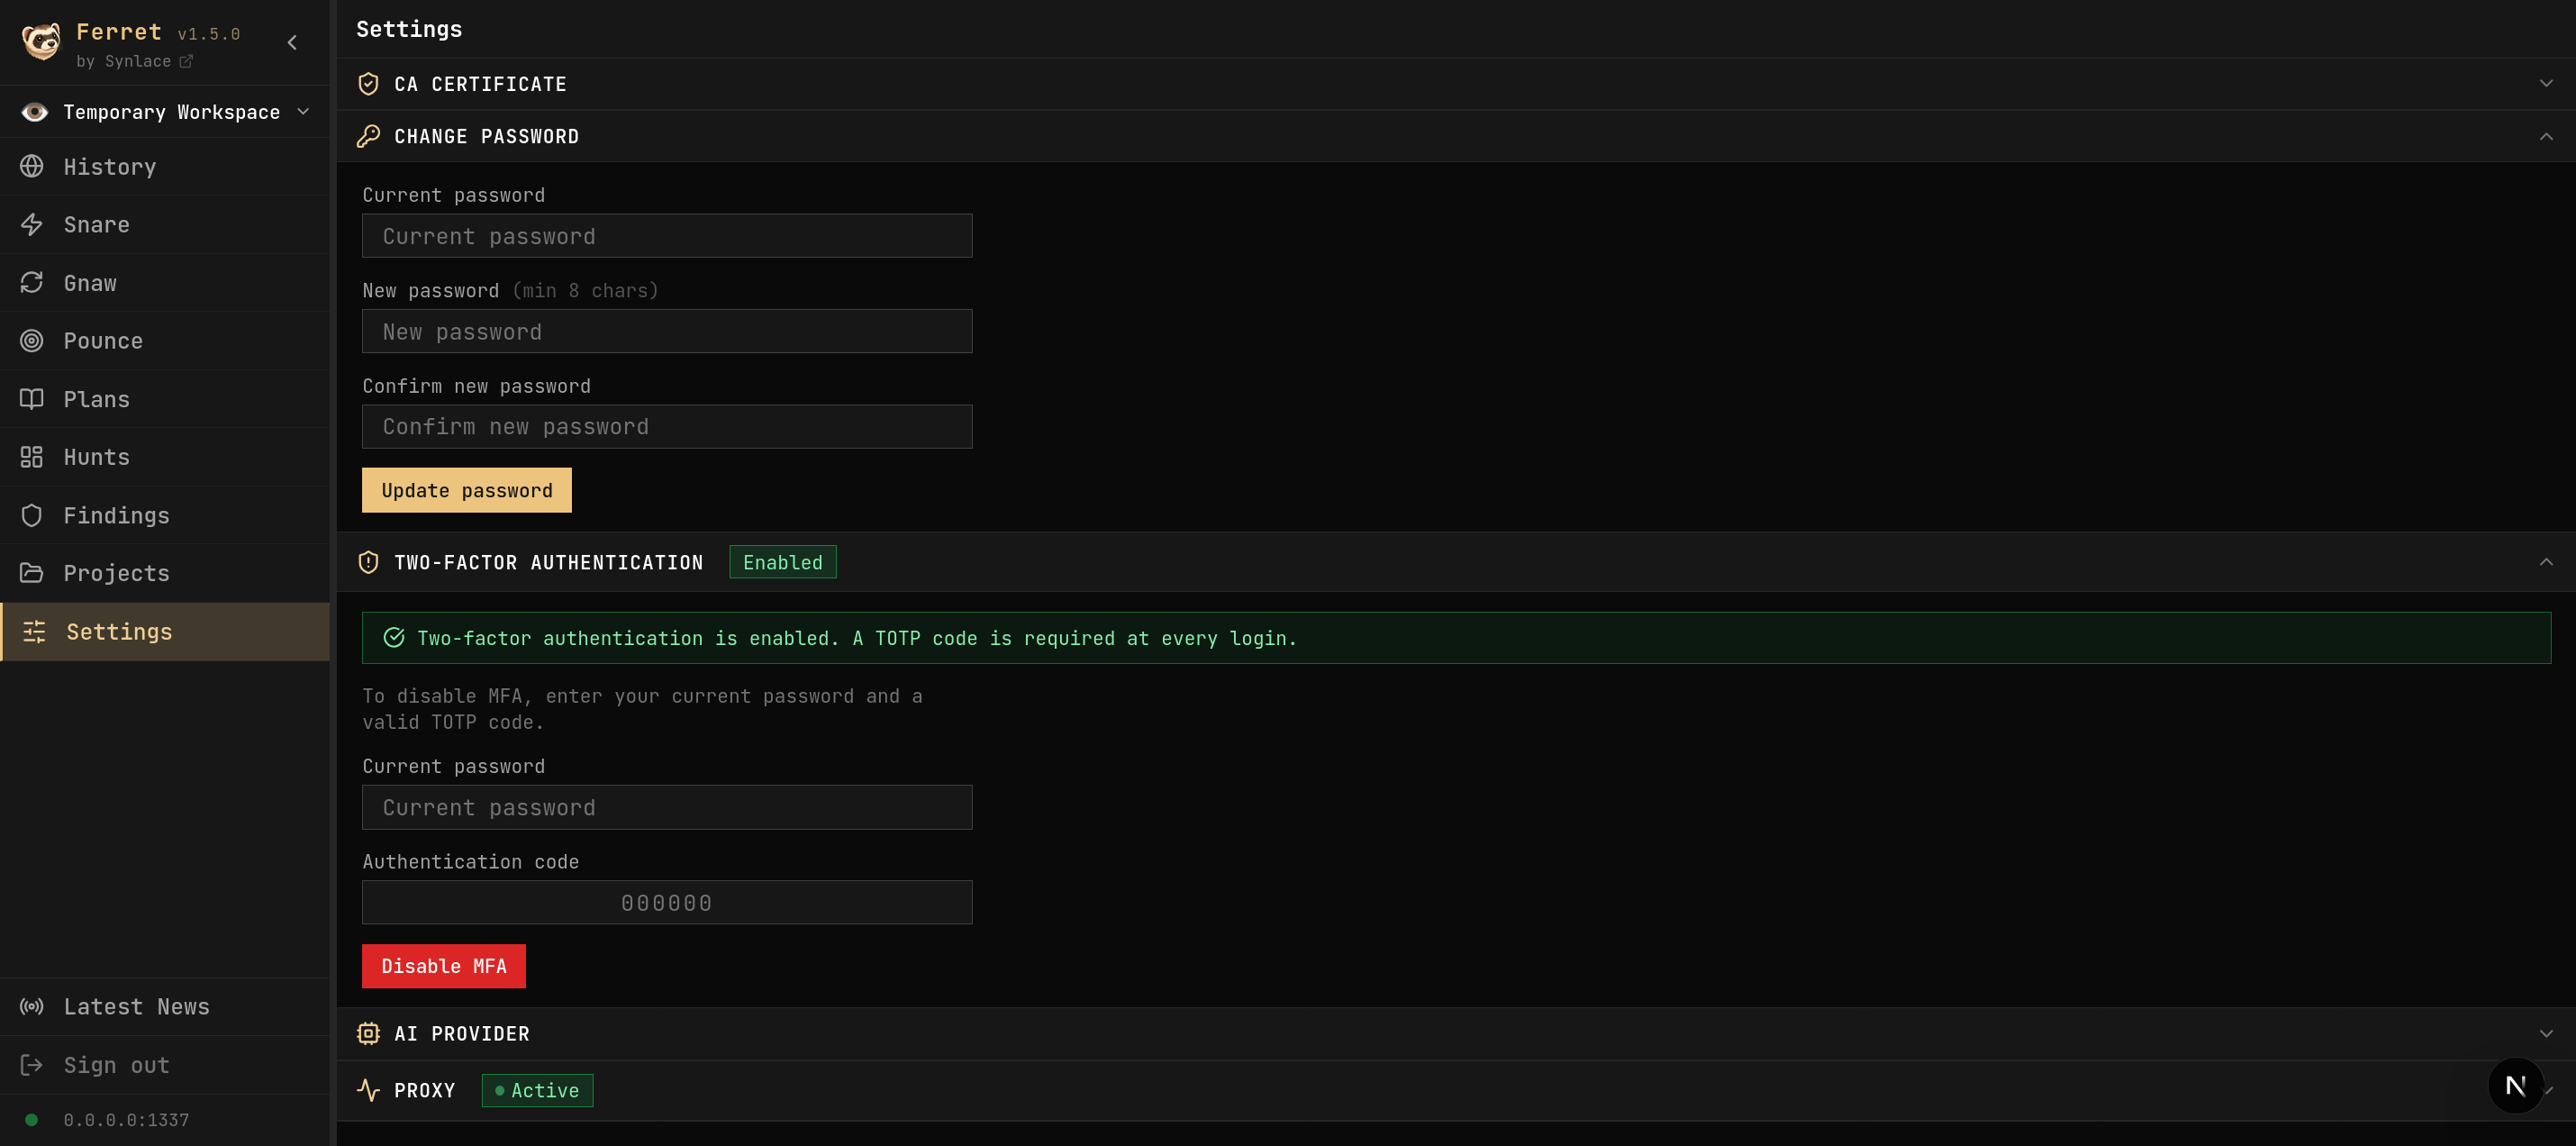
Settings - Manage the CA certificate, password, 2FA, AI provider, API keys, and proxy status.
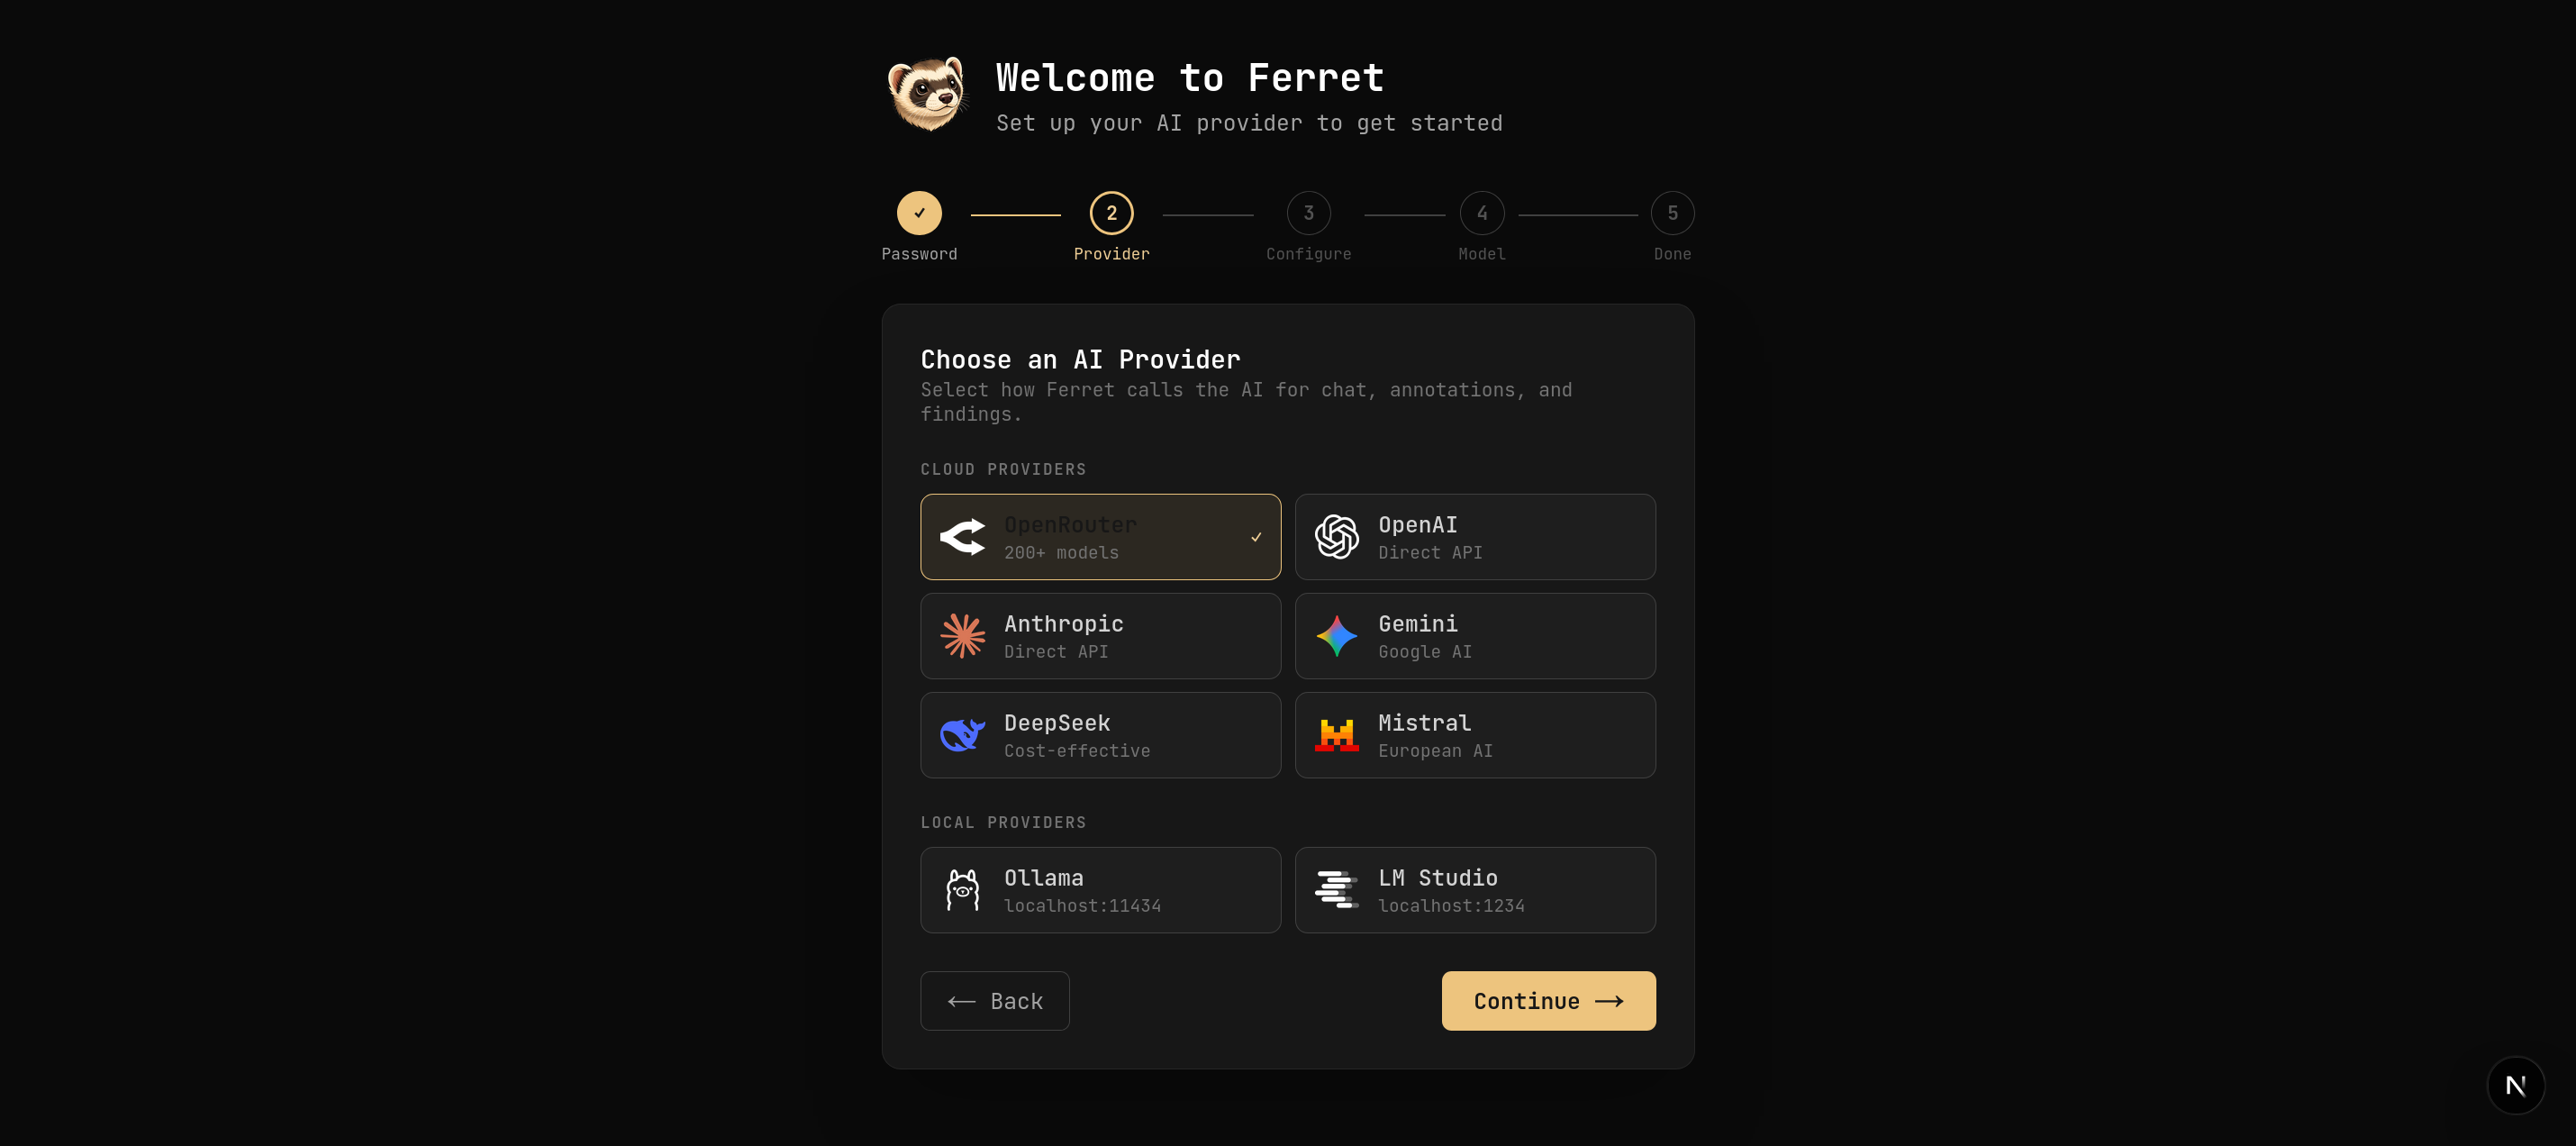
Setup wizard - First-run setup for password creation and AI provider configuration.
Configure your browser, CLI tool, or test client to use:
HTTP proxy:  127.0.0.1:1337
HTTPS proxy: 127.0.0.1:1337
For HTTPS interception, download and install the mitmproxy CA certificate from the Settings page.
Ferret requires authentication on every install.
/login.HttpOnly SameSite=Strict session cookie.TOTP-based 2FA can be enabled from the Settings page.
Once enabled, a valid authenticator code is required at login.
Set a static API key in .env:
FERRET_API_KEY=your-random-secret
Then use it as a Bearer token:
curl -H "Authorization: Bearer your-random-secret" \
  http://localhost:8000/api/requests
Session cookies and Bearer tokens are checked independently.
Copy .env.example to .env to preconfigure Ferret.
Most AI provider settings can also be configured from the setup wizard.
| Variable | Default | Description |
|---|---|---|
FERRET_API_KEY | - | Static Bearer token for programmatic API access |
OPENROUTER_MODEL | google/gemini-3-flash-preview | Default OpenRouter model |
PROXY_HOST | 0.0.0.0 | Proxy bind address |
PROXY_PORT | 1337 | Proxy port |
UI_PORT | 3000 | UI port |
FERRET_DATA_DIR | ./data | Persistent data directory |
NEXT_PUBLIC_API_URL | http://localhost:8000 | API URL used by the browser |
NEXT_PUBLIC_SIGINT_URL | - | Optional SIGINT/news feed JSON URL |
