 password123456/about-hmac
HMAC Implementation Example and Explanation




An Example Implementation of Basic HMAC (Hash-based Message Authentication Code) Using Flask in Python.
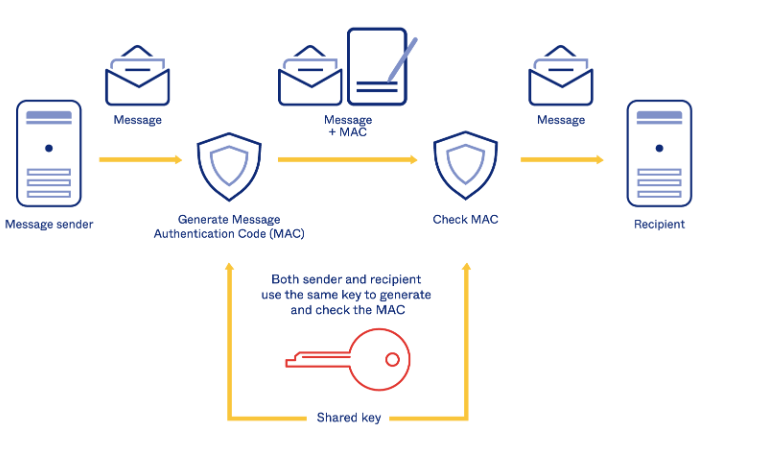
Hash-based message authentication code (HMAC) provides the server and the client each with a private key that is known only to that specific server and that specific client. The client creates a unique HMAC, or hash, per request to the server by hashing the request data with the private keys and sending it as part of a request. What makes HMAC more secure than Message Authentication Code (MAC) is that the key and the message are hashed in separate steps.
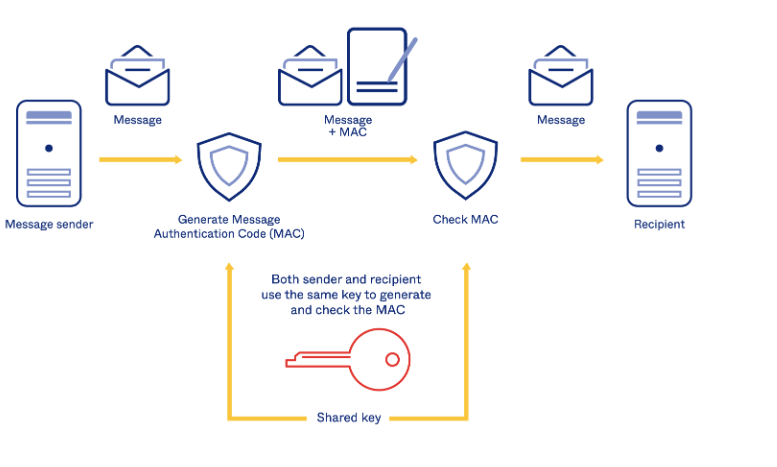
When a client sends a request to the server, it includes the following headers:
X-Authorization-Content-HMAC: HMAC hash (Entire Request URI, Current Unix Timestamp(UTC), and HMAC Secret key)
X-Authorization-Timestamp: Client current Unix Timestamp(UTC)
(request)
GET /example/users?user=test&institutionID=999&signature=7e745d74b69b7f62e8e2 HTTP/1.1
Host: example.com
X-Authorization-Content-HMAC: 1c73495878ccea24af9dd281a4c883c40a3551ba799d30f4ad7d9afb6a60fbd4
X-Authorization-Timestamp: 1711662980
[ Client Request Process ]
When the server responds to a valid request, it includes the following headers:
X-Response-Content-HMAC: HMAC hash (Entire response body, Current Unix Timestamp(UTC), and HMAC Secret key)
X-Response-Content-TimeStamp: Current Unix Timestamp(UTC)
(response)
HTTP/2 200 OK
Date: Fri, 29 Mar 2024 06:50:49 GMT
Content-Type: text/html; charset=utf-8
Content-Length: 52
X-Response-Content-HMAC: 529c33aac3e33bf2a95d534f8b3ac61dee2ed79232d729e571dc669417a1a2ae
X-Response-Content-TimeStamp: 1711663027
Connection: close

{"result": "ok", "users": "test", "sub": 2840345654}
[ Response Process ]
Server response HMAC verification successful
--------------
Response timestamp: 2024-03-29T09:25:31
Current time: 2024-03-29T09:25:31
Time difference: 0
If you find this helpful, please the "star"🌟 to support further improvements.
