 morpheuslord/gpt_vuln-analyzer
Uses ChatGPT API, Bard API, and Llama2, Python-Nmap, DNS Recon, PCAP and JWT recon modules and uses the GPT3 model to create vulnerability reports based on Nmap scan data, and DNS scan information. It can also perform subdomain enumeration to a great extent


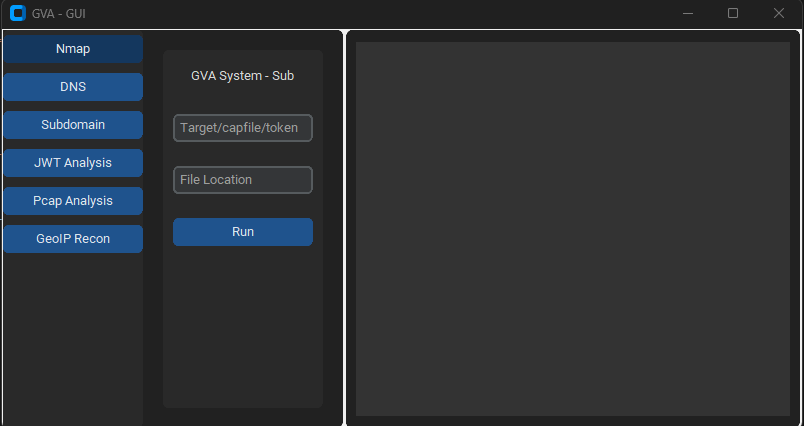
GVA is an AI-assisted reconnaissance and vulnerability-analysis toolkit. It runs the scan (nmap, DNS, subdomains, JWT, PCAP, GeoIP), then hands the raw output to a large language model that returns a structured, pentester-oriented analysis. It ships with both a command-line interface and a desktop GUI.
The AI layer is provider-agnostic: OpenAI, Anthropic Claude, Google Gemini, and local Ollama models are all supported. Pick one, or run several at once and let a deliberation agent reconcile their analyses into a single report.
pyproject.toml (managed with uv) or requirements.txtnmap on PATH for the nmap attacktshark on PATH for the pcap attackThe nmap attack shells out to the system nmap binary through python-nmap, so nmap
must be installed and runnable.
sudo, or you can pass --sudo. Profiles 1–5 run unprivileged; profile 1
is the default and works without root.libssh2.so.1: cannot open shared object file:
the system nmap is missing a shared library. If you use conda,
conda install -c conda-forge nmap is self-contained and takes PATH precedence.
Otherwise layer it with rpm-ostree install libssh2 (then reboot), or use
brew install nmap or a distrobox container.If nmap is missing or broken, the attack reports a clean error instead of crashing.
The install script sets up system packages, uv, and the Python dependencies. Run it as your normal user; it elevates only the system-package step with sudo.
./install.sh              # full install
./install.sh --no-system  # skip system packages (uv + Python deps only)
It auto-detects your package manager (apt, dnf, pacman, zypper, apk, brew, or
rpm-ostree), installs uv at user level, runs uv sync, and creates .env. Do not
sudo su first: if the project sits on a user-only mount (for example /run/host or
/media), root cannot read it, so the normal-user invocation is the reliable path.
To install manually with uv:
uv sync
pip install -r requirements.txt also works as a fallback.
Copy the example environment file and fill in keys for the providers you want. Any provider without a key is skipped automatically.
cp .env.example .env
GEOIP_API_KEY=
OPENAI_API_KEY=
ANTHROPIC_API_KEY=
GEMINI_API_KEY=
Every provider is a Pydantic AI agent that returns a validated, structured result. Select more than one and each model analyses the scan independently and concurrently; a deliberation agent (one of the selected models) then reconciles them into a single consolidated report. A live progress board shows each model's status, timing, and the deliberation step while it runs.
| Provider | Key | Default model | Approx. price / 1M tokens |
|---|---|---|---|
| OpenAI | openai | gpt-5.6-luna | $0.20 in / $1.20 out |
| Anthropic | claude | claude-haiku-4-5 | $1.00 in / $5.00 out |
gemini | gemini-3.6-flash | $0.75 in / $3.75 out | |
| Ollama | ollama | llama3 | local / free |
Override any model with the matching *_MODEL variable in .env. See .env.example
for alternatives. Ollama uses a local Docker image and is started automatically when
selected.
Run with uv run gpt_vuln.py ..., or python gpt_vuln.py ... inside an activated venv.
# Help
uv run gpt_vuln.py --help
uv run gpt_vuln.py --rich_menu help

# Nmap scan (default profile 1), analysed by OpenAI
python gpt_vuln.py --target scanme.nmap.org --attack nmap --ai openai

# Choose a scan profile (see the profile table below, or --list_profiles)
python gpt_vuln.py --target scanme.nmap.org --attack nmap --profile 2
python gpt_vuln.py --list_profiles

# DNS recon (no profile needed)
python gpt_vuln.py --target example.com --attack dns

# Subdomain enumeration (default or custom wordlist)
python gpt_vuln.py --target example.com --attack sub
python gpt_vuln.py --target example.com --attack sub --sub_list path/to/list.txt

# GeoIP lookup
python gpt_vuln.py --target 8.8.8.8 --attack geo

# JWT analysis
python gpt_vuln.py --target <token> --attack jwt

# PCAP analysis
python gpt_vuln.py --target capture.pcap --attack pcap --output outputs/output.json

# Several providers: each analyses independently, then one consolidated report
python gpt_vuln.py --target example.com --attack dns --ai openai,claude,gemini

# Choose which model deliberates, and also show each model's own analysis
python gpt_vuln.py --target example.com --attack dns --ai all --summarizer claude --show_individual

# Password cracking
python gpt_vuln.py --password_hash <hash> --wordlist_file words.txt --algorithm md5 --parallel

# Interactive step-by-step menu
python gpt_vuln.py --menu
--menu launches a guided interface that prompts for the target, options, and AI
providers for each attack.
┏━━━━━━━━━┳━━━━━━━━━━━━━━━━┓
┃ Option  ┃ Action         ┃
┡━━━━━━━━━╇━━━━━━━━━━━━━━━━┩
│ 1       │ Nmap scan      │
│ 2       │ DNS recon      │
│ 3       │ Subdomain enum │
│ 4       │ GeoIP lookup   │
│ 5       │ JWT analysis   │
│ 6       │ PCAP analysis  │
│ 7       │ Hash cracker   │
│ q       │ Quit           │
└─────────┴────────────────┘
Profiles 1–5 run unprivileged (TCP connect scans, no root). Profile 1 is the default.
Profiles 6–10 use SYN/UDP/OS-detection flags that need root; GVA escalates just the
nmap step with sudo when you pick one. Run python gpt_vuln.py --list_profiles to
see this table in your terminal.

