Skip to content
KitploitKITPLOIT
ToolsExploitsBlog
Log in
Submit
ToolsExploitsBlog
Submit

Hacking, PenTest, and Cybersecurity Tools for Your Security Arsenal!

Kitploit is a directory of hacking, cybersecurity, and pentesting tools. Discover the latest project updates to find vulnerabilities, analyze systems, automate testing, and strengthen your security.

··Feeds·Contact·Privacy·© 2026 Kitploit

Tool Directory

Categories

View all categories
Loading categories
flashlight — Pentesters spend too much time during information gathering phase. Flashlight (Fener) provides services to scan network/ports and gather information rapidly on target networks. So Flashlight should be the choice to automate discovery step during a penetration test. In this article, usage of Flashligh application will be explained. | Kitploit
Tools/GitHubGitHub/galkan/flashlight
Packet Sniffing & AnalysisReconnaissanceVulnerability ScannersNetwork MappingPort ScanningInformation GatheringPenetration Testing
GitHubgalkan/flashlight

flashlight

View Repository
19648229 years agoReviewed by Kitploit

Most Popular

View all →

Discover the most used tools by our community.

Explore all tools

Browse our collection of tools

View all tools →

About

Pentesters spend too much time during information gathering phase. Flashlight (Fener) provides services to scan network/ports and gather information rapidly on target networks. So Flashlight should be the choice to automate discovery step during a penetration test. In this article, usage of Flashligh application will be explained.

Share

Automated Information Gathering Tool for Penetration Testers

Videos :

https://www.youtube.com/watch?v=EUMKffaAxzs&list=PL1BVM6VWlmWZOv9Hv8TV2v-kAlUmvA5g7&index=4 https://www.youtube.com/watch?v=qCgW-SfYl1c&list=PL1BVM6VWlmWZOv9Hv8TV2v-kAlUmvA5g7&index=5 https://www.youtube.com/watch?v=98Soe01swR8&list=PL1BVM6VWlmWZOv9Hv8TV2v-kAlUmvA5g7&index=6 https://www.youtube.com/watch?v=9wft9zuh1f0&list=PL1BVM6VWlmWZOv9Hv8TV2v-kAlUmvA5g7&index=7

Pentesters spend too much time during information gathering phase. Flashlight (Fener) provides services to scan network/ports and gather information rapidly on target networks. So Flashlight should be the choice to automate discovery step during a penetration test. In this article, usage of Flashligh application will be explained.

For more information about using Flashlight, "-h" or "-help" option can be used.

Parameters for the usage of this application can be listed below

  • -h, --help: It shows the information about using the Flashlight application.
  • -p <ProjectName> or --project < ProjectName>: It sets project name with the name given. This paramater can be used to save different projects in different workspaces.
  • -s <ScanType> or –scan_type < ScanType >: It sets the type of scans. There are four types of scans: Active Scan , Passive Scan, Screenshot Scan and Filtering. These types of scans will be examined later in detail.
  • -d < DestinationNetwork>, --destination < DestinationNetwork >: It sets the network or IP where the scan will be executed against.
  • -c <FileName>, --config <FileName>: It specifies the configuration file. The scanning is realized according to the information in the configuration file.
  • -u <NetworkInterface>, --interface < NetworkInterface>: It sets the network interface used during passive scanning.
  • -f <PcapFile>, --pcap_file < PcapFile >: It sets cap File that will be filtered.
  • -r <RasterizeFile>, --rasterize < RasterizeFile>: It sets the specific location of Rasterize JavaScript file which will be used for taking screenshots.
  • -t <ThreadNumber>, --thread <Threadnember>: It sets the number of Threads. This parameter is valid only on screenshot scanning (screen scan) mode.
  • -o <OutputDiectory>, --output < OutputDiectory >: It sets the directory in which the scan results can be saved. The scan results are saved in 3 sub-directories : For Nmap scanning results, "nmap" subdirectory, for PCAP files "pcap" subdirectory and for screenshots "screen" subdirectories are used. Scan results are saved in directory, shown under the output directories by this parameter. If this option is not set, scan results are saved in the directory that Flashlight applications are running.
  • -a, --alive: It performs ping scan to discover up IP addresses before the actual vulnerability scan. It is used for active scan.
  • -g <DefaultGateway>, --gateway < DefaultGateway >: It identifies the IP address of the gateway. If not set, interface with “-I” parameter is chosen.
  • -l <LogFile>, --log < LogFile >: It specifies the log file to save the scan results. If not set, logs are saved in “flashlight.log” file in working directory.
  • -k <PassiveTimeout>, --passive_timeout <PassiveTimeout>: It specifies the timeout for sniffing in passive mode. Default value is 15 seconds. This parameter is used for passive scan.
  • -m, --mim: It is used to perform MITM attack.
  • -n, --nmap-optimize: It is used to optimize nmap scan.
  • -v, --verbose: It is used to list detailed information.
  • -V, --version: It specifies version of the program.

Installation

``` apt-get install nmap tshark tcpdump dsniff ```

In order to install phantomjs easily, you can download and extract it from https://bitbucket.org/ariya/phantomjs/downloads.

Flashlight application can perform 3 basic scan types and 1 analysis type. Each of them are listed below.

1) Passive Scan

In passive scan, no packets are sent into wire. This type of scan is used for listening network and analyzing packets.

To launch a passive scan by using Flashlight; a project name should be specified like “passive-pro-01”. In the following command, packets that are captured by eth0 are saved into “/root/Desktop/flashlight/output/passive-project-01/pcap" directory, whereas, Pcap files and all logs are saved into "/root/Desktop/log" directory.

./flashlight.py -s passive -p passive-pro-01 -i eth0 -o /root/Desktop/flashlight_test -l /root/Desktop/log –v

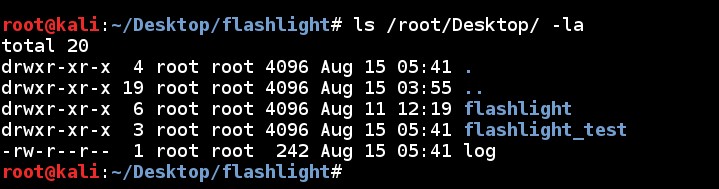
When the scan is completed a new directory, named “flashlight_test" and a log file, named “log”, are created in "/root/Desktop/" directory.
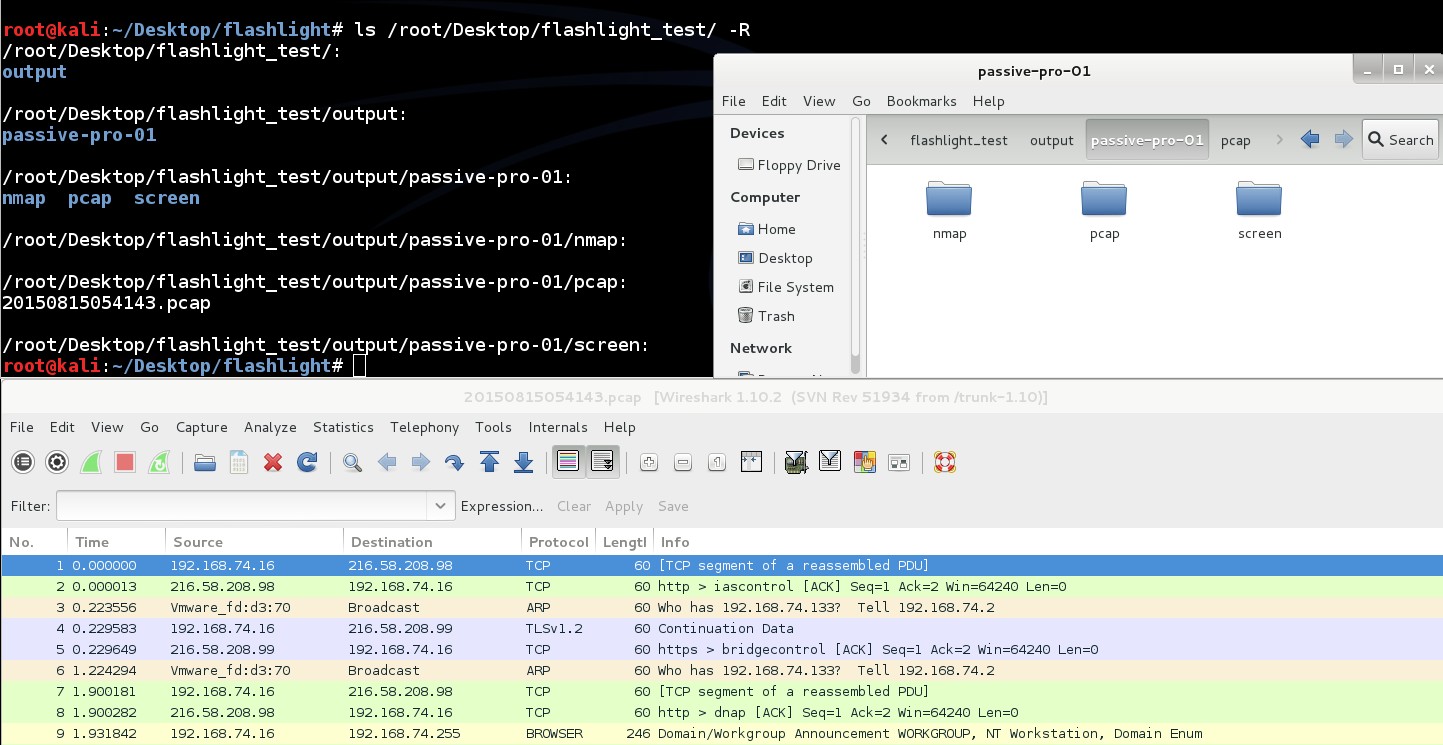
Directory structure of “flashlight_test” is like below. PCAP file is saved into “/root/Desktop/flashlight_test/output/passive-pro-01/pcap” directory. This PCAP file can be used for analysis purposes. ls /root/Desktop/flashlight_test -R
Content of the log file is like command line output:

During standard passive scanning Broadcast packets and direct packets to scan machines are captured. Beside this, by using “-mim/-m” parameter, Arp Spoof and MITM attack can be performed.

./flashlight.py -s passive -p passive-project-02 -i eth0 -g 192.168.74.2 -m -k 50 -v

By analyzing captured PCAP file HTTP traffic can be seen.


Download Tool