 flangvik/azurec2relay
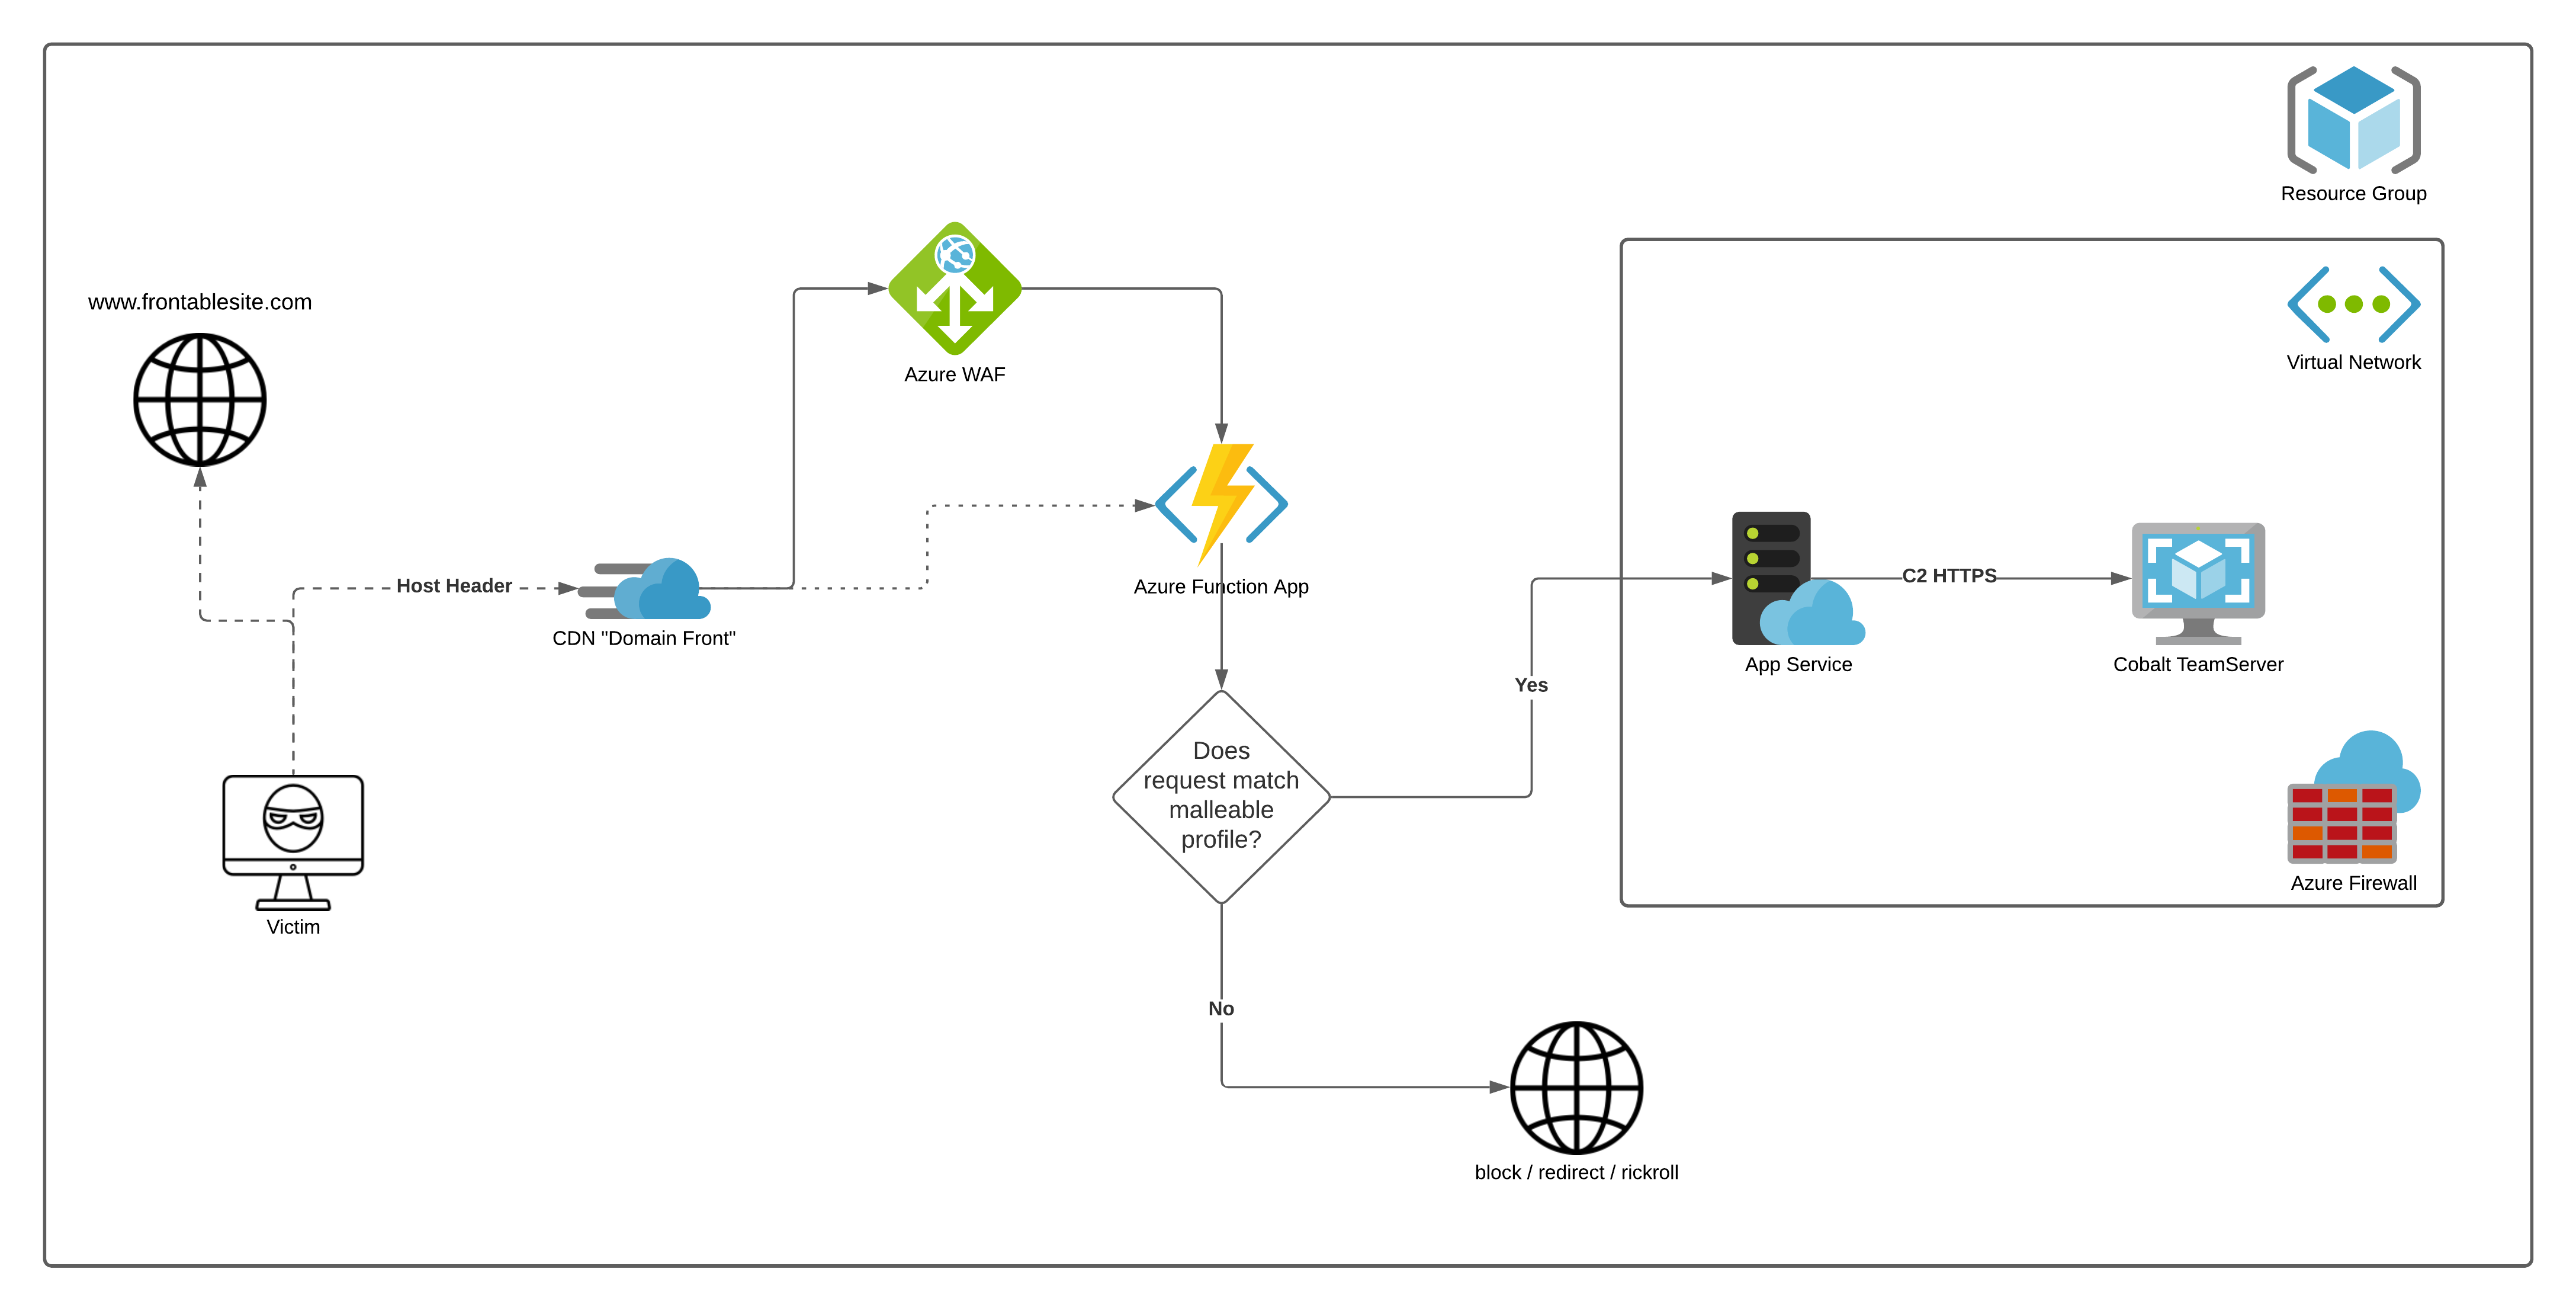
Azure Function that validates and relays Cobalt Strike beacon traffic using malleable C2 profiles, redirecting invalid requests to a decoy site and forwarding validated traffic to a team server over SSH.

AzureC2Relay is an Azure Function that validates and relays Cobalt Strike beacon traffic by verifying the incoming requests based on a Cobalt Strike Malleable C2 profile. Any incoming requests that do not share the profiles user-agent, URI paths, headers, and query parameters, will be redirected to a configurable decoy website. The validated C2 traffic is relayed to a team server within the same virtual network that is further restricted by a network security group. Allowing the VM to only expose SSH.
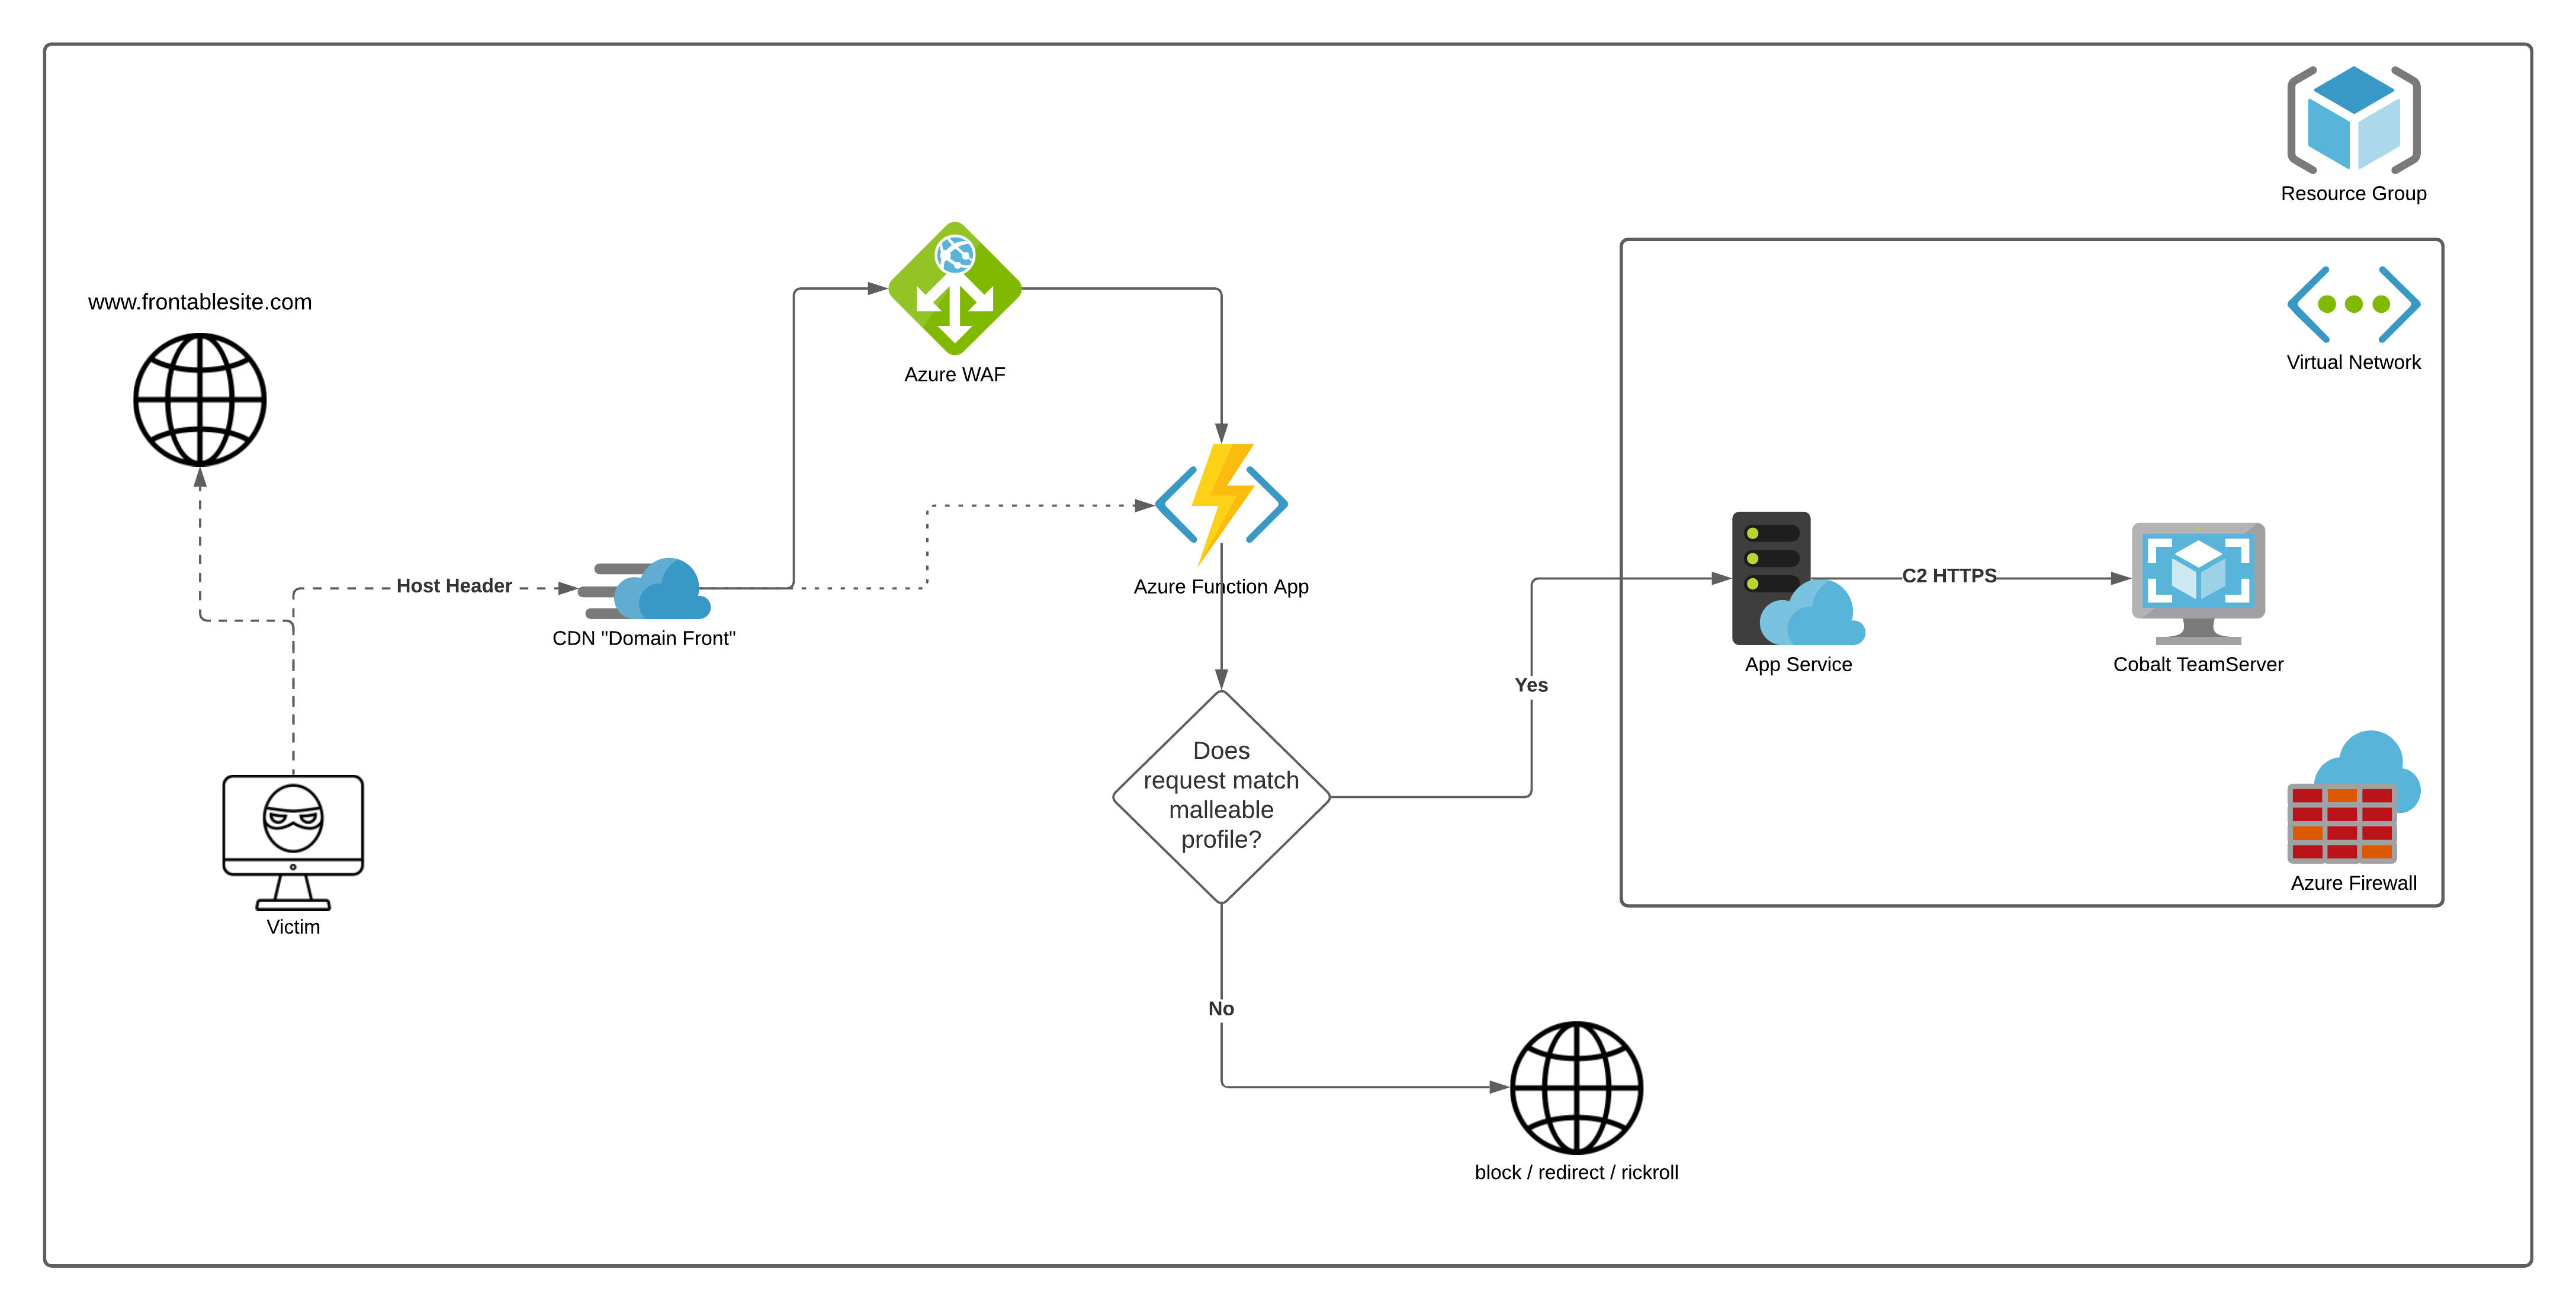
AzureC2Relay is deployed via terraform azure modules as well as some local az cli commands
Make sure you have terraform , az cli and the dotnet core 3.1 runtime installed
Windows (Powershell)
&([scriptblock]::Create((Invoke-WebRequest -UseBasicParsing 'https://dot.net/v1/dotnet-install.ps1'))) -runtime dotnet -version 3.1.0
Invoke-WebRequest 'https://releases.hashicorp.com/terraform/0.14.6/terraform_0.14.6_windows_amd64.zip'  -OutFile 'terraform.zip'
Expand-Archive -Path terraform.zip -DestinationPath "$([Environment]::GetFolderPath('ApplicationData'))\TerraForm\"
setx PATH "%PATH%;$([Environment]::GetFolderPath('ApplicationData'))\TerraForm\"
Invoke-WebRequest -Uri https://aka.ms/installazurecliwindows -OutFile .\AzureCLI.msi; Start-Process msiexec.exe -Wait -ArgumentList '/I AzureCLI.msi /quiet'; rm .\AzureCLI.msi
Mac
curl -L https://dot.net/v1/dotnet-install.sh | bash -s --  --runtime dotnet --version 3.1.0
brew update
brew tap hashicorp/tap
brew install hashicorp/tap/terraform
brew install azure-cli
Ubuntu , Debian
curl -L https://dot.net/v1/dotnet-install.sh | bash -s --  --runtime dotnet --version 3.1.0
wget https://releases.hashicorp.com/terraform/0.14.5/terraform_0.14.5_linux_amd64.zip
unzip terraform_0.14.5_linux_amd64.zip
sudo cp terraform /usr/local/bin/terraform
curl -sL https://aka.ms/InstallAzureCLIDeb | sudo bash
Kali
curl -L https://dot.net/v1/dotnet-install.sh | bash -s --  --runtime dotnet --version 3.1.0
wget https://releases.hashicorp.com/terraform/0.14.5/terraform_0.14.5_linux_amd64.zip
unzip terraform_0.14.5_linux_amd64.zip
sudo cp terraform /usr/local/bin/terraform
echo "deb [arch=amd64] https://packages.microsoft.com/repos/azure-cli/ stretch main" | sudo tee /etc/apt/sources.list.d/azure-cli.list
curl -L https://packages.microsoft.com/keys/microsoft.asc | sudo apt-key add -
sudo apt-get update && sudo apt-get install apt-transport-https azure-cli
config.tf to suit your needsaz loginterraform initterraform apply -auto-approve to deploy the infraOnce terraform completes it will provide you with the needed ssh command, the CobaltStrike teamserver will be running inside an tmux session on the deployed VM
When your done using the infra, you can remove it with terraform destroy -auto-approve
