 elhart05/airmongui
A locally-hosted GUI for the aircrack-ng wireless auditing suite.

A local web interface for the aircrack-ng wireless toolkit.





Screenshots · Quick start · Features · Roadmap · Contributing
[!WARNING] Use this only on networks you own or have written permission to test. Scanning, deauthenticating, or capturing traffic from networks you don't control is illegal in most places. See Legal and responsible use.
AirmonGUI puts airmon-ng, airodump-ng, aireplay-ng, and aircrack-ng behind one web app that runs on your own machine. You enable monitor mode, scan for networks, capture a WPA handshake, and crack it by clicking through labelled forms instead of remembering flags.
It does not reimplement any of the tools. The backend shells out to the real binaries and parses their output, so what you see is what the suite actually did. The UI binds to 127.0.0.1 and the API never reaches outside your machine.
The aircrack-ng suite is excellent, but the workflow lives across four separate commands and a lot of flags you have to keep in your head: put the card in monitor mode, hop channels to find a target, lock onto a BSSID, fire deauth on the correct channel, wait for the four-way handshake, then feed the capture into a wordlist. Miss the channel and the deauth goes nowhere. Forget --bssid and your capture is full of noise.
I wanted that whole sequence as a set of screens that walk you through it, show you what's on the air, and keep the state straight between steps. That is what this is. It works well for learning how the attacks actually behave, for lab work, and for speeding up an authorized assessment.
| Area | What it does |
|---|---|
| Monitor mode | Enable or disable monitor mode on a chosen interface with airmon-ng. A separate check-kill action runs airmon-ng check kill when background services like NetworkManager are blocking monitor mode. |
| Network scanning | Runs airodump-ng capture jobs and shows access points and clients in a live table you can filter by name, security, or band. |
| Signal analysis | Ranks access points by how attackable they are (signal strength, weak security, active clients) and charts channel congestion and the security mix in range. |
| Deauthentication | Sends targeted or broadcast deauth through aireplay-ng, setting the interface to the access point's channel first so the frames land. |
| Handshake capture | A three-step workflow that locks airodump-ng to a target, runs an auto-deauth engine, and detects the WPA four-way handshake on its own. |
| Cracking | Feeds a capture and a wordlist to aircrack-ng, streams the live log, and shows the recovered key the moment it appears. |
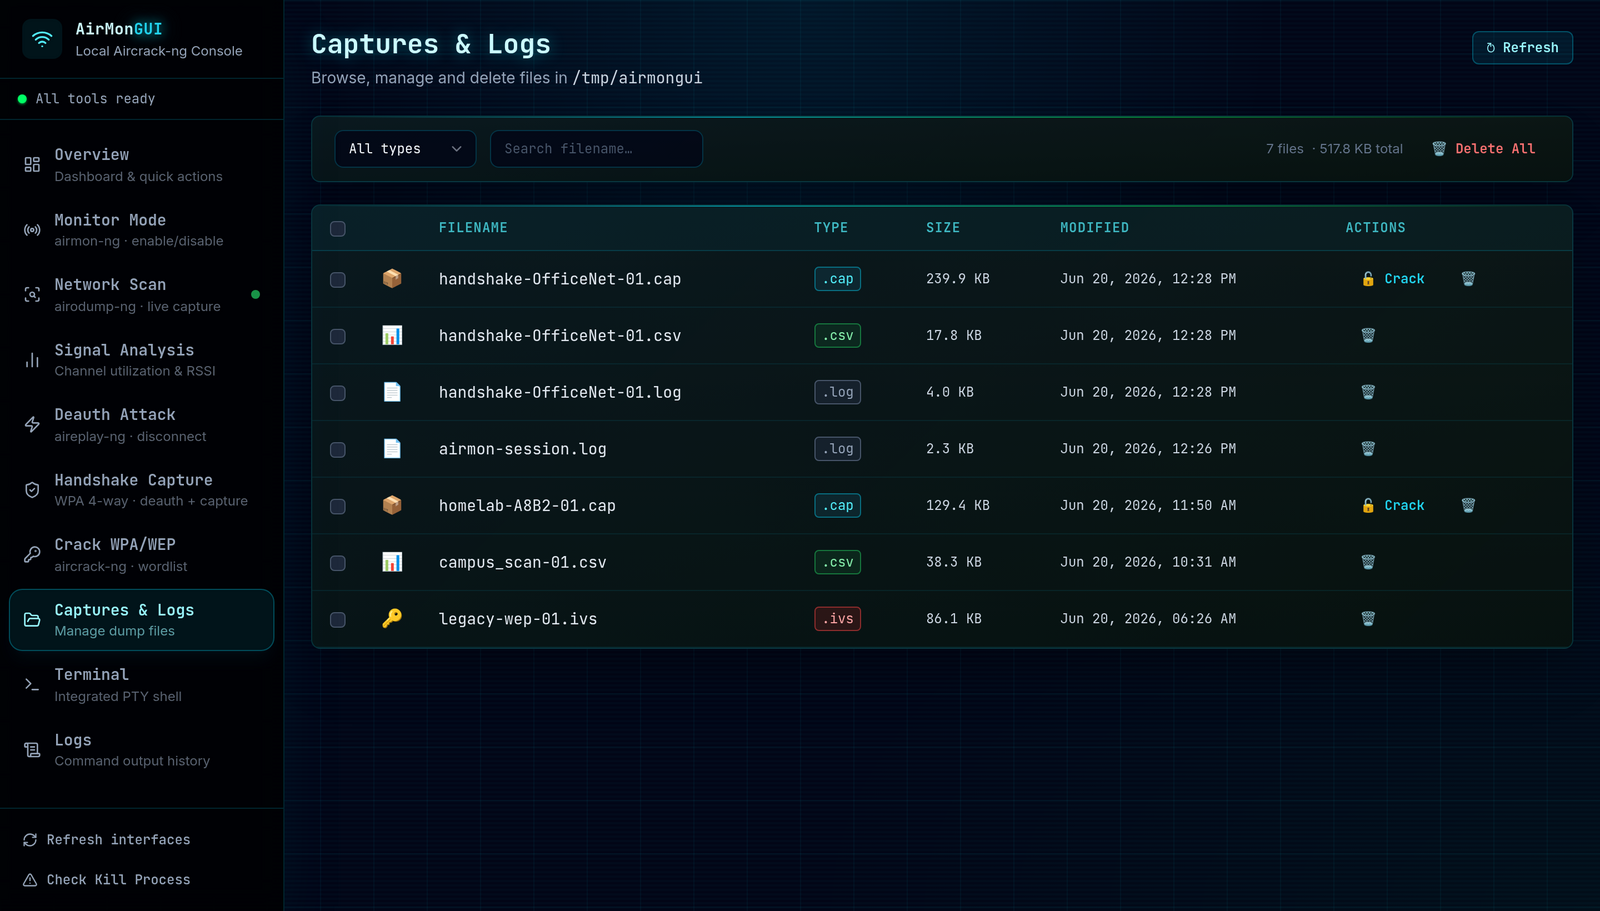
| Capture management | Browse, filter, bulk-select, and delete the .cap, .csv, .pcap, .ivs, and .log files the suite writes. |
| Integrated terminal | A real PTY shell (xterm.js) for when you want the raw command line in the same window. |
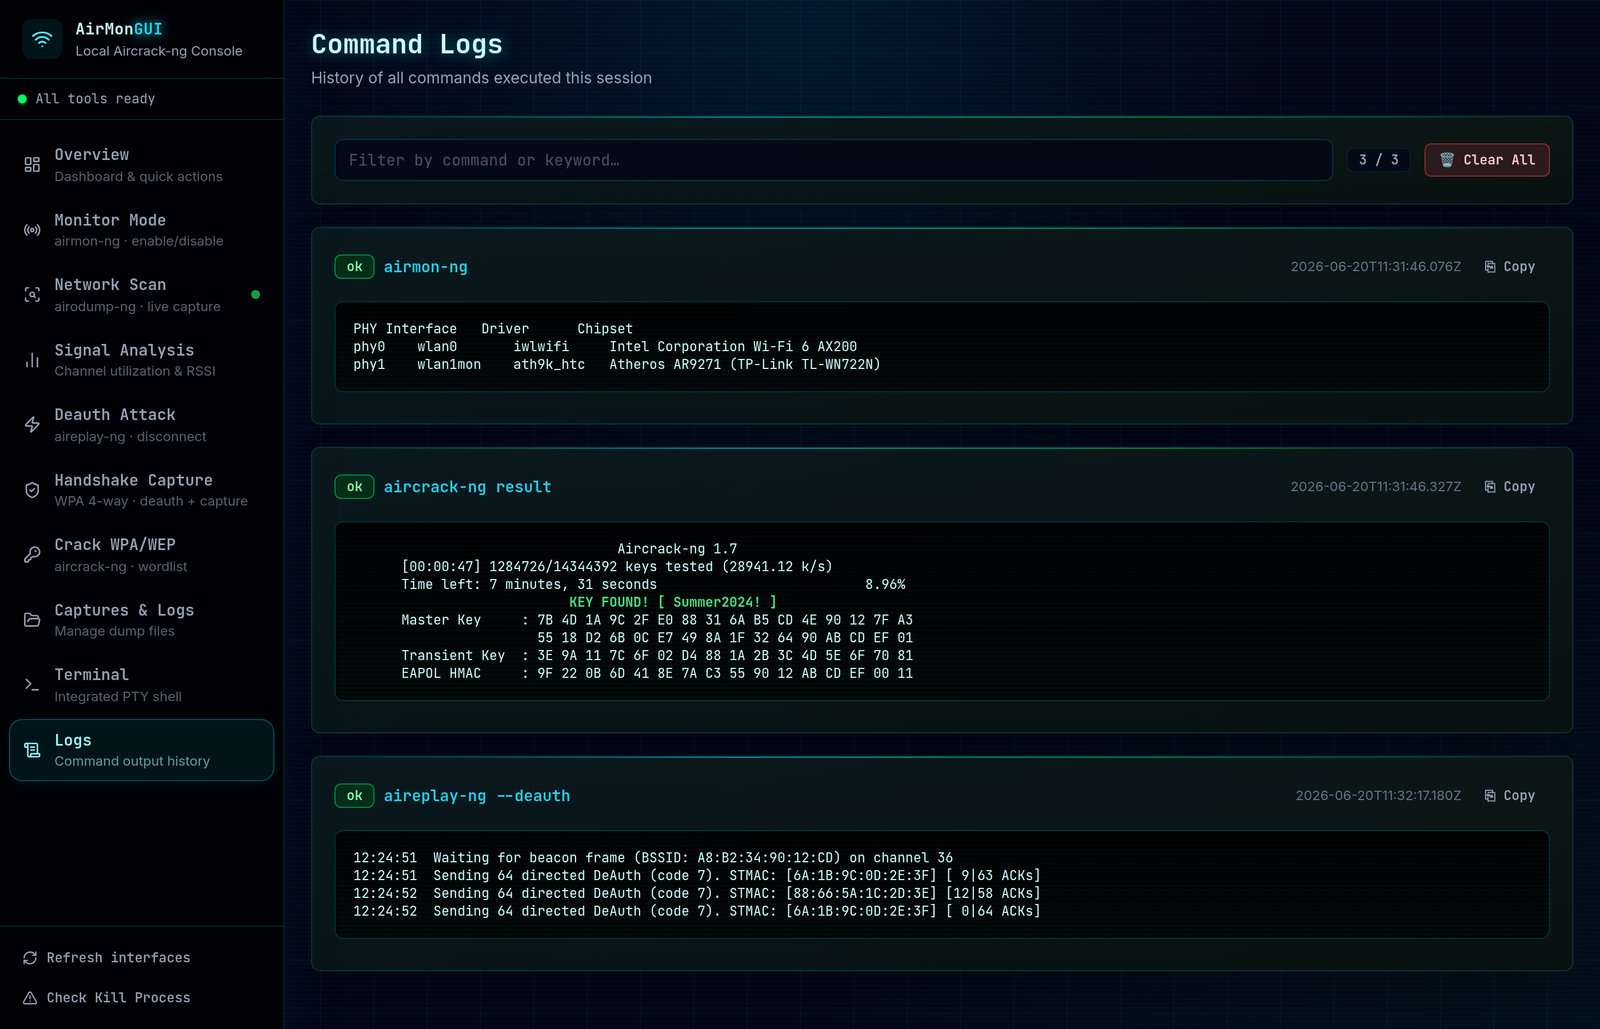
| Command logs | Every command run in the session, with stdout, stderr, status, and one-click copy. |
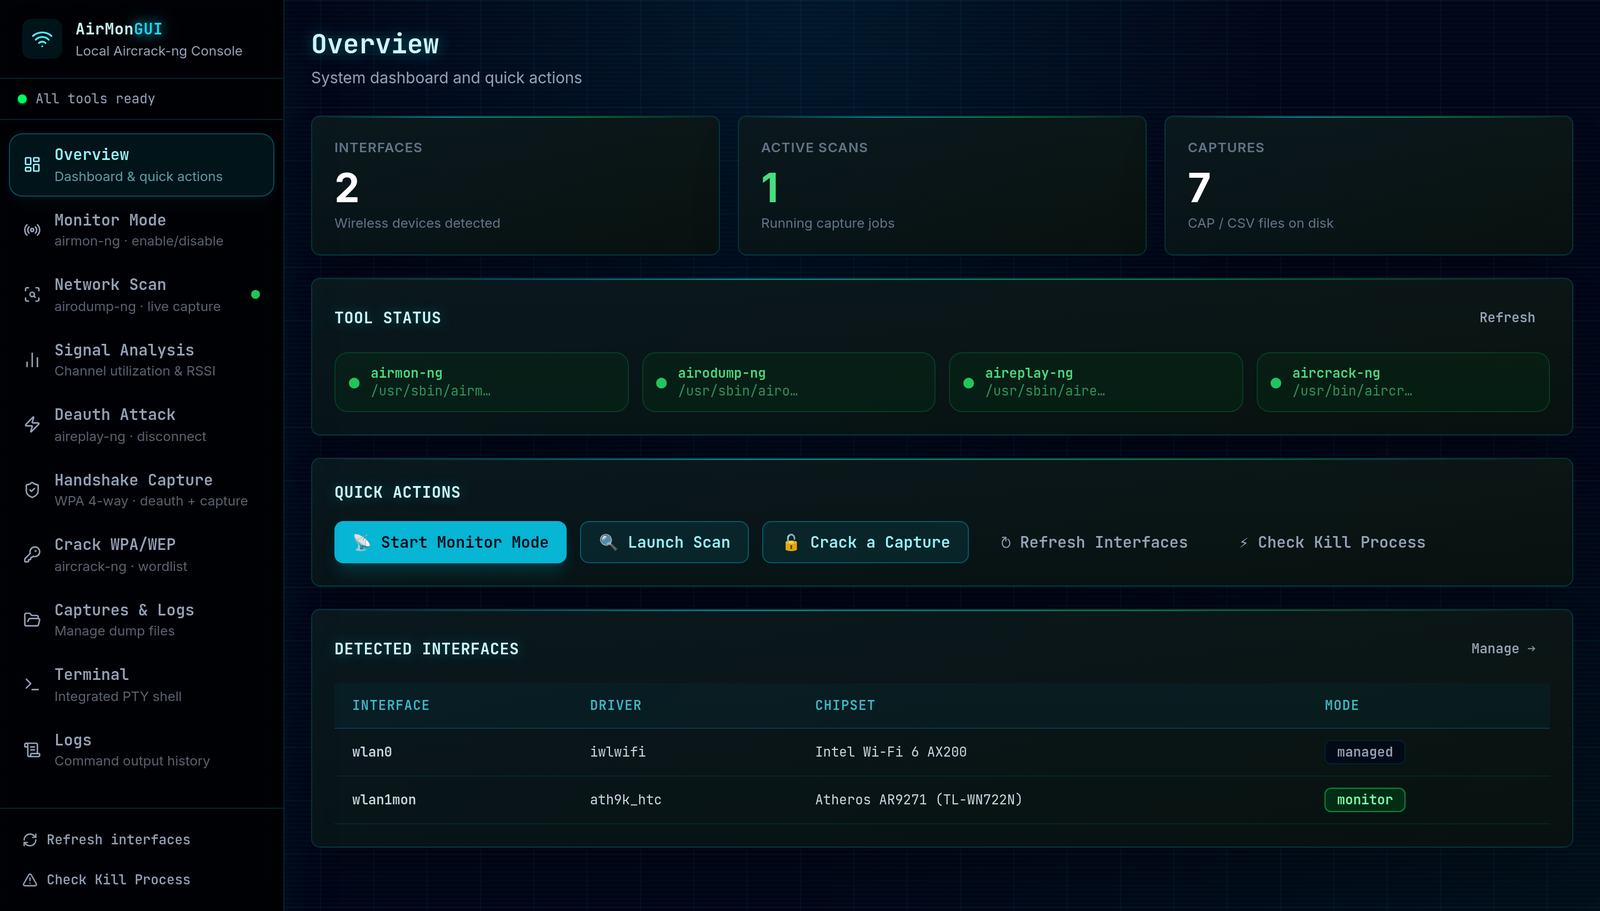
A run moves top to bottom down the sidebar. Here is each screen.
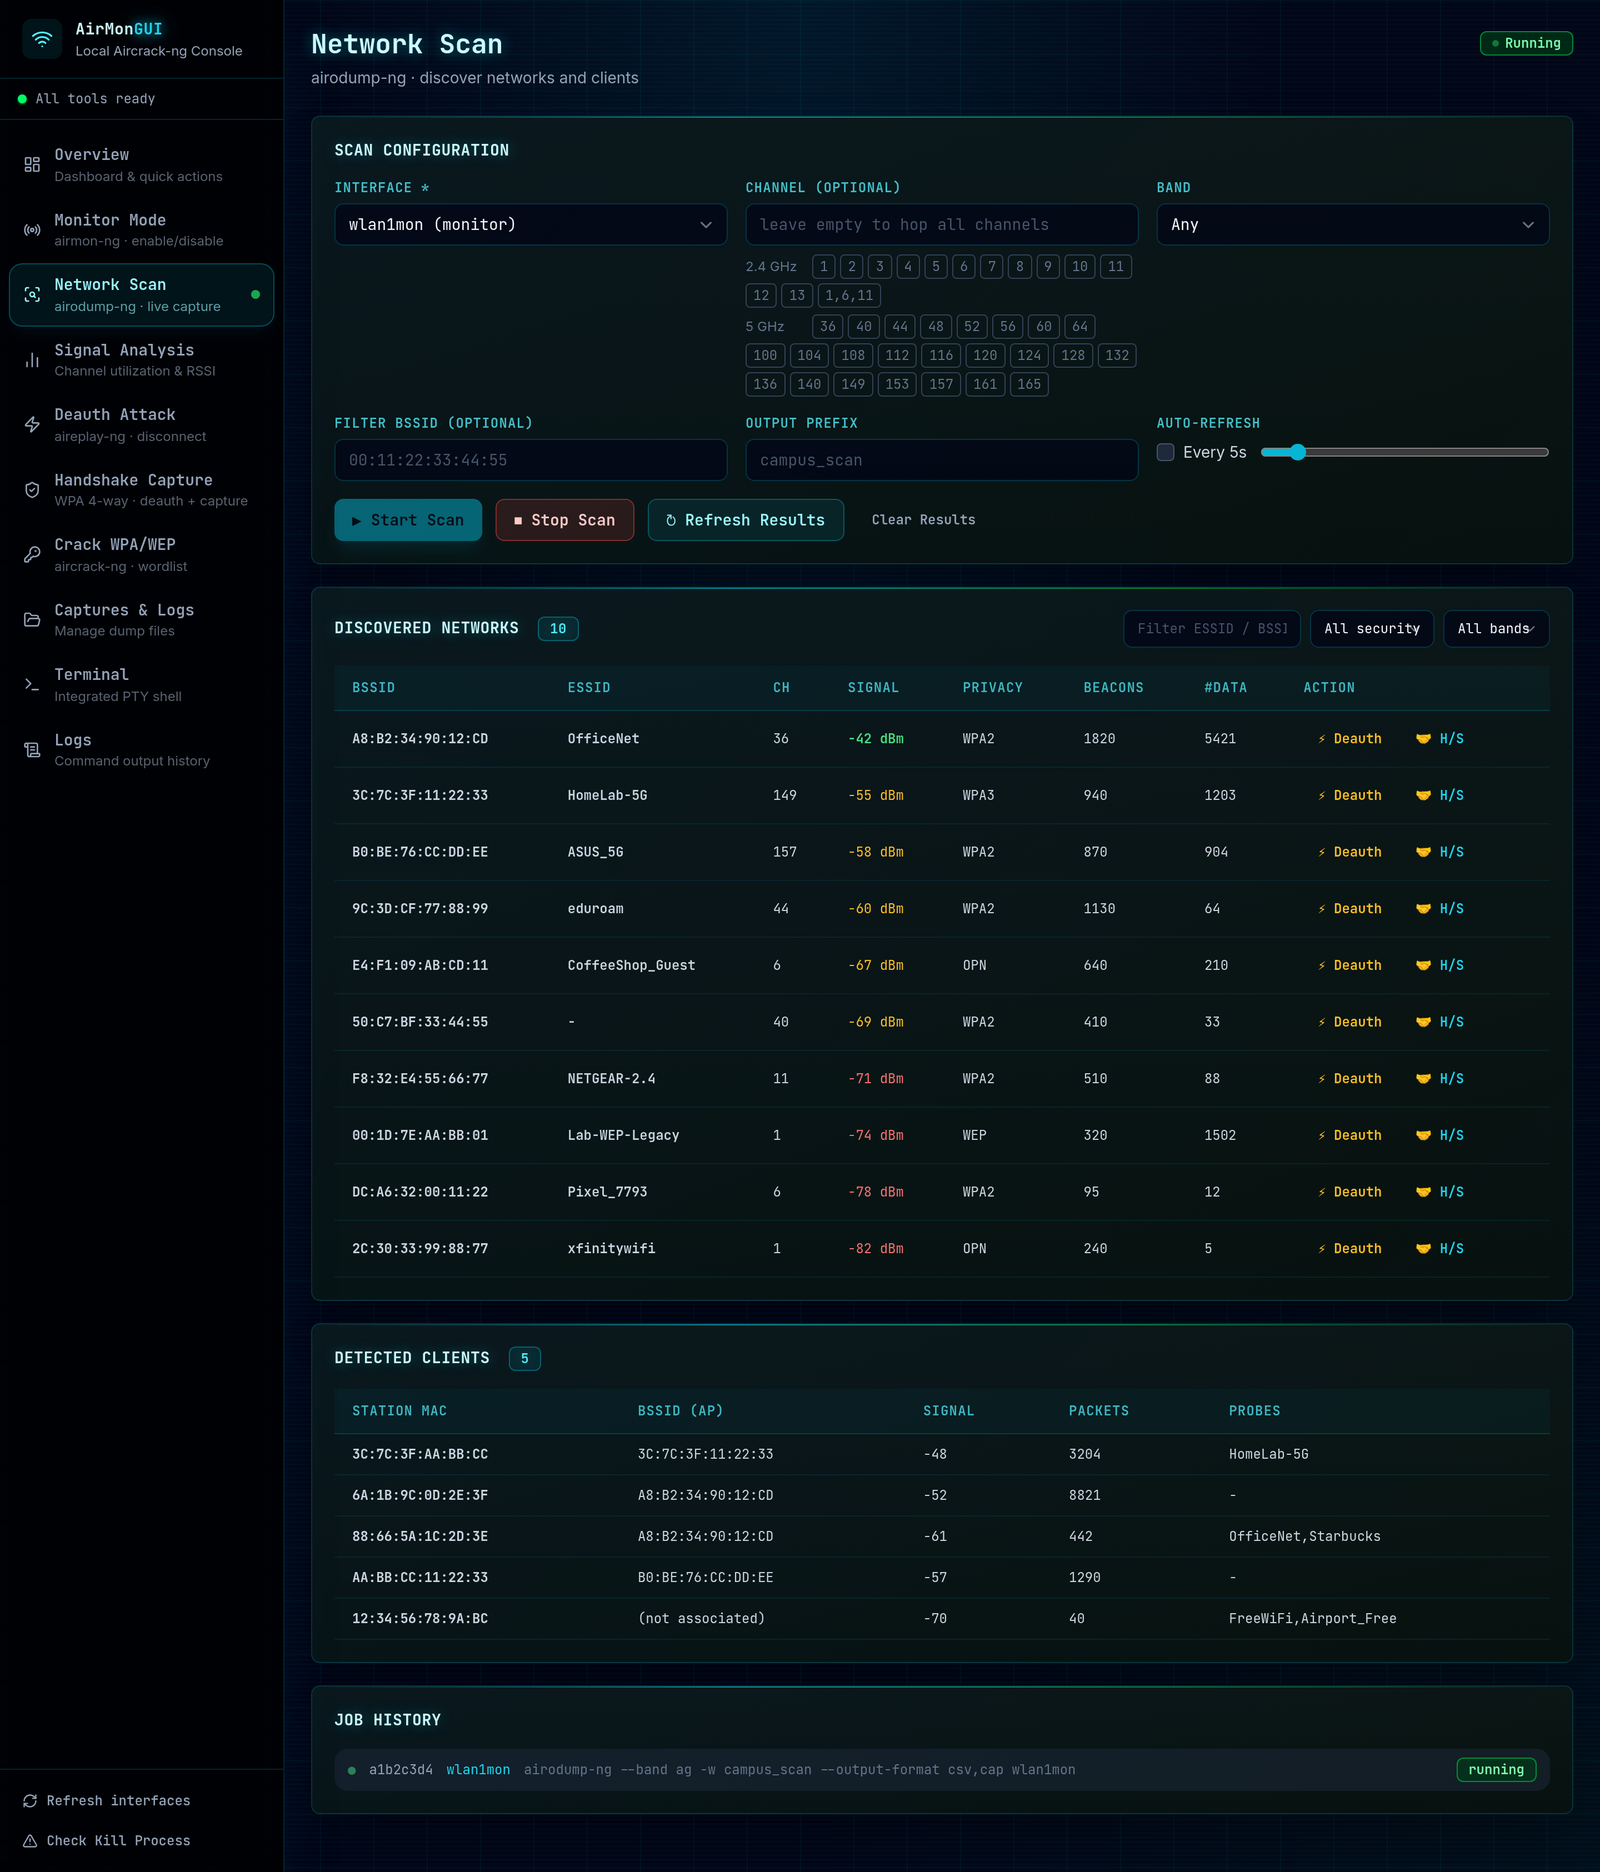
The networks, BSSIDs, and clients in the screenshots below are synthetic demo data, not a real capture.
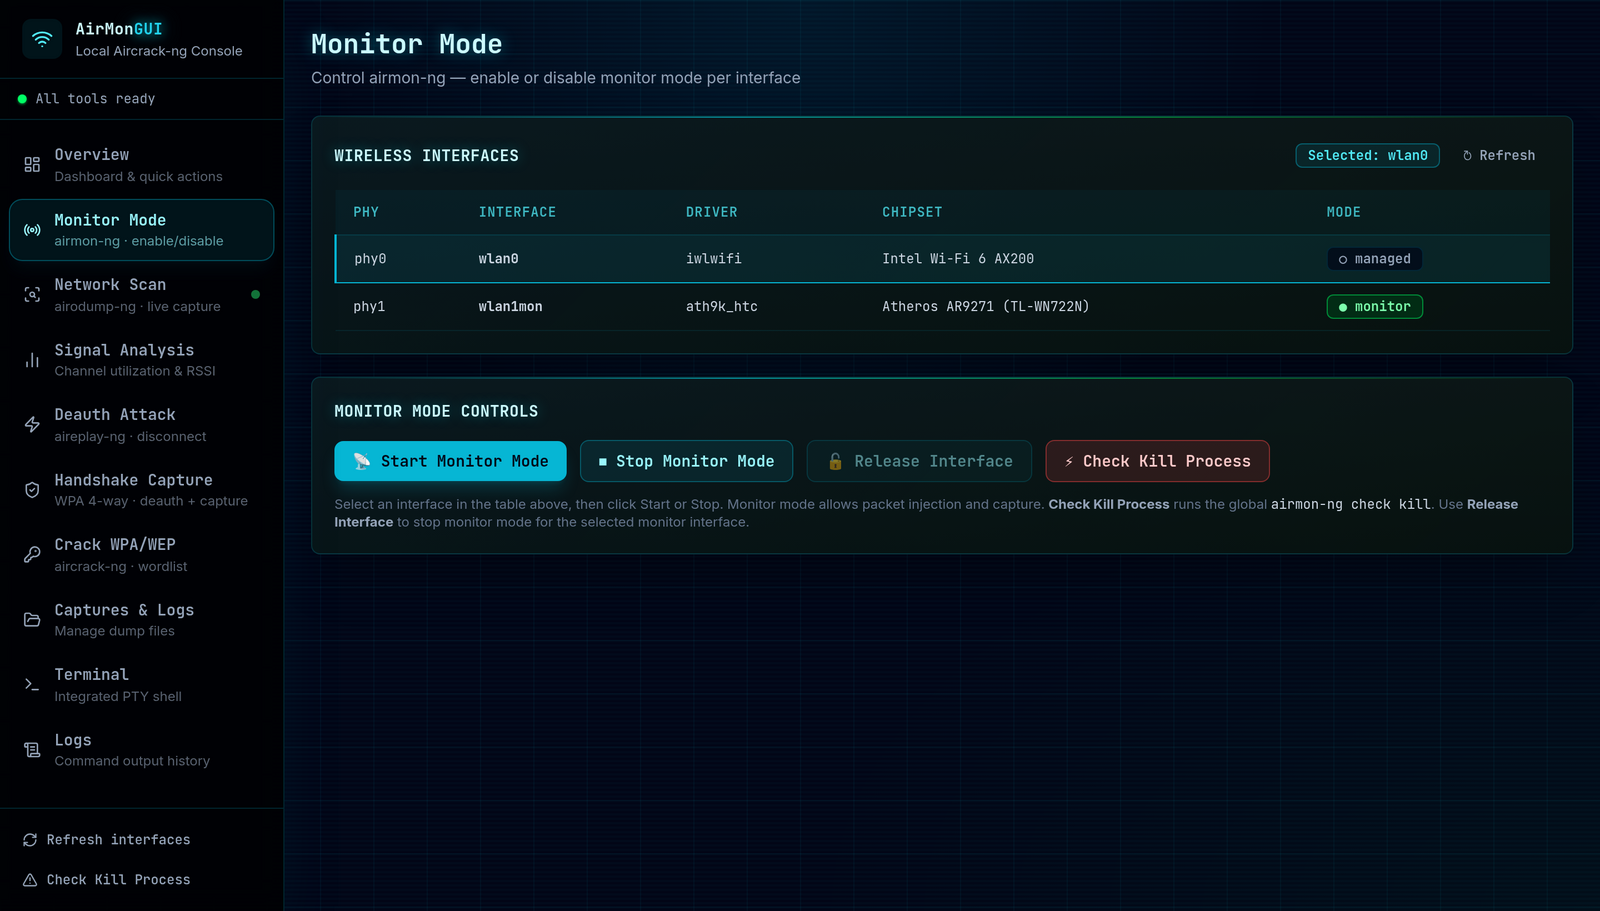
Pick an interface, check its driver, chipset, and PHY, and switch monitor mode on. Release just that interface when you're done.
Start an airodump-ng job and watch access points and clients fill in as they're found. Filter the table, then send any network straight to a deauth or handshake workflow.
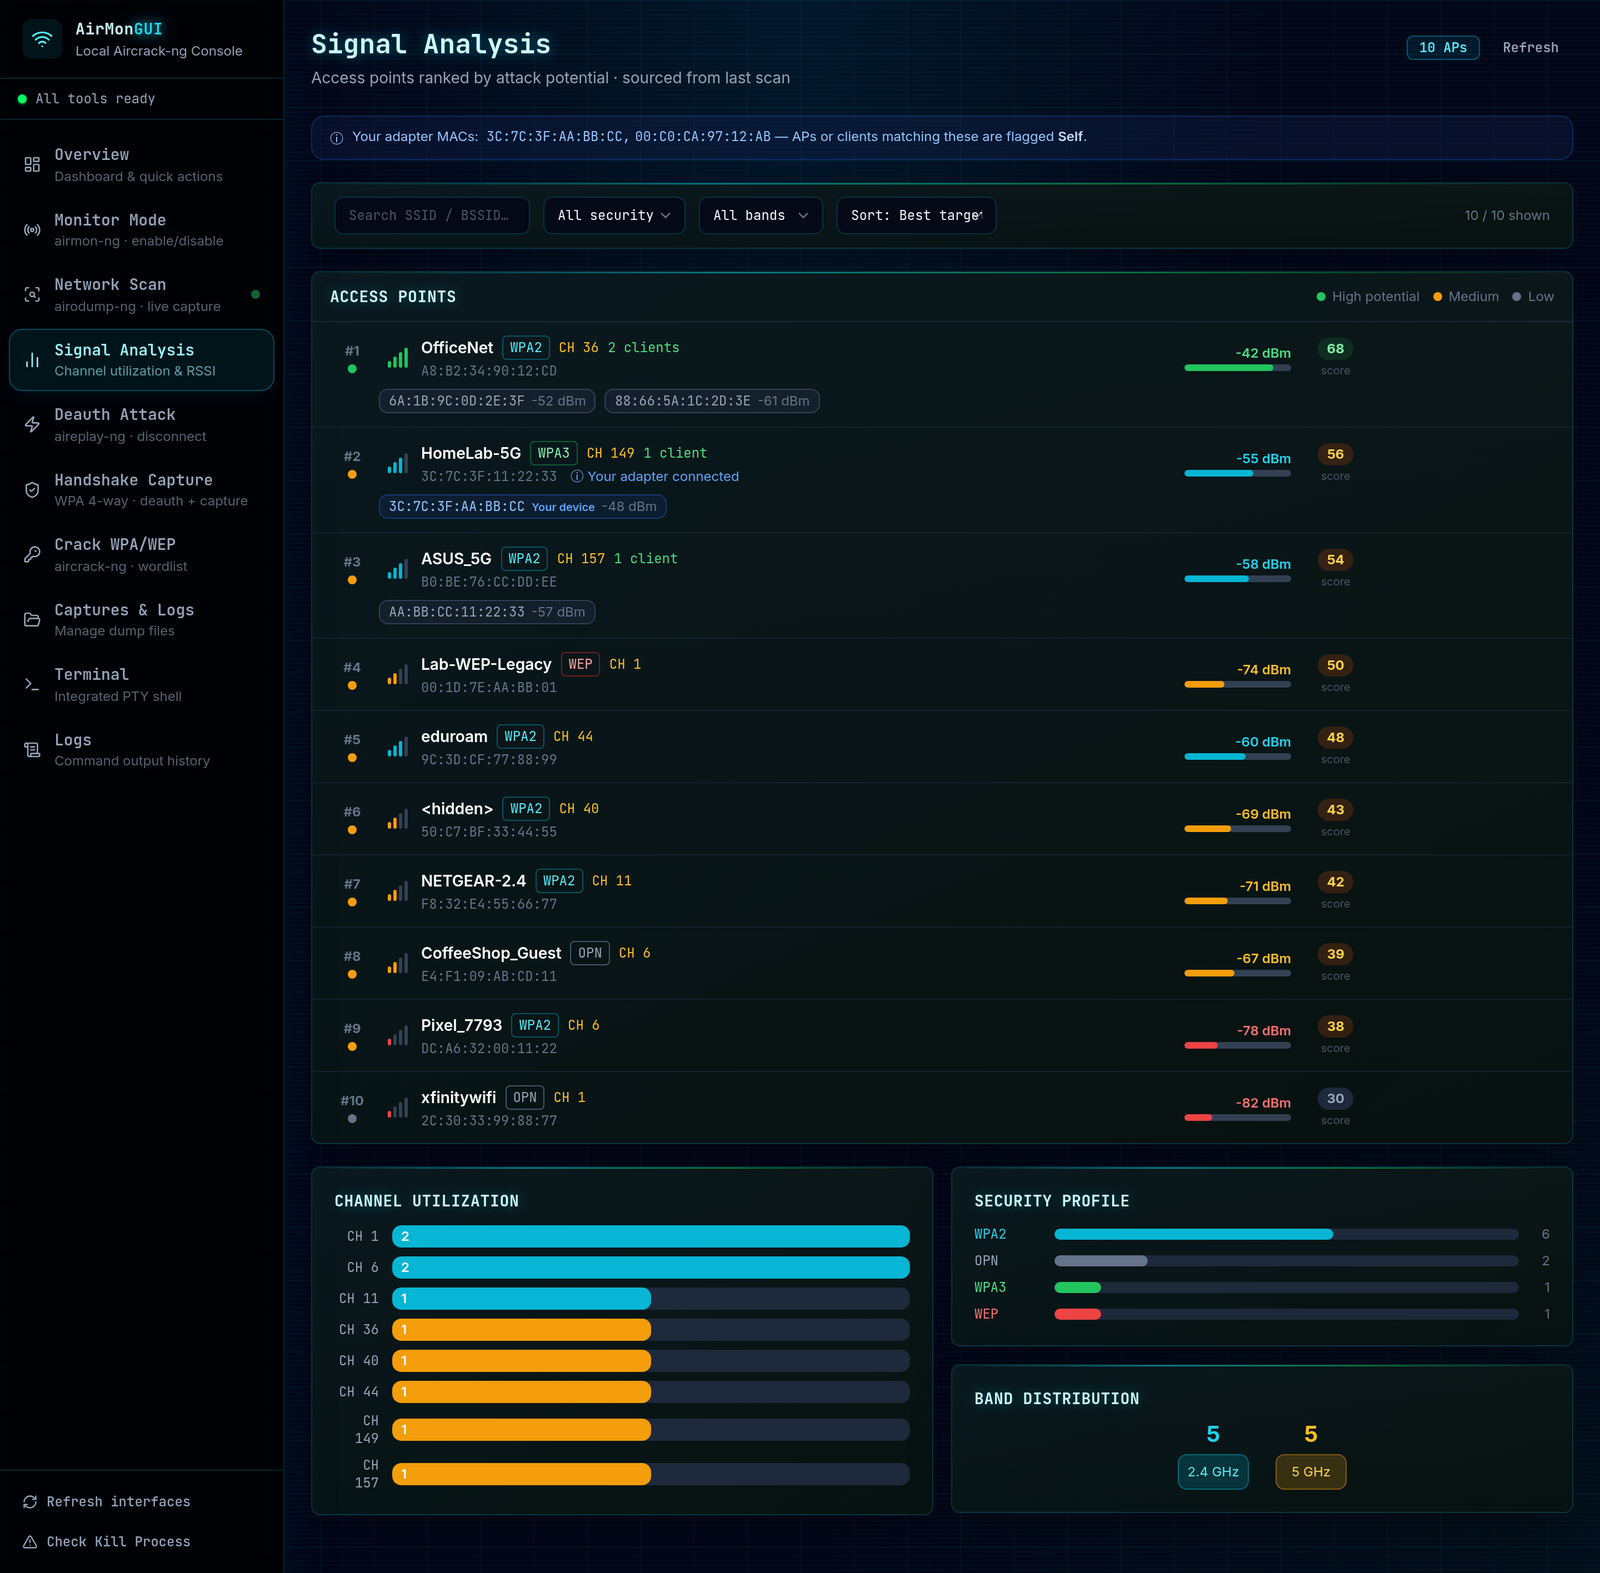
Signal Analysis scores every access point so the strong, weakly-secured ones with active clients rise to the top. It also shows how busy each channel is and what security the surrounding networks use. Your own devices get flagged so you don't point anything at yourself by mistake.
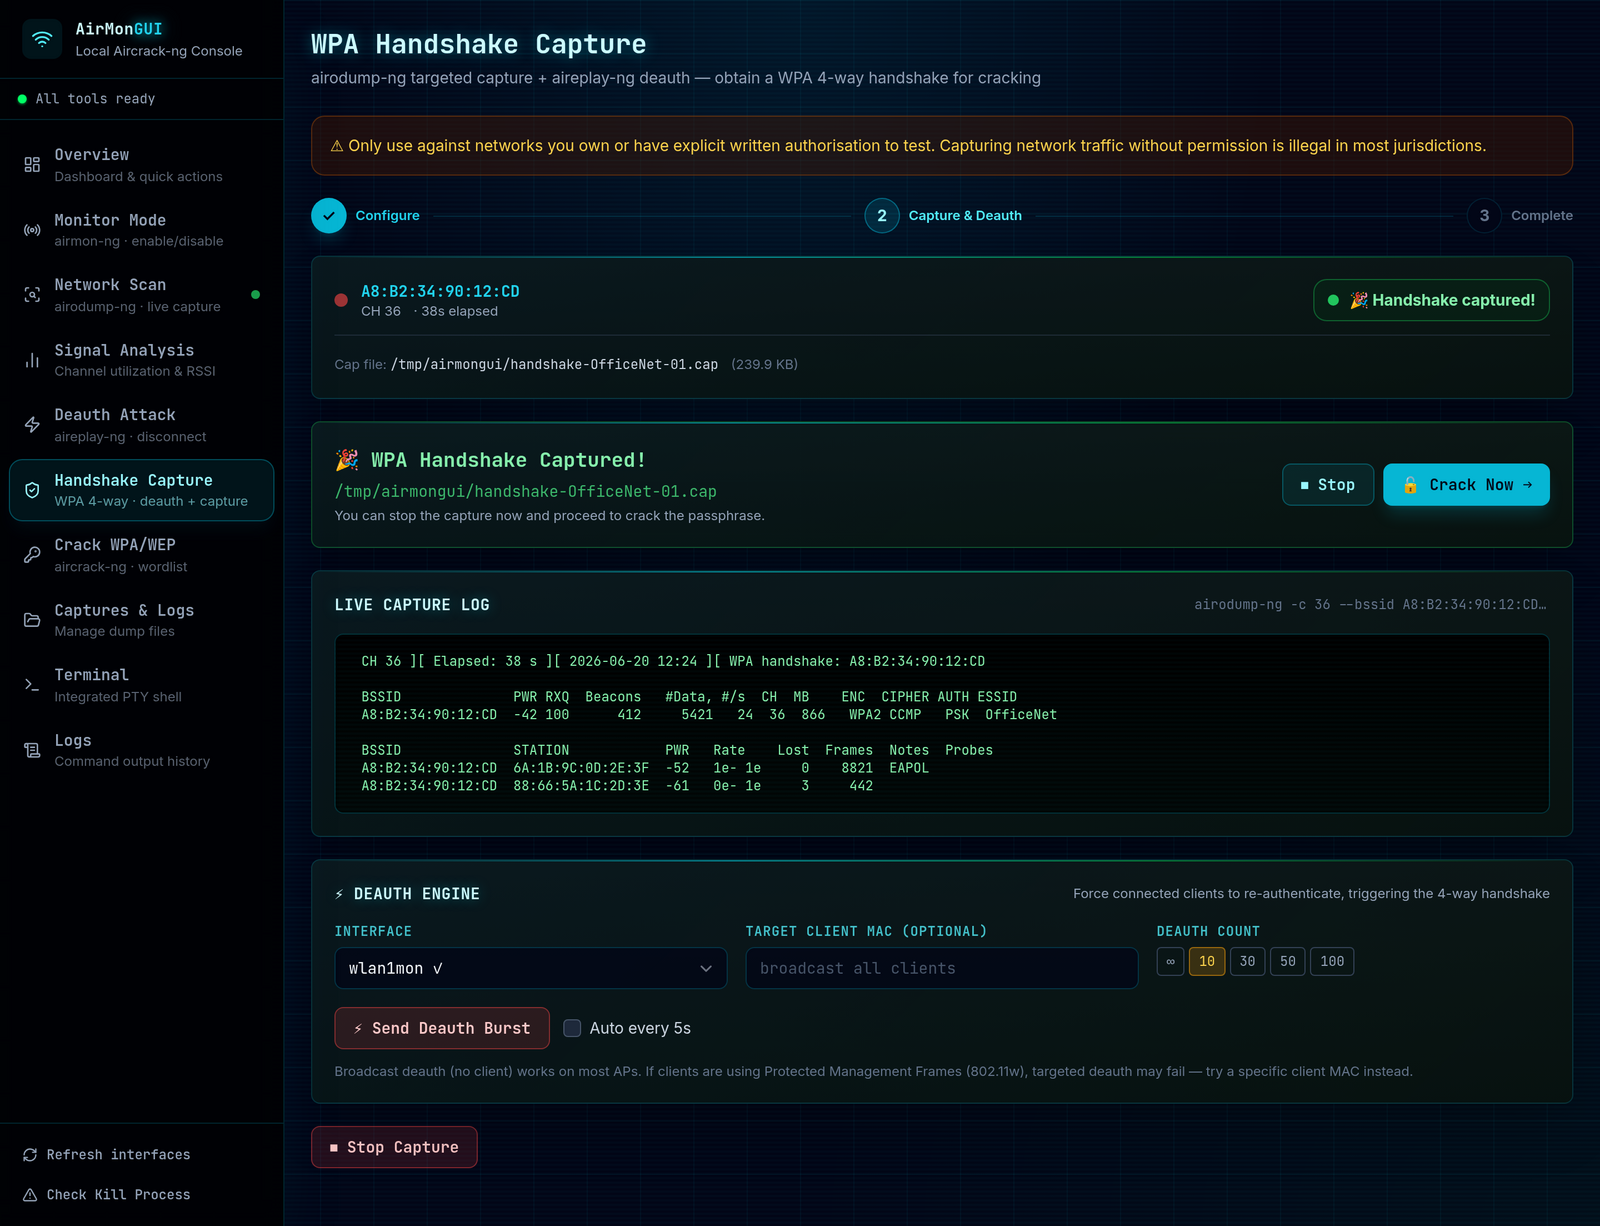
This screen locks airodump-ng to the target's BSSID and channel, runs the auto-deauth engine to knock clients off so they reconnect, and turns green the instant a four-way handshake is captured.
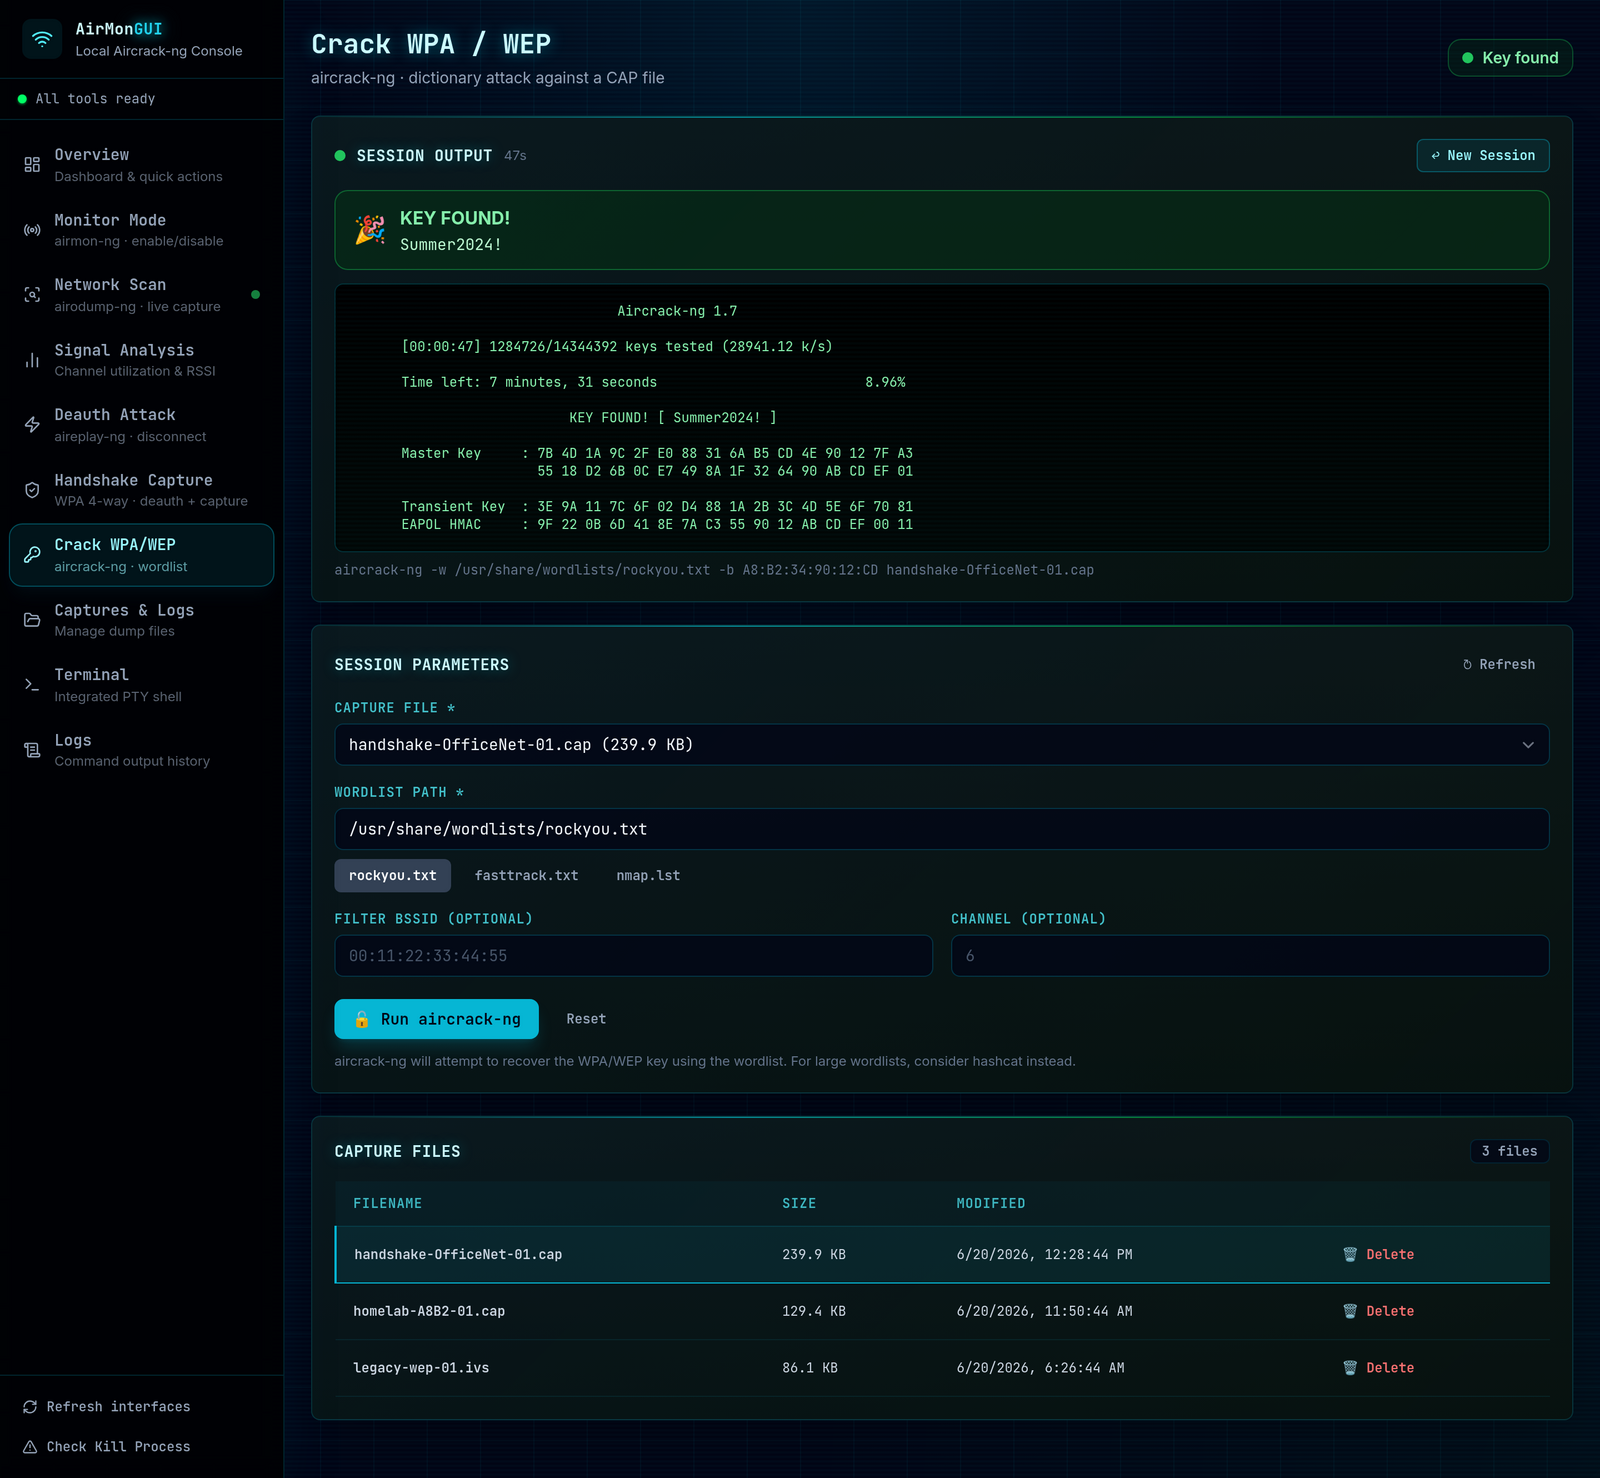
Point aircrack-ng at the capture and a wordlist. The log streams as it runs, and if the passphrase is in your list, it shows up at the top.
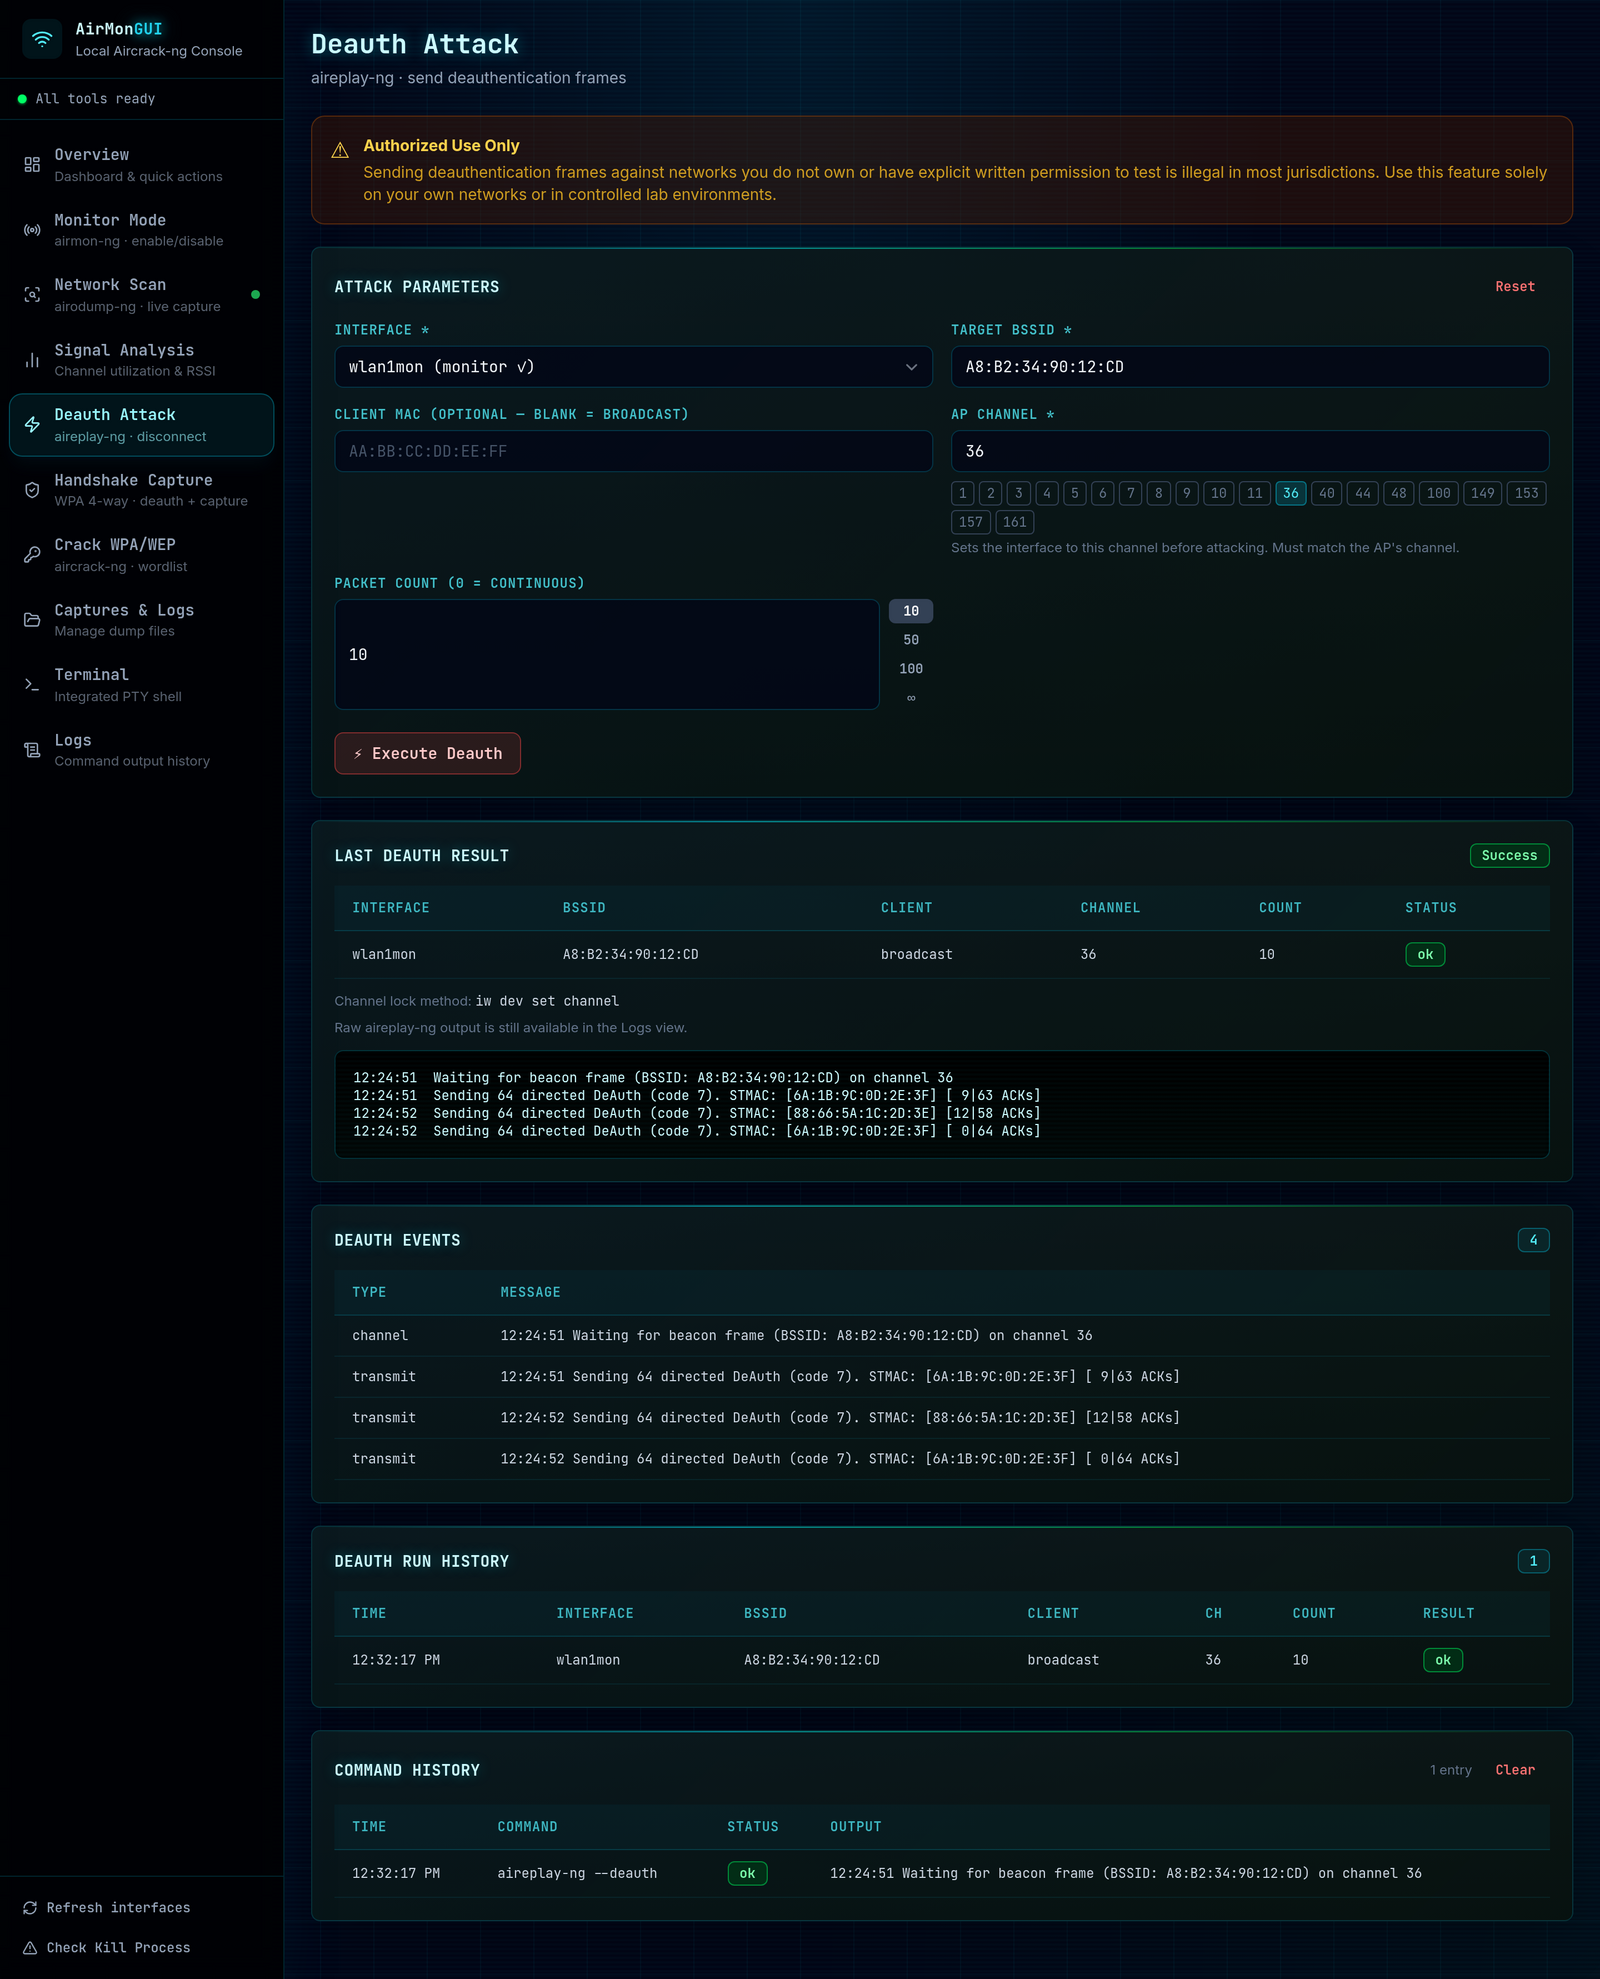
Standalone deauth with channel locking, run history, and parsed event output:
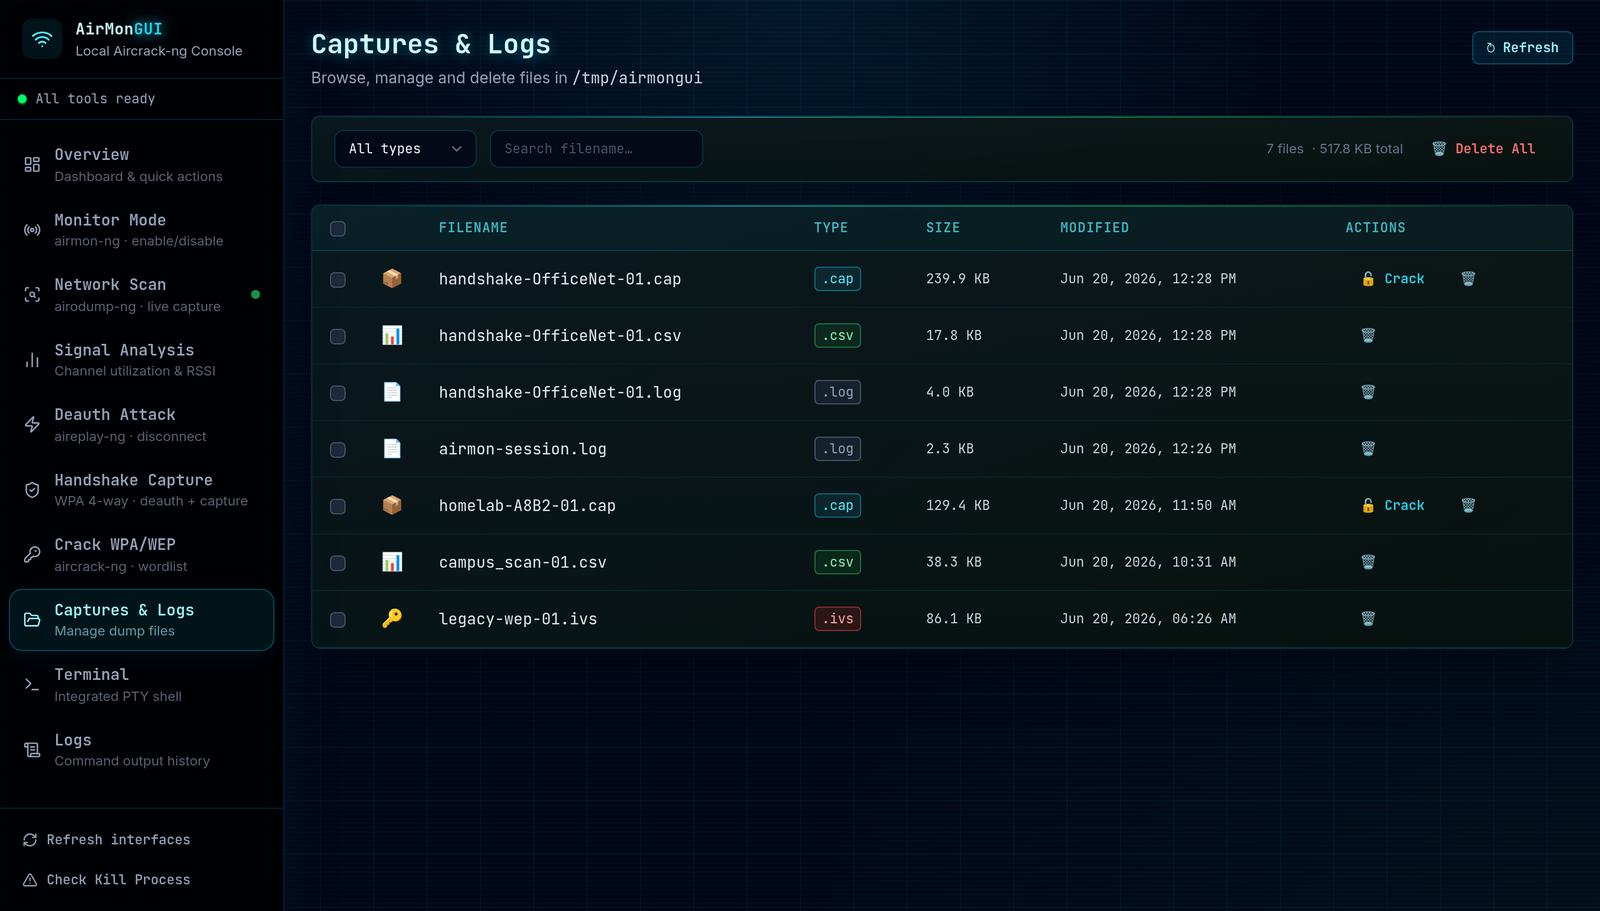
Capture file management:
Session command history:
You need Linux, root, a wireless adapter that supports monitor mode, and the aircrack-ng suite on your $PATH. See Requirements for the full list.
# 0. Install the suite (Debian, Ubuntu, Kali)
sudo apt update && sudo apt install aircrack-ng wireless-tools

# 1. Clone
git clone https://github.com/ELHart05/AirmonGUI.git
cd AirmonGUI

# 2. Backend (terminal 1)
cd backend
python3 -m venv .venv && source .venv/bin/activate
pip install -r requirements.txt
sudo -E .venv/bin/uvicorn main:app --host 127.0.0.1 --port 8000

# 3. Frontend (terminal 2)
cd frontend
npm install
npm run dev
Open http://localhost:5173. The UI only talks to 127.0.0.1:8000.

