 controlplaneio/kubesec
Security risk analysis for Kubernetes resources

[![Testing Workflow][testing_workflow_badge]][testing_workflow_badge] [![Security Analysis Workflow][security_workflow_badge]][security_workflow_badge] [![Release Workflow][release_workflow_badge]][release_workflow_badge]
[![Go Report Card][goreportcard_badge]][goreportcard] [![PkgGoDev][go_dev_badge]][go_dev]
For more examples visit Kubesec.io, which uses ControlPlane's hosted API at v2.kubesec.io/scan.
Create a Kubernetes resource file (e.g., kubesec-test.yaml) to scan. For a quick test, you can save the following Pod
manifest:
$ cat <<EOF > kubesec-test.yaml
apiVersion: v1
kind: Pod
metadata:
  name: kubesec-demo
spec:
  containers:
  - name: kubesec-demo
    image: gcr.io/google-samples/node-hello:1.0
    securityContext:
      readOnlyRootFilesystem: true
EOF
Execute a scan against your manifest file:
# Using the local binary
kubesec scan kubesec-test.yaml

# Or using Docker
docker run -i kubesec/kubesec:v2 scan /dev/stdin < kubesec-test.yaml

# Using the local binary with a human-readable table output format
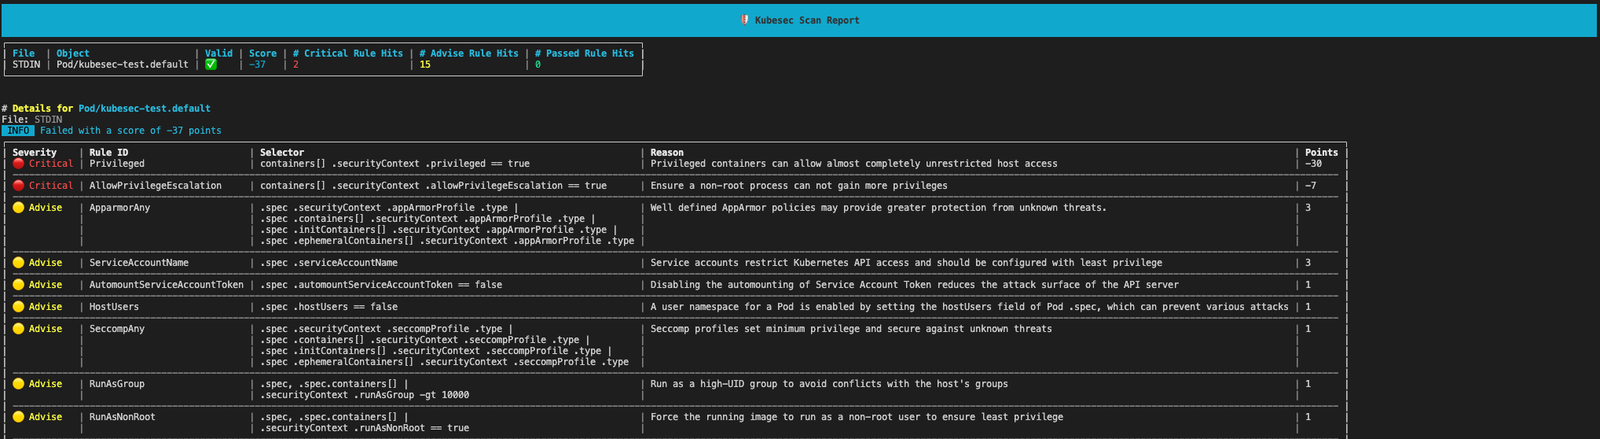
kubesec scan kubesec-test.yaml --format table
[!TIP] To view the results in a human-readable table instead of the default JSON format, use the
--format tableflag
kubesec will output a security score and a detailed analysis of your resource.
Kubesec is available as a:
docker.io/kubesec/kubesec:v2Or install the latest commit from GitHub with:
$ go install github.com/controlplaneio/kubesec/v2@latest
$ GO111MODULE="on" go get github.com/controlplaneio/kubesec/v2
Scan Kubernetes resources from local files or standard input.
Kubesec can scan multiple YAML documents in a single input file, or scan documents from multiple files at once, as long
as they are correctly formatted as multiple documents separated by ---.
# Scan a specific local YAML file
kubesec scan ./deployment.yaml

# Scan from standard input (JSON or YAML)
cat file.json | kubesec scan -

# Scan a rendered Helm chart
helm template -f values.yaml ./chart | kubesec scan /dev/stdin

# Scan multiple YAML documents separated by '---'
{ cat test/asset/multi.yml; echo "---"; cat test/asset/critical.yml; } | kubesec scan -
You can run the same scanning commands using the official Docker image:
# Scan a file via Docker using standard input
docker run -i kubesec/kubesec:v2 scan /dev/stdin < kubesec-test.yaml
Kubesec supports three different output formats, specified by the --format / -f flag: json (default),
table, and template, and can scan multiple YAML documents in a single input file.
# JSON array output (default behaviour)
kubesec scan ./deployment.yaml --format json

# Human-readable table output
kubesec scan ./deployment.yaml --format table

# Use a custom template for the output
kubesec scan ./deployment.yaml --format template --template report-template.tmpl
# One rule
kubesec scan --rules CapSysAdmin kubesec-test.yaml

# Multiple rules
kubesec scan --rules RunAsNonRoot,SeccompAny,ApparmorAny kubesec-test.yaml
[
  {
    "object": "Pod/security-context-demo.default",
    "valid": true,
    "message": "Failed with a score of -30 points",
    "score": -30,
    "scoring": {
      "critical": [
        {
          "selector": "containers[] .securityContext .capabilities .add == SYS_ADMIN",
          "reason": "CAP_SYS_ADMIN is the most privileged capability and should always be avoided",
          "points": -30
        }
      ],
      "advise": [
        {
          "selector": "containers[] .securityContext .runAsNonRoot == true",
          "reason": "Force the running image to run as a non-root user to ensure least privilege",
          "points": 1
        },
        {
          // ...
        }
      ]
    }
  }
]
# Print all scanning rules with their associated point scores
kubesec print-rules

# Print all scanning rules with their associated point scores as a table
kubesec print-rules --format table
[
  {
    "id": "AllowPrivilegeEscalation",
    "selector": "containers[] .securityContext .allowPrivilegeEscalation == true",
    "reason": "Ensure a non-root process can not gain more privileges",
    "kinds": [
      "Pod",
      "Deployment",
      "StatefulSet",
      "DaemonSet"
    ],
    "points": -7,
    "advise": 0
  },
...
]
Kubesec leverages kubeconform (thanks @yannh) to validate the manifests to scan. This implies that specifying different schema locations follows the rules as described in the kubeconform README.
# Usees the latest schema from upstream
# Schema will be fetched from: https://raw.githubusercontent.com/yannh/kubernetes-json-schema/master/master-standalone-strict/pod-v1.json
kubesec scan ./pod.yaml

# Use a specific schema version from upstream (format x.y.z with no v prefix)
# Schema will be fetched from: https://raw.githubusercontent.com/yannh/kubernetes-json-schema/master/v1.25.3-standalone-strict/pod-v1.json
kubesec scan ./pod.yaml --kubernetes-version 1.25.3

# Use a specific schema version in an airgapped environment over HTTP
# Schema will be fetched from: `https://host.server/v<version>-standalone-strict/pod-v1.json`
kubesec scan ./deployment.yaml --kubernetes-version <version> --schema-location https://host.server
