
Skip to content
KitploitKITPLOIT
ToolsExploitsBlog
Log in
Submit
ToolsExploitsBlog
Submit

Hacking, PenTest, and Cybersecurity Tools for Your Security Arsenal!

Kitploit is a directory of hacking, cybersecurity, and pentesting tools. Discover the latest project updates to find vulnerabilities, analyze systems, automate testing, and strengthen your security.

··Feeds·Contact·Privacy·© 2026 Kitploit

Tool Directory

Categories

View all categories
Loading categories
frida-ui — Interact with Frida devices, processes, and scripts directly from your browser. | Kitploit
Tools/GitHubGitHub/adityatelange/frida-ui
Android SecurityDynamic Analysis (Sandboxing)Web Proxies & InterceptionReverse EngineeringScripting & AutomationDebuggersPenetration TestingMobile Security
GitHubadityatelange/frida-ui

frida-ui

Interact with Frida devices, processes, and scripts directly from your browser.

View Repository
23823206 months agoReviewed by Kitploit

Most Popular

View all →

Discover the most used tools by our community.

Explore all tools

Browse our collection of tools

View all tools →
Share
Website

Frida UI

PyPI version Python PyPI - Downloads License

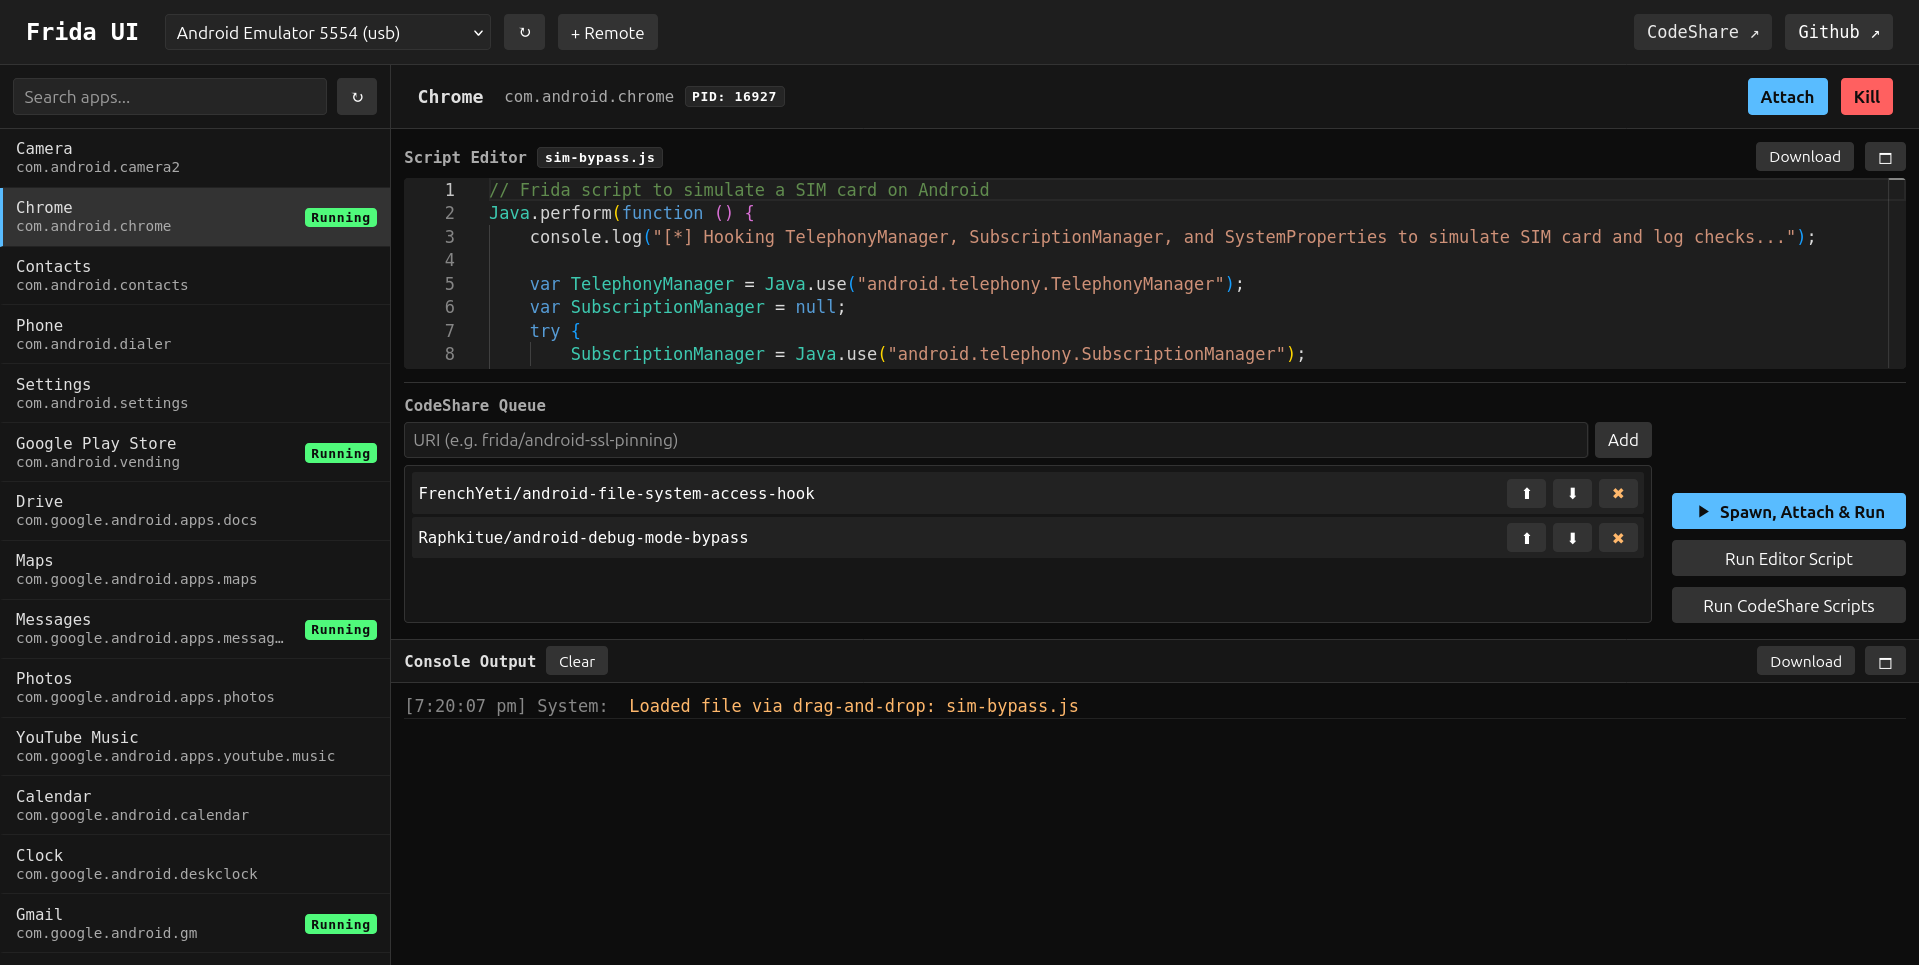
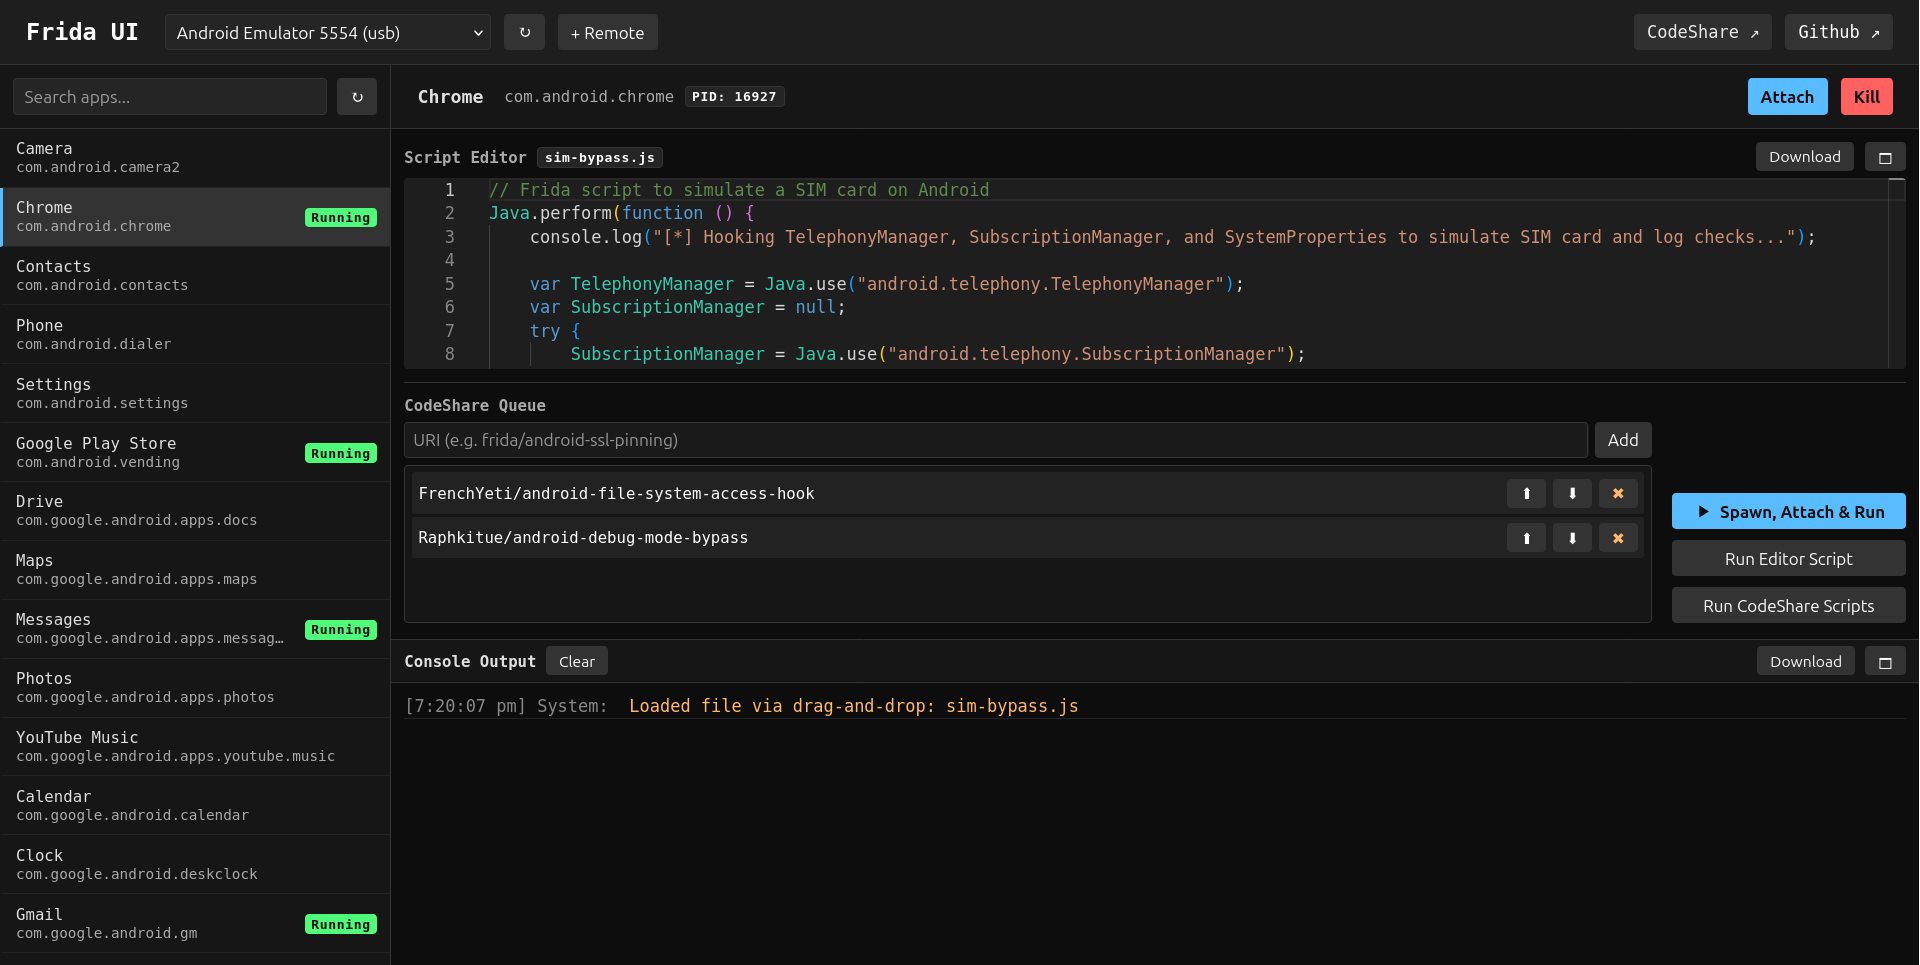
A modern, lightweight, web-based user interface for Frida, designed for Android application penetration testing. It allows you to interact with devices, processes, and scripts directly from your browser.

Quick Start

# Install using uv (recommended) or pipx/pip
uv tool install frida-ui
# Or: pipx install frida-ui
# Or: pip install frida-ui

# Start the server
frida-ui

Open your browser and navigate to: http://localhost:8000

Features

📱 Device Management

  • Auto-discovery: Automatically detects connected USB and local devices.
  • Remote Devices: Easily add and manage remote Frida servers (e.g., 192.168.1.x:27042).
  • Device Info: View detailed system parameters (OS, Arch, API Level) and visual type indicators for selected devices.

🚀 Process & App Control

  • Application List: View installed applications and running processes.
  • Search: Real-time filtering of applications by name or identifier.
  • Session Management:
    • Attach: Connect to running processes.
    • Spawn: Launch installed applications.
    • Spawn & Run: Launch an app and immediately inject the editor script along with any queued CodeShare scripts (early instrumentation).
    • Kill/Detach: Terminate processes or gracefully disconnect.

💻 Scripting & Instrumentation

  • Script Editor: Built-in editor for writing Frida scripts. Includes an optional Monaco editor for richer editing (syntax highlighting and automatic layout) with a graceful fallback to a plain textarea.
  • File Loading: Load scripts from local files or drag-and-drop .js files into the editor.
  • Download script: Export the current editor content as a .js file (frida-ui_<app id>_<timestamp>.js) directly from the editor header.
  • CodeShare Integration:
    • Import scripts directly from Frida CodeShare.
    • CodeShare Queue: Queue multiple CodeShare scripts to be loaded and executed automatically during Spawn & Run or manually via the "Run CodeShare Scripts" button.

📊 Console & Logging

  • Real-time Output: View console.log, send(), and error messages from your scripts.
  • Log History: Persistent logs per application session.
  • Export: Download console logs as .txt files for analysis.

🎨 UI/UX

  • Dark Theme: Clean, consistent dark mode interface.
  • Persistence: Remembers your selected device, application, and pane sizes across sessions.
  • Responsive: Adjustable panes for sidebar, editor, and console.
  • Focus Modes: Toggle Editor-only or Console-only views to hide other panes for a distraction-free workflow.
  • Accessibility: Keyboard shortcuts (e.g., Escape to reset view or close overlays) and ARIA support.

Getting Started

Prerequisites

  • Python 3.7+
  • uv (recommended) / pipx / pip.

Installation

Option 1: Install from PyPI (Recommended)

uv tool install frida-ui

You can also customize the Frida version:

uv tool install frida-ui --with frida==16.7.19

Option 2: Install from Source (Bleeding Edge)

uv tool install git+https://github.com/adityatelange/frida-ui

You can customize the Frida version:

uv tool install git+https://github.com/adityatelange/frida-ui --with frida==16.7.19

[!IMPORTANT] The Frida version you install must match the frida-server version on your Android device to ensure compatibility.

Running

Start the server using the default configuration:

frida-ui

Or with custom options:

frida-ui --host 127.0.0.1 --port 8000 --reload
  • --host: Specify the host (default: 127.0.0.1)
  • --port: Specify the port (default: 8000)
  • --reload: Enable auto-reload for development

Open http://localhost:8000 in your browser.

Android Device Setup

Before using frida-ui, you must have frida-server running on your Android device. The version of frida-server must match the Frida version you installed in the previous step.

Option 1: USB Connection

If you have ADB installed and want to connect via USB:

  1. Download frida-server: Visit Frida releases and download the frida-server binary for Android matching your device's architecture/abi (e.g., frida-server-x.x.x-android-arm64.xz).

  2. Extract and Push to Device:

    unxz frida-server-x.x.x-android-arm64.xz
    mv frida-server-x.x.x-android-arm64 frida-server
    adb push frida-server /data/local/tmp/
    
  3. Run frida-server:

    adb shell "chmod 755 /data/local/tmp/frida-server"
    adb shell "/data/local/tmp/frida-server -D"
    
  4. Verify Connection: Ensure your device is connected via USB and visible via adb devices. frida-ui will automatically detect it when running.

Option 2: Remote Connection (Network)

Alternatively, you can run frida-server with a network listener and connect remotely:

  1. Download and run frida-server on your Android device (using any method - ADB, custom script, etc.):

    ./frida-server -l 0.0.0.0:27042 -D
    
  2. Add Remote Device in frida-ui: In the frida-ui interface, add a remote device with the IP address and port where frida-server is listening (e.g., 192.168.1.x:27042).

    No ADB installation is required for this method.

Usage Guide

  1. Select a Device: Choose a device from the dropdown in the top header.
  2. Select an App: Click on an application in the sidebar.
  3. Write/Load Script:
    • Type JS in the editor.
    • Or drag & drop a file.
    • Or add scripts URL from CodeShare.
  4. Action:
    • Click Attach to inject into a running process.
    • Click Spawn to start the app.
    • Click Spawn & Run to start the app with your script injected immediately.
  5. Monitor: Watch the console for output.

💡 Example Script

Try this simple script to hook a method (replace with your target):

// Simple method hook example
Java.perform(() => {
  const MainActivity = Java.use("com.example.app.MainActivity");
  MainActivity.checkPassword.implementation = function (password) {
    console.log("[*] checkPassword called with: " + password);
    return true; // Bypass check
  };
});

Notes

[!NOTE] This tool is an independent project and is not part of the official Frida toolset and is not sponsored by the Frida project. It is a third-party user interface built to interact with Frida's core functionality.

[!WARNING] This tool allows executing arbitrary JavaScript in target processes. Only expose frida-ui to trusted networks and users. Executing untrusted scripts can compromise your system and data. The web server runs locally by default but exposes powerful instrumentation capabilities.

Credits

  • Frida Project - https://frida.re/.
  • Monaco Editor - https://microsoft.github.io/monaco-editor/.
  • Thanks to Github Coplilot for code suggestions and improvements.

Stargazers over time

Stargazers over time

Download Tool